Sign up for the Family Tree Newsletter Plus, you’ll receive our 10 Essential Genealogy Research Forms PDF as a special thank you!
Get Your Free Genealogy Forms
"*" indicates required fields
Want to set up a website where your family can share photos, recipes, news and events? Looking for a quick and easy way to share research findings with your relatives? Follow these steps to create your own family group on Facebook.
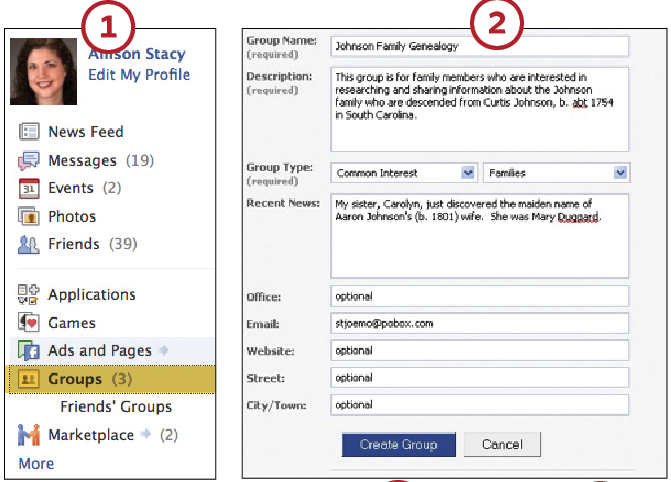
1. Select Groups from the navigation bar, located on the left side of your home page beneath your profile photo. If you don’t see Groups listed, click the More button; this will expand the bar to show more choices.
2. On the next page, click the Create a Group button. This will launch a page asking for information about your new group. Fill out as much or as little information as you wish. For the Group Type, you’ll have several choices via the pull-down menu, such as Common Interest, Just for Fun and Organizations.
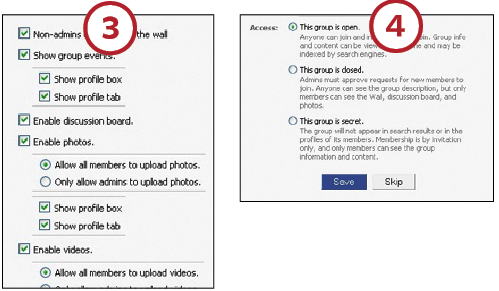
3. Next, configure your settings. These are the options that determine group permissions, such as who can write on the wall, upload photos and post links.
4. At the bottom of the configuration screen, you’ll find the options that control group membership—in other words, your privacy settings. The Open option allows anyone to join the group. Closed means your group will show up when users search Facebook, but people can’t join unless you approve their request. Secret is the setting for maximum privacy—this makes membership invitation-only, and your group won’t pop up in search results. If you hope to attract other surname researchers to your group, a closed group will allow them to find you, a secret group will not. Choose your option, then click Save.
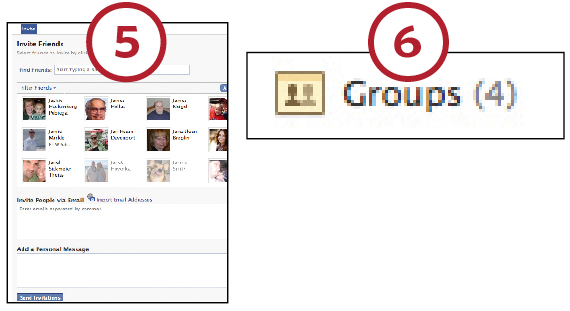
5. Now you’re ready to invite your family and friends by picking from your list of Facebook friends or sending an e-mail invitation. You also have the option to add a personal message. If your group is secret, let your family members know that so they don’t worry about family information being public.
6. Once your group is set up, you can access it via the Groups item in the navigation bar. Begin by uploading images, starting a discussion or adding family information to your wall.
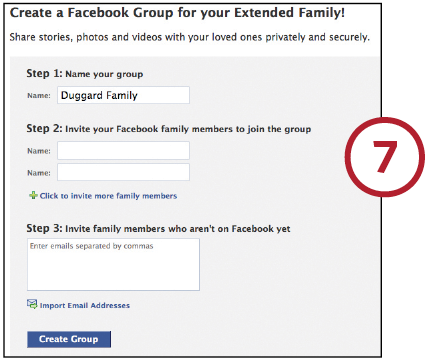
7. If you’re certain that you want a secret group, skip the steps above and go directly to <facebook.com/family/create_group.php>. This page gives you a one-click option to set a group for family members to share information privately. When you create a group this way, the highest level of privacy is pre-set, and everyone in the group automatically gets permission to upload images, videos and links as well as start discussion boards.
From the November 2010 issue of Family Tree Magazine.
More great genealogy resources from Family Tree Magazine:
ADVERTISEMENT
