Sign up for the Family Tree Newsletter Plus, you’ll receive our 10 Essential Genealogy Research Forms PDF as a special thank you!
Get Your Free Genealogy Forms
"*" indicates required fields
Is your computer out of shape, suffering from flabby folders, poor back-up posture and a disorderly desktop? Are you spending too much time searching for files and worrying about a catastrophic crash that would delete your data?
Your computer is probably your No. 1 research assistant, but it’s easy to get lazy and skip tidying up your files and backing up your work. Maybe it’s time to boost your research productivity by cleaning up your hard drive and giving it a makeover.
In only a few hours, you can whip your computer back into shape and start a workout program that will maximize your research efforts—and protect the results. You’ll spend your time searching for ancestors, not files on your computer.
We’ve made it easy by breaking down the entire project into five separate tasks you can tackle one at a time. After you finish this project, you’ll be able to work faster, easier and safer on your newly optimized and organized computer desktop. Let’s get started.
1. Delete or Rename Files
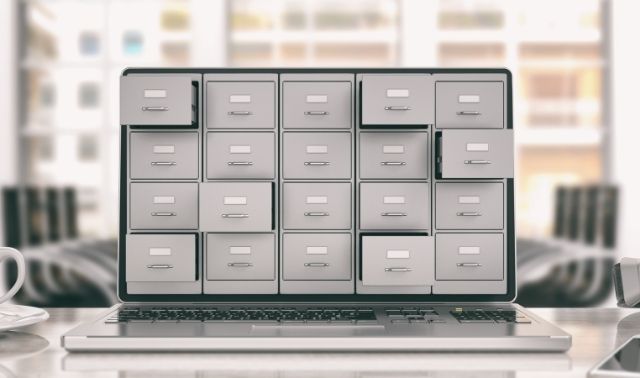
Think of a computer hard drive as a filing cabinet. At one point in time, all your important papers may have fit into a single accordion file. As life became more complicated and generated more paperwork, you may have graduated to the additional storage space of a file cabinet (and the extra folders the cabinet provided).
But before you upgraded to that new cabinet, you probably took the time to clear out old files to maximize your space. Do the same with your computer. Before you add more hard drive storage (which can be expensive) it’s a good idea to downsize and delete obsolete information so you only keep the computer files you need and use.
Open your folders and take a close look at your old files. Are there multiple copies of old documents, outdated society notes, or past-their-prime PDFs? Delete files you no longer need. Uninstall software you don’t use and get rid of temporary files (such as those in your downloads folder that you also saved elsewhere).
If your hard drive is almost full, consider moving space-hogging media files to an external hard drive. Media files such as photos, movies and music are considerably larger than document files. Go to your system preferences or list of apps and note how much space you’re devoting to these large files in various folders or apps.
External hard drives also offer more than just additional storage space. You can use a large drive for incremental backups (that is, a backup of only new data, instead of a full backup of all your files), and a small portable drive is a convenient way to transfer files between computers. If you share a computer, an external hard drive can offer portability, storage and privacy.
A word of caution if you use a photo-organization program: Move your original file images only from within the program. Some programs might create a link to each photo that will be broken if you move files. Broken links will make the images appear to be missing. Check your user guide for information on how best to move image files to a new location.
As you go through your files and delete what you no longer need, make sure each file is descriptively named so you don’t have to open it to see what it is. Try to keep file names short and consistent, using no spaces and all lowercase.
My naming system for genealogy documents and images consists of a name, a date and a place, following this formula:
[surname]-[first name or initial]_[year]_[state two-letter abbreviation]-[county]-[town or item title]
Using my naming system, I would save a marriage record with a file name that looks like this: kinsel-chamblin_1889_ca_alameda_marriage.jpg.
If you consistently use a file-naming structure that includes a name, date and place, you can sort files alphabetically within a folder for easy retrieval. An even greater benefit to consistent file-naming is that you can easily search for your files using your computer’s Search or Spotlight function.
2. Simplify Your File Folders
After you’ve purged unneeded files and renamed files so they’re easy to identify, shape up your folder system to keep things easy to find. When setting up your folder system, keep in mind that more isn’t necessarily better. More folders means more time spent searching because there are more places to look for your files. Keep your system as simple as possible.
Start by using the folders already set up on your hard drive: Documents, Movies, Music, Pictures. Just as you don’t store your DVD collection with your insurance policies, you shouldn’t store your digital media files with important documents. Keep photos, movies and music in separate folders for easier backups and searching.
Create subfolders within these master folders and you’ll have a structure that makes it easy to save files where they belong. In my Documents folder, I have folders for Home, Business, Volunteer, Genealogy, Blogs and Writing. Within these subfolders, I’ve set up more nested folders for particular projects.
Let’s focus on how to make nested folders within a Genealogy document folder. Genealogists work with people, places and dates. Each of these categories is a logical point for creating and naming a folder in which to store your files. Two popular methods for organizing your folders are:
Surname folders
Within my Genealogy folder are individual folders for each surname I’m researching. If I have my computer set to arrange folders and files by name, the surname folders will be arranged alphabetically, making it even faster to find what I’m looking for. I put all files related to a surname in that surname’s folder.
If, within a surname folder, I have lots of documents related to a particular record group, such as probate or military, I create a subfolder for that record group. In my Kinsel surname file, for example, are two subfolders: Kinsel Bible (which holds family Bible records) and Kinsel Notes. I can quickly scan the alphabetical list to find other files, such as censuses and vital records, without searching through various nested folders. Remember, fewer folders mean fewer places to look and fewer steps to properly file away a computer file.
Record group folders
Another way to organize your files is to create subfolders within your genealogy surname folder for major record groups. With this method, the Surname folder for each family contains subfolders labeled Vital Records, Military, Census, Probate, and so on.
This has the advantage of keeping similar record types together, but requires the additional step of filing in the correct subfolder. You also must be consistent with where you place files that belong in a few different categories. For example, you’ll always need to remember whether you file obituaries under Newspapers or Vitals.
You could have the best filing system in the world, but it won’t do you any good if you don’t maintain it. If you’re like me, when you’re in the middle of research, you don’t want to take the time to file all those new documents you’re creating.
The good news is there’s a way to stay organized and leave all your filing to the end of your work session. Inside my Documents folder, I created a folder called Inbox, and I placed a shortcut to this folder on my desktop and in my sidebar. I place all my work on my current project in this Inbox. When I’m finished for the day, each file is moved from my Inbox folder into its proper subfolder.
No matter what subfolder method you use, keep your genealogy-related files in a Genealogy folder within your Documents folder. You can easily copy this folder to a USB flash drive and take all of your research with you, without worrying about missing a document. Be sure to copy or sync the data with your main computer when you get back home.
3. Move Files Off Your Desktop
It might seem handy to keep documents parked on your desktop, especially when you’re in the middle of a large project, but this habit can slow down your computer. Each file on the desktop is loaded into memory when your computer starts. Lots of large files stored on your desktop can cause a slow startup.
To keep your desktop clean and clutter-free, move files to your freshly organized folder system and create shortcuts to current projects. Unless you use an application frequently, don’t let its icon clutter up your desktop.
Also remember to regularly empty your trash or recycle bin. The delete function only moves files to the trash; the trash has to be emptied for the file to be permanently deleted. To empty your recycle bin on a PC, right-click the recycle bin icon and select Empty Recycle Bin. To empty your trash on a Mac, select Finder in your menu bar, then select Empty Trash. Stay on top of this task by emptying your trash once a month after you’ve backed up your files.
4. Back Up Your Files
You may think you have your files backed up because you have multiple copies of them on your computer. But the truth is it doesn’t matter how many copies you have if they’re all stored on the same device. If something happens to that device, all of your copies will be lost.
To truly back up your files, you need to store copies on at least two separate devices. What those devices are depends on your needs, time and budget. Here are some options:
External storage devices
This category includes media cards (the same type that go in your digital camera), USB flash drives, external hard drives and recordable DVDs.
Computer storage prices have dropped dramatically; external hard drives costing under $80 will hold 2 or more terabytes (TB) of data, which translates to tens of thousands of photos or songs. When shopping for an external hard drive, look for the highest transfer speed suitable for your computer and look for the correct cable connection.
Mac users have an option called Time Machine that automatically back ups data to an external hard drive. PC users can configure a similar setup with an external hard drive and software.
For portability, consider using a USB flash drive as a secondary backup device. Newer computers offer USB ports, and many also have an SSD card slot for a CompactFlash or SmartMedia card. Note that media cards work well in a pinch, but overall aren’t as economical as the USB flash drive.
If you like to archive photos on DVDs or CDs, you’ll need special software that burns the files to the disc for this kind of storage. As technology changes, though, be sure to migrate your files to current media. Just as recordable CDs replaced floppy disks, USB flash drives and hard drives with ever-lower prices are replacing CDs and DVDs. Today, computers produced without CD or DVD drives are increasingly common, and you want to be able to retrieve your files years down the road.
What if your external hard drive gets lost? Label its exterior with your name and phone number. Also create an “If Found” text document that reads “If found, please return this drive to [your name and phone number]” and load it onto the device.
Cloud storage
Online storage, sometimes referred to as “cloud” storage, has become popular. With this type of backup system, you upload or copy your files to a site where the data is stored on that company’s servers. You then access the data over the internet. Although you still view the information on your computer, it’s stored remotely on a different computer. Some of the most popular services include Dropbox, Carbonite and Apple’s iCloud.
After you decide where you’ll store your backup files, decide which files you’ll back up. It’s not practical or necessary to back up every item on your computer. Some data, such as software applications, can be reinstalled after a crash or when you get a new computer. (Keep an inventory of your software applications with website URLs and serial numbers so you can reinstall after a crash or when you get a new computer.)
Instead, your backup efforts should focus on irreplaceable files: photos, videos, documents and databases. Identify the files that are most important to you and be sure you use a storage method large enough to accommodate them. If you set up a good folder system, it should be easy to find what you want to back up.
The final step to your backup plan is deciding how often to back up your files. You want to protect all your data, whether you created it last year, last month or within the last hour. Consider adapting the following plan to suit your own needs and schedule:
- Monthly: Full data backup on the first day of the month to an external hard drive and to online storage.
- Weekly or after a major research session: Back up only your genealogy database to an external hard drive and to online storage. This protects your work between regularly scheduled major backups.
5. Customize Your Computer
Be more efficient on your computer by customizing it to meet your needs. Here are few options that can be real timesavers:
Password manager
Nothing is more frustrating than forgetting your username or password for an online account. Though it’s tempting to create a master list on or near your computer, this can be dangerous. If your laptop were lost or your home computer stolen, the person who ends up with your computer will have access to all your accounts.
Fortunately, there’s a safe and easy way to keep track of all your online account information. I use a browser tool called LastPass Password Manager on both my PC and my Mac to keep track of usernames, passwords, and autofill forms. It also automatically logs me in when I visit a new site. Information is encrypted and maintained on the LastPass servers, which means I can access my online genealogy services anytime and anywhere without worrying about remembering my user name or password.
Other popular password managers that keep your passwords secure only on your computer include Roboform for Windows and Mac, 1Password for Mac, and KeePass open source cross-platform.
Web clipper
Instead of bookmarking, downloading, or cutting information you find on the web and pasting it into a Word document, keep the information online (and off your hard drive) by saving it with browser extensions. I use the Evernote web clipper to copy material to my Evernote account. I add a few quick tags and save it for later. The best part about this service is that all my clippings live in the cloud and are searchable from any internet-connected device.
Bookmarker
Bookmarks are great, but they live only on your computer. What if you want to use a favorite site while working remotely? You can keep your bookmarks in an online account through Diigo. Such a tool lets you access your bookmark collection on any computer, and easily share them.
Make time for regular computer workout sessions and you’ll be soon be more productive with your lean mean research machine.
A version of this article appeared in the February 2012 issue of Family Tree Magazine. Last updated February 2021.
ADVERTISEMENT


