Sign up for the Family Tree Newsletter Plus, you’ll receive our 10 Essential Genealogy Research Forms PDF as a special thank you!
Get Your Free Genealogy Forms
"*" indicates required fields
You can — with the magic of digital imaging. A few mouse clicks can restore your treasured pictures to near-original condition. And retouching photos digitally is surprisingly simple: All you need is an image-editing program — such as Adobe Photoshop Elements <www.adobe.com/products/photoshopel>, Jasc Paint Shop Pro <www.jasc.com/products/paintshoppro> or Ulead PhotoImpact <www.ulead.com/pi> — and a little practice. Restoring badly damaged pictures does take some effort, hut the photo fix-it techniques are straightforward enough for family history buffs to master.
Of course, you’ll first need to put damaged photos into electronic form, using either your scanner or a digital camera. Those electronic images are your master copies. You should always work from copies of those original digital files — especially when you don’t have access to the original photograph. Once you get engrossed in retouching, it’s easy to make a mistake and accidentally save it over your only good file. By working on copies, you can practice your retouching skills without risk to your irreplaceable originals. In fact, you can start over, back up and adjust your efforts as often as von need to. Get in the habit of zooming in on problem areas of the image, too. Whatever the defect, it’s usually easier to work on a big image.
Ready to transform your old photos from damaged to dazzling? Boot up your software, and let us guide you step by step through fixes to four common photo problems.
Reversing Photo Fade
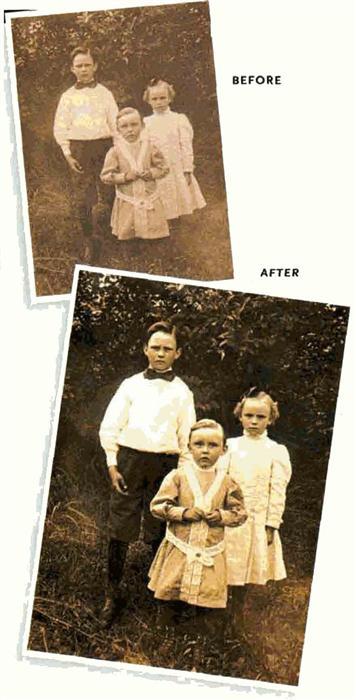
Over time, photographs perform a slow-but-steady disappearing act: As light and other environmental factors wipe out contrast and detail, the images gradually fade away. Old black-and-white or sepia-toned pictures may look washed out. Even in newer color photos, the hues become less vivid or, in some cases, the images get discolored (think of those snapshots from the ’60s or ’70s in which Dad’s lime-green leisure suit has turned a sickly olive shade). But your photo editor can restore the correct color balance to modem pictures and the crispness to your oldest images.
• Color photos: If your program has a one-step fade-correction feature, try that first. Paint Shop Pro’s Fade Correction dialog box, for example, has before-and-after preview windows that let you monitor your color and contrast adjustments (see the Fade Correction screen with picture A, below). Play with the Amount of Correction (usually a numeric value) to find the best fix. But stick with the smallest value that produces an acceptable result — too much correction will reduce detail in highlight and shadow areas.
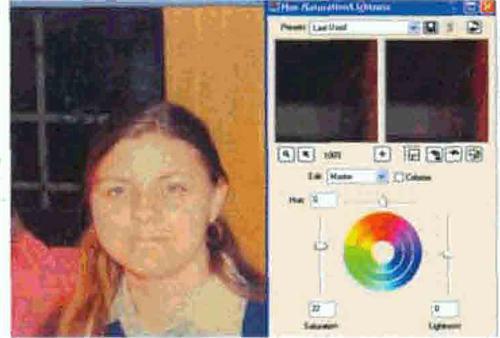
If this quick fade fix doesn’t work to your satisfaction, try boosting the saturation, which reduces the amount of white light “diluting” the image (higher saturation means less white light and more-vivid color). You can do this using either the hue and saturation filter or the manual color-adjustment controls. Look for menu choices such as hue, color adjustment, contrast and saturation (see the Hue/Saturation/Lightness screen with picture A). Since you’re working from a digital copy, don’t hesitate to try different settings and methods; you can always “erase” mistakes with the Undo or Step Backward command (found under the Edit menu).
One of the easiest methods of restoring faded colors is using the Multiply Blending mode (also called Merging). Here’s how it works: You create a duplicate of your image, which becomes a separate “layer.” (Layers are like digital transparency paper — they let you add effects on top of an image without changing the original, “background” layer.) The software multiplies the original image’s brightness in the new layer, then blends the two layers — instantly intensifying the color. You may need to duplicate the original layer more than once to get really vivid colors.
In Photoshop Elements, the Multiply Blending technique is easy:
1. Click Windows on the top toolbar, then select Layers — this opens another small window that displays all the layers you create.
2. Click Layer, then Duplicate Layer. At this point, the small Layers window will now show two identical images.
3. On the small Layers window, select Multiply in the pull-down menu. Leave the opacity at 100 percent (see the Multiply Blending screen with picture A). If you don’t like the results, click Undo (under the Edit menu), and try a different opacity level.
You can perform a similar feat in other photo-editing programs by duplicating the photo, then merging or blending the duplicate with the first image.
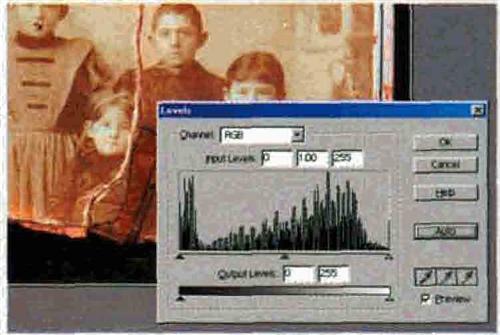
• Black-and-white images: You might not even realize the details that have faded from old black-and-white pictures until you start playing around in your image-editing software. For example, say your ancestors posed on a Grecian-style bench in front of an ivy-covered backdrop. Fading may be hiding the ivy or even the bench. To regain detail, you’ll need to experiment with several features, including the Brightness/Contrast controls, as well as Levels and Curves (more on these in a minute). Remember: There’s no magic formula for correcting defects — successful photo retouching is the result of trial and error.
Picture A: Recapturing Color
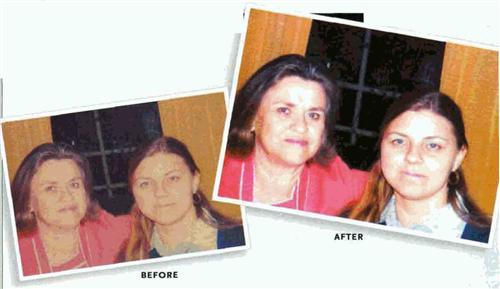
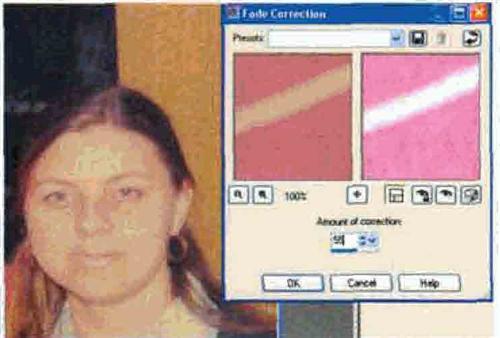
Fade correction: Paint Shop Pro’s Fade Correction feature restores colors in one step, and lets you preview the results.
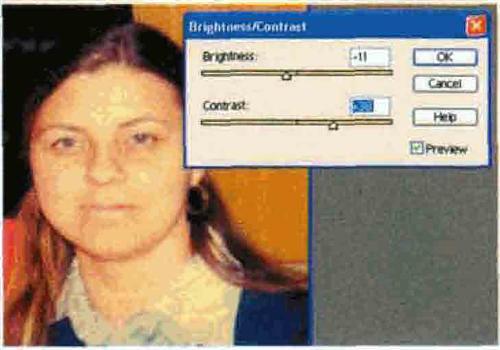
Brightness/contrast: You also can tweak colors with the Brightness/ Contrast window. Photoshop Elements previews changes in the main image window, so it’s easy to experiment with the levels.
Hue/saturation/lightness: Use these controls to adjust color manually. From Paint Shop Pro’s Hue/Saturation/Lightness menu, you can change the values numerically or move the slider bars to find your desired settings.
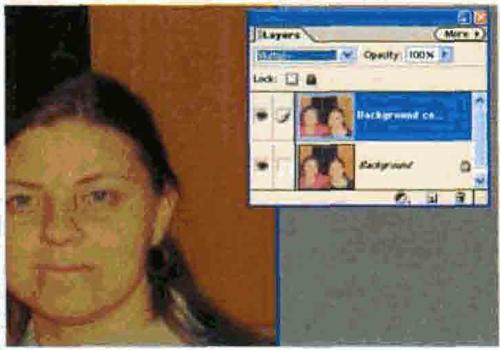
Multiply blending: This technique intensifies color lost to fading. In Photoshop Elements’ Layers window, simply duplicate the original image, highlight the new layer and select Multiply.
Brushing away spots and dust
Spots might come from mold or water damage to prints and negatives, or simply a bit of dust on your scanner. You can eliminate these tiny imperfections using your software’s built-in Blur tool. Blur softens a selected area and decreases contrast, thus reducing detail. Presto! Spots vanish into the background.
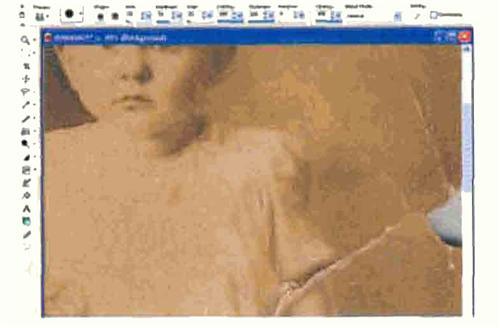
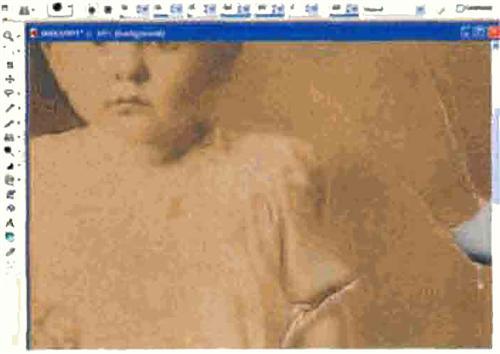
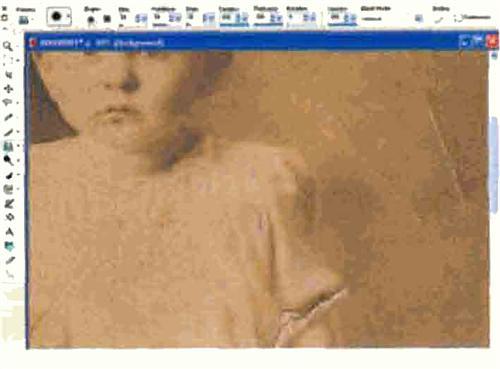
Picture C had three white spots to the right of the girl’s head, as well as a dark spot on her forehead (see the Zoom In screen with picture C). In Photoshop Elements, I selected the Blur tool, chose a tip size and just “painted” on top of the spots. Voilà! The spots are gone (see the Blur Tool screen).
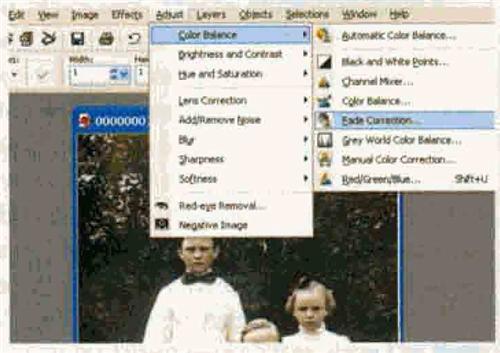
Fade correction: The Fade Correction feature in Paint Shop Pro restored contrast to this photo.
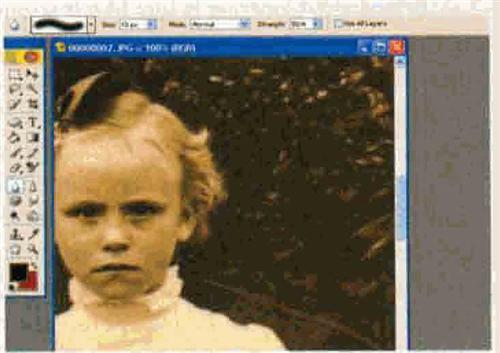
Zoom in: Always hone in on the damaged area of a photo before your try to fix it. For example, the white spots in this picture are easier to repair when they’re enlarged.
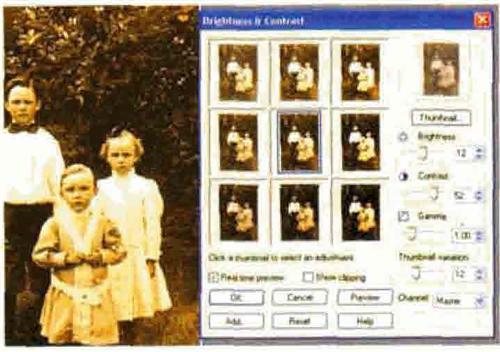
Brightness and contrast: Using the Brightness & Contrast menu in PhotoImpact also improved the photo’s contrast, but with a different overall effect.

Stamping out tears, scratches and folds
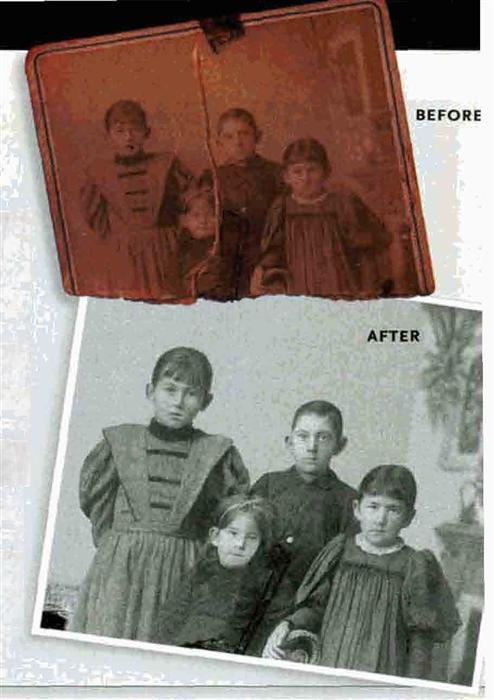
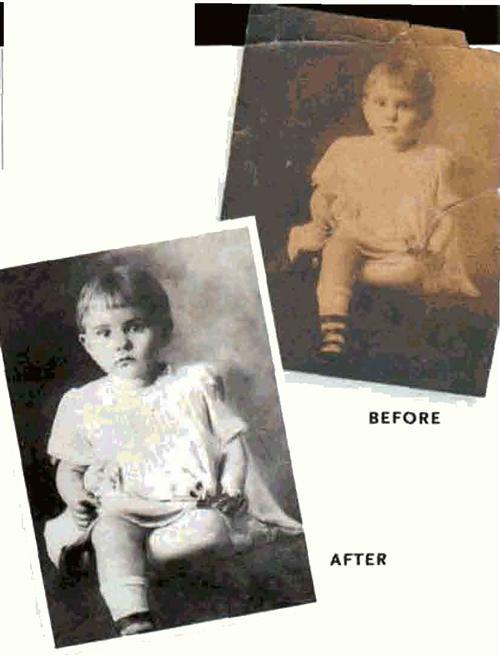
Picture D (below) is one of my favorite photographs of my mother, taken when she was about 3 years old. Time has been far better to Mom than to her photo — the print shows scratches, tears, spots, fading and what looks like a pen outline around her head. Restoring this photo will require using most of the tools we’ve already discussed, plus one more — the Clone tool.
The Clone tool (your program may call it a Rubber Stamp) picks up details in one part of an image — or in a different image altogether — and replicates them in an area you select. In effect, it takes a snapshot of good pixels and “stamps” them on top of bad ones.
To start restoring my mother’s photo, I used Paint Shop Pros Clone tool (the circle on the right side of the Clone Tool screen) to copy an undamaged part of the image. Next, I transferred the good pixels to the torn and creased area (see Fold Fix). Each programs a little different, but usually you just have to click the mouse while pressing the Alt or Ctrl button. As you can see, the imperfections disappeared as I cloned over them (see Rip Removal).
When using the clone tool, march your selections’ colors and shades as closely as possible to the areas you’re trying to repair — take care not to inadvertently clone light areas to fix flaws in a darker part of the image (or vice versa); otherwise, it won’t look natural.
Depending on the amount and severity of the damage, cloning away folds, tears and scratches can take a few minutes or several hours. Be sure to zoom in on the damaged area and pick an appropriate-sized rip for the Clone tool — a tip that’s too big can wipe out detail you want to preserve; one that’s too small can add considerable time to your job.
With the tears gone and contrast restored, Mom’s photo looks as good as new — and so will your favorite pictures, once you master these simple software tricks. Just remember; Whether you’re rescuing a badly damaged photo or simply reinvigorating an aging snap-shot, experimentation is the key to success. It doesn’t matter how many mistakes you make or which effects you choose, as long as you work on a copy. Try oddball recipes, combine techniques and use artistic filters until you get the image you want. You’ll find that retouching old photos really is magical — it’s a bit like bringing your ancestors hack to life.
Clone tool: The first step in erasing folds or tears is selecting a clean part of the image. Be sure it matches the area you’re going to cover up.
Fold fix: Next, use the Clone tool to “stamp” the good pixels onto the creased and torn area.
Rip removal: Continue cloning over the tear. The damage eventually will disappear.
ADVERTISEMENT
