Sign up for the Family Tree Newsletter Plus, you’ll receive our 10 Essential Genealogy Research Forms PDF as a special thank you!
Get Your Free Genealogy Forms
"*" indicates required fields
Nothing excites genealogists more than the opportunity to share research, but finding the right outlet isn’t always easy. Have you ever tried to entice your relatives with pedigree charts and census records? You probably got less-than-successful results. But present Great-grandma Irene’s life story in an album or slide show, and suddenly the clan’s all ears.
These three software programs will help you create multimedia packages you can show at reunions, weddings and casual get-togethers. You don’t have to be a technology whiz to use them. Just gather up some old photos, home movies, genealogical records and memorabilia, and you’ll be spinning those family tales to a captive audience in no time.
Savvy scrapbooker
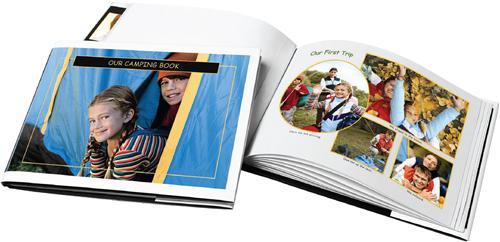
To share your family’s memories in a tangible scrapbook format relatives can flip through, look to the StoryTeller PhotoBook Creator from Epson <www.epson.com>. Each kit contains the software, photo paper, hardbound book and cover sheets you need to build an attractive album out of digital pics. Choose from the 5×7-inch book with 10 pages for $19.99, the 8×10-inch book with 10 pages for $24.99 and the 8×10-inch book with 20 pages for $29.99.
This is a great option for people who like the look of a traditional scrapbook but feel overwhelmed by all the papers, stickers and inks available for that craft. StoryTeller simplifies the design process by offering six book styles, each with several pre-designed page layouts. Just pick the layouts you like and add your own digital pictures, captions and titles. When you’re finished, you can print your pages on glossy photo paper.
To get the best results, you’ll need an ink-jet printer and a computer with lots of memory. The software requires Windows 98 or higher, 256MB RAM (512MB recommended) and at least 2.3GB hard disk space. Epson warns that layouts make huge computer files, so they’ll use a lot of space and might take a while to complete. But if you have the memory, give StoryTeller a try.
Designing a book couldn’t be easier. After installing the software, you’ll use it to select photos from your hard drive. Take advantage of StoryTeller’s editing tools to fix red eye; adjust brightness, sharpness and contrast; and apply special color effects such as sepia tone. Next, choose a book style and page layouts. To add pictures, you’ll drag them one at a time from the “photo bin” onto the empty boxes on each page. StoryTeller will automatically crop the pictures to fit in the boxes, but you can resize and reposition them. When you’re happy with the pictures’ positions, add captions and page titles.
Once you’ve completed your book pages, you can print them on the photo paper included with the kit. You’ll create a cover by following essentially the same steps. Finally, attach the printed pages to the book using the enclosed adhesive strips, slip the cover page into its protective plastic case, and voilà — you’ll have a beautiful photo book.
Bio engineer
 For his father’s 65th birthday party, Telling Stories CEO and company founder Seth Socolow created a touching “This Is Your Life” presentation complete with old photos, home movie footage and period music. The presentation begins with his father’s birth and leads up to the big celebration. Socolow narrates, recounting his father’s memories while a bar mitzvah invitation, high school diploma and other keepsakes appear on screen. You can click on each of these documents to see the details.
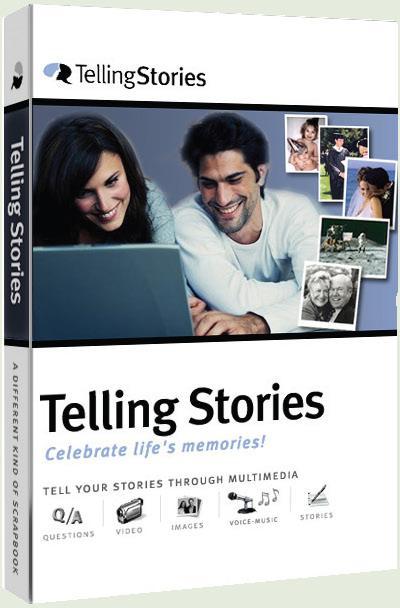
Putting together a biographical sketch like Socolow’s is remarkably easy with Telling Stories <www.tellingstories.com>. The program initially prompts you for your subject’s name, sex and date of birth, and then automatically creates a timeline of that person’s life. This timeline serves as the foundation for your presentation, and will include a few default event markers (such as “Robert is 21” and “Berlin Wall Falls”), which you can edit or delete. To add a new event, simply click the Add button located at the top of the screen.
For each life event, you’ll choose a title and date, and select a predefined event type, such as birth, graduation or romance. (The “type” determines the background image for that part of the presentation — for example, a heart for romance. You can add your own event type if you’d like.) Now for the fun part: Incorporate any photos, stories, videos and music associated with that event. The Help Wizard will walk you through this process. Need a little creative inspiration? Click on the Interview tab, and you’ll get a series of questions pertaining to that event — such as “When and where did you first meet?” and “Where did you go on your first date?”
Telling Stories makes adding digital media a snap. The integrated CD ripper quickly copies songs from your CDs, so you can include them in your presentation. Telling Stories also supports MP3 audio files and AVI and MPG video files.
Once you’ve finished your timeline, switch over to the presentation view to preview each slide. Telling Stories automatically creates one or more slides for each event (depending on the number and types of media you’re including), but you can change the colors of the slides, the fonts, the transition speed and type, and other features. You also can record a voiceover if your computer has a microphone connected to or built into it. When you’re done, send your presentation to relatives on a CD-ROM or as an e-mail attachment.
Telling Stories requires Windows 2000 or higher and 50MB hard disk space. The program costs $49.95.
The express way
A few years ago, creating a Ken Burns-style family history CD would have required a degree in video production — or at least an above-average understanding of how to combine photos, documents, video and sound into a TV-quality creation. But now you can choose from dozens of software packages designed to turn your memories into multimedia masterpieces. What to do? Check out The Jefferson Project’s Passage Express. This program’s intuitive interface makes it easy to transform your research into a polished presentation on CD or DVD, even if you’re not a computer whiz. (Those familiar with the company’s Family History CD software will recognize Passage Express — slated for release in June — as a new, retooled version of the original.)
Startup is as simple as naming your project and deciding what goodies to include in the show. For instance, you might want to create a CD containing all your research on a specific surname or detailing the most recent family reunion. The program will help you create an introductory screen for your CD, with navigation buttons similar to those on movie DVDs. You can choose from a variety of background images such as leaves, wood, parchment paper, clouds and fabric. If you prefer a plain background, pick one or two solid colors to create a fade effect.
You can incorporate all sorts of files on your discs: text documents, genealogy software files, photos, music, video and audio. Passage Express’ project organizer makes adding, deleting and categorizing files a cinch. As you add items, a handy status bar in the upper-right corner tracks how much room remains on your CD.
I especially like the program’s method for labeling photos. Using the Face Labels feature, you can draw a box around the face of each person in a group photo, then type his or her name. In your finished presentation, the label will appear when you position your mouse over a person’s face. You can use this technology for any photo subject: pets, heirlooms, houses — you name it.
I’m also keen on the ability to add narration. You probably wish you could’ve heard your ancestors’ voices — so why not treat future generations to your own? You also can add audio clips from the deluxe version’s Sound Library, a copyright-free music loop from Flash Kit <www.flashkit.com/loops> or tunes from a favorite CD (just take care not to violate copyright laws).
Planning to give away copies of your creation? Relatives don’t need Passage Express to view the presentation: Aunt Gertrude’s computer will automatically open the files on your CD using her system’s default programs. So be sure to stick to file formats most computers can read, such as WAV, MIDI and MP3 for audio clips.
Don’t worry about making mistakes — you can test the project every step of the way, then add, edit and remove items with ease. If you get stuck, click the Help button for more information. Once you’ve perfected the presentation, click Publish, choose your output option (video CD or slide show, for instance), and you’re done.
From the August 2005 Family Tree Magazine
ADVERTISEMENT