Sign up for the Family Tree Newsletter Plus, you’ll receive our 10 Essential Genealogy Research Forms PDF as a special thank you!
Get Your Free Genealogy Forms
"*" indicates required fields
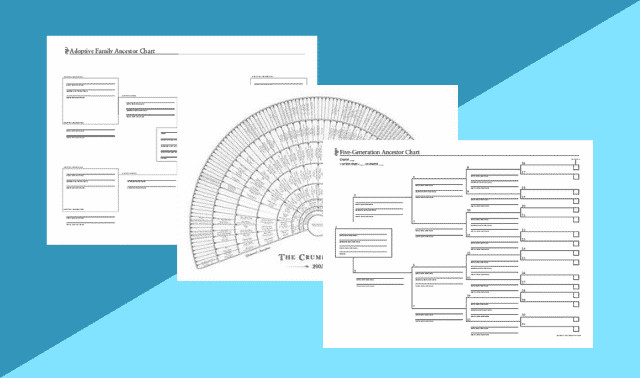
Your genealogy software does more than just help you organize names, dates and places. Imagine enhancing your computerized pedigree chart with a photo of Great-aunt Mildred and her scanned naturalization document. How about a sound recording of your grandfather telling war stories, or a home movie of your just-married parents dancing the hora? Most programs let you add photos, sound bites and video clips to create an impressive multimedia family history showcase. You don’t even have to be a technological wizard to do it — just read our answers to these 10 key questions.
1. How do the multimedia capabilities of different genealogy programs compare?
Most genealogy software can edit photos, create a slide show and even put together a multimedia scrapbook. You also can print graphical wall charts and publish your family history — with pictures — on the World Wide Web. No genealogy software stands out overall, but you can bet at least one program performs well in each area.
Of the 10 most popular genealogy programs (see the guide on page 36), Family Tree Maker, Family Tree Legends, Legacy Family Tree and RootsMagic boast the most powerful photo-editing capabilities. All can rotate pictures, crop them, and adjust brightness and contrast. Family Tree Maker can correct red eye, and once your pictures and pedigree are ready for display, it excels at producing attractive wall charts.
Legacy creates especially appealing Web sites with pictures, and it gives you the most flexibility in printing scrapbooks. You can include anywhere from one to 30 pictures on each scrapbook page and, no matter how many you choose, the program automatically resizes the pictures to fit on the page.
When you create a Web site, most genealogy software lets you include only one picture of each person. Ancestral Quest and the programs based on it (Ancestry Family Tree, Family Trees Quick & Easy, Heritage Family Tree and Personal Ancestral File) can create a family history report for the Web that includes each person’s full scrapbook of pictures, as well as video and audio clips.
In addition to a scrapbook for each person, some genealogy programs, such as Family Tree Legends and Family Tree Maker, have a separate marriage or family scrapbook. Put pictures showing a single family member in that individual’s scrapbook, and pictures that show siblings or a couple in the family scrapbook.
2. How do I get photographs into my genealogy program? Do they have to be saved a certain way?
You can get digitized images for your genealogy software by scanning prints, saving images from a Web site, taking pictures with a digital camera or ordering a photo CD-ROM when you have your film developed. Family Tree Legends, Family Tree Maker, The Master Genealogist and RootsMagic let you scan an image directly into a scrapbook.
Genealogy software generally supports several graphic-file formats, including these:
? BMP is a commonly used format that retains details well, but creates large files.
? GIF, which “reads” fewer colors than other formats, works with Family Tree Legends and The Master Genealogist. Most programs don’t support GIFs, however.
? JPG, also called JPEG, files are compressed for speedy downloads from the Web, but the compression can degrade image quality. Its suitability for both printing and publishing on the Web make JPG a good choice for use with genealogy software.
? PCD is the format used for images on Kodak Photo CDs.
? PNG is a compressed file format that doesn’t lose image quality as JPG files do, but it’s also not supported by as many Web browsers as JPG is.
? TIFF format is ideal for images you want to print or archive for posterity. But the files are large, and many genealogy programs don’t support compressed TIFF files.
You can save images as JPG files using graphics software such as Jasc Paint Shop Pro, Adobe Photoshop Elements or Windows Paint (access it from your computer’s desktop by selecting Start>All Programs>Accessories>Paint). Just open the image, select Save As from the File menu and choose JPG or JPEG from the file types.
3. I plan to use my genealogy program to generate printed reports and a family Web site with photos. How can I make sure the photos look their best?
Some genealogy software lets you designate different pictures for charts and Web sites. When choosing an image, you should consider the picture’s appearance, the file type and size, and the image’s dimensions.
? Appearance: Whether you want to add photographs to a family group sheet, a wall chart or a Web site, a close-up of your ancestor’s head and shoulders usually works best. If your picture shows more, you may want to crop it. But be sure to save a separate, high-resolution copy of the uncropped original.
? File type and size: I recommend JPG files because they’re small, but still retain enough detail to look nice in print and on the Web.
? Image dimensions: Graphics on charts and Web reports should be fairly small, probably no larger than 300 pixels in either dimension. That’s large enough for printing and small enough so others can quickly download an image, even with a dial-up Internet connection.
Some genealogy programs will automatically convert a BMP or TIFF image to JPG, or reduce the image size — and the results are often disappointing. You’re better off cropping and resizing the image with graphics software, then using it with your genealogy program.
4. How can I attach images of original documents, such as census records and family Bible pages, to the source citations in my family file?
If you attach a digitized image of a source document to a fact in your family file, you’ll be able to read your family information and then, in one click, view an image of the document where you found the data — no more scrounging through your paper files to find a source record.
An easy way to get digitized images of source documents is to scan your papers. Some libraries — including the Church of Jesus Christ of Latter-day Saints’ Family History Library and a few of its branch Family History Centers — have digital photocopiers that can save an image as a computer file. (You’ll find a disk drive and, probably, a label with instructions.) If you subscribe to Ancestry.com <Ancestry.com > or Genealogy.com <www.genealogy.com>, you can save census records as JPG files, and book pages as BMP or PNG files. The libraries-only site HeritageQuest Online <www.heritagequestonline.com> lets you save census images as TIFF or PDF files, and book pages as PDF files. (See the next tip for information on using PDFs.)
Attaching a document image to a fact in Family Tree Maker takes special attention. Follow these steps: Click on the fact, then press Control-S and select an existing source or add a new one. Then click on the Add Image button and select where you’ll find the image (file, scanner, existing scrapbook or Photo CD). Family Tree Maker automatically compresses images so they take up less disk space, but the result usually looks blurry. For a better image, select the file and click on the Compression button. Choose 1:1 for the highest image quality. Then click OK, Open and OK twice more. Now the image will be clear enough that you actually can read it.
Once you’ve attached digitized documents to source citations, most programs can display the documents on screen, but can’t include them in printed reports. Two exceptions, Ancestral Quest and Heritage Family Tree, can insert images of source documents into family group sheets. Each document gets a caption and a description, and you can print it on a full, half or quarter page. Printing source documents with your family group sheets puts all your evidence at your fingertips when you go on a research trip.
PDF files won’t work with genealogy software. You’ll need the free Adobe Reader <www.adobe.com/products/acrobat/readstep2.html> to view PDFs and convert them to graphic files. Double-click on the PDF file to open it, click on the Graphics Select Tool (it’s the dashed-outline square around an overlapping circle and square), use the mouse to select all or part of the image, go to the Edit menu and choose Copy. Then open a graphics program such as Windows Paint and paste the image into a new document (Edit>Paste). Next, choose File>Save As and select JPG as the file type. Name the file, pick the folder where you want to save it and click Save. Voilà! You now have a JPG file you can use with your genealogy software.
5. Besides photos and documents, what other files can I use in my genealogy software?
The scrapbooks in most genealogy programs can include sound clips, such as WAV files, and video clips, such as AVI and MPG (or MPEG) files, of any size or length. When you open the scrapbook files, your computer automatically will start up whatever program it needs to run the attached clip.
6. What information should I include with the multimedia files and photos I add to my program?
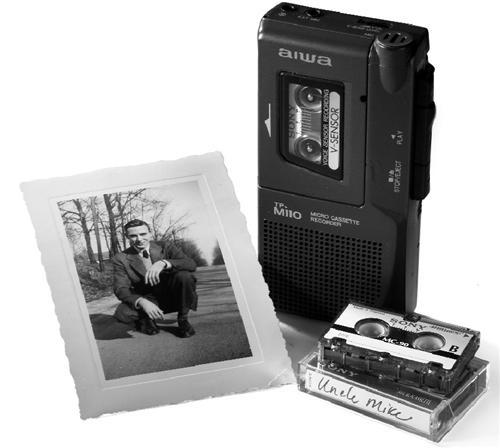
Most genealogy software gives you two fields, Caption and Description, to annotate the files you attach to records. Some programs have a date field, too. Include the names of the people pictured or recorded, the place (both the city and specific location, such as “house of Mildred Carmichael, 46 Mill St.”), the occasion (if applicable) and the date. You also might add the name and address of the photographer or videographer, the dimensions and type of the original photo (such as cabinet card or daguerreotype), the name and residence of the person who owns the original picture or recording, and the date you copied it. Mention if you’ve edited the photo, video or audio, too.
Suppose your genealogy program gives you less note-taking room than you need, or you want to share a photo and its info with relatives who use different software. If the picture is a JPG or TIFF file, you can bypass your genealogy program altogether and enter notes in the file-information fields. Here’s how: In Windows, open the folder that holds the image, right-click on the file name or the image icon and select Properties. Click on the Summary tab and, if the file-information fields don’t already show, hit the Simple button. JPG images have fields for Title, Subject, Author, Keywords and Comments; TIFF files have fields for Title, Author and Comments. You can annotate MPG video files in the Title, Subject, Author, Category, Keywords and Comments fields. Some file formats, such as AVI and WAV, don’t have file-information fields. You may want to create a text file to describe these multimedia files.
On a Mac, select (but don’t open) the file you want to annotate. In the File menu, go to Get Info>General Information. You’ll enter all your notes into a single Comments field.
Two genealogy programs, Genbox and RootsMagic, have image-annotation windows that provide a field for the hard copy’s document number. Whether your software has this special field or not, you might want to record a file number or a description of the photo album so you easily can retrieve a hard copy of the picture, if you have one.
7. I’ve attached images, video and sound clips to records in my genealogy program. If I send someone a GEDCOM file with information on my family, how do I include the multimedia files?
When you attach a photo or audio clip to your family file, most genealogy software stores only a link to where the image is saved on your computer — not a copy of the image file itself. When you click on the link to open the photo or sound clip, your software tells your computer where to look for the file.
Likewise, if you create a GEDCOM file (the standard format for genealogy files), the GEDCOM will contain only links to the multimedia files you attached to the records (unless you use Family Tree Maker software; see right). When you e-mail the GEDCOM to Uncle Edgar, you’ll have to send the images separately. It’ll be much easier for both you and Edgar to keep track of those images if you save them in a single folder.
When Uncle Edgar gets your e-mail, his challenge is to make sure the links in the GEDCOM still point to the folder with the images. You could send along instructions telling him where you kept the image files on your computer, for example: “The image path is C:Documents and SettingsOwnerMy DocumentsMy PicturesGenealogy Pictures.”(That translates to “I keep the images on drive C in a folder called Genealogy Pictures within the My Pictures folder.”) If Edgar copies the multimedia files you sent to a same-named folder on his own computer, the links should work fine when he uses his genealogy software to import and view the GEDCOM.
Say Uncle Edgar e-mails you back with one of his GEDCOMs and some images, but no instructions about where to save the images so the links will work. That means you may need to change the links in the GEDCOM. Personal Ancestral File (PAF) makes it easy to do that: First, copy the image files where you want them on your hard drive. Import the GEDCOM into PAF, open up PAF and then click on a link to an image. If the program can’t find the image, you’ll be prompted to locate the file on your hard drive. Then it’ll ask if you want to change the paths of all the multimedia links in the file to the new path you specified. Answer yes, and as long as you kept all the images in the same folder, the links will be updated correctly.
RootsMagic’s search-and-replace feature also simplifies updating broken links. Start up the program and select Search>Search and Replace. In the Search In field, select Multimedia File Names. In the Search For field, enter the part of the old path that you want to change. Enter the corrected part of the path in the Replace With field. For example, if you want to change the path from C:My PicturesGenealogy to C:My PicturesRoots Magic Photos, search for Genealogy and replace it with RootsMagic Photos.
Family Tree Maker handles multimedia files differently from other programs. Instead of storing just links to multimedia files, it copies those files and stores them as part of its family files. The advantage of this system: You can share your family file and accompanying images, sound or video in Family Tree Maker format with other Family Tree Maker users — you don’t have to worry about sending the multimedia files separately. On the downside, you can’t share the multimedia files with non Family Tree Maker users. Its GEDCOMs don’t include multimedia links, and the program can’t import the multimedia links in GEDCOM files created with other programs.
Ancestral Quest and Heritage Family Tree give you the best of both GEDCOM worlds. You can make a GEDCOM that links to photo files, or you can encode the actual image into the GEDCOM. No other software does this, so your recipient must use one of these programs to import a GEDCOM with encoded multimedia.
Before sending someone a GEDCOM file, find out what genealogy software he uses. If it’s the same as yours, send a file in that program’s unique format, such as an FTW (for Family Tree Maker) or a PAF file, rather than a GEDCOM. Then you know everything — including photos — will transfer.
8. My genealogy software can play a slide show of my family photos. Can I put the slide show on a CD-ROM or on my Web site?
The Master Genealogist is the only genealogy program that lets you create slide shows with pictures, sound and video, and e-mail them to relatives with a viewing utility.
Other programs let you share and post photos in different ways. Legacy Family Tree can save an ancestor’s photo album as a PDF file. In the Family View, highlight a person and click on the Picture Gallery icon. Then click Print Photo Album, Preview and Create PDF. Now you can post the PDF file on your Web site or burn it onto a CD-ROM (users will need Adobe Reader to view it).
Ancestral Quest and the programs derived from it can create a family history report for the Web that includes each person’s full scrapbook of pictures. You could upload the report to the Internet as we described in question 1, or you could copy it to a CD-ROM. Anyone can view the report and pictures with a Web browser. No genealogy program can create a slide show for your Web site.
9. What can photo-editing and photo-management software do that my genealogy software can’t?
Genealogy software has the basic photo editing capabilities, such as cropping and resizing, that you need to prepare pictures for family tree charts, family history books and Web sites.
If you’d like to do more-sophisticated photo editing, programs such as Adobe Photoshop Elements <www.adobe.com> ($99) and Jasc Paint Shop Pro <www.jasc.com> ($99 download or $109 CD-ROM) can restore damaged photos, blend multiple images into seamless panoramas and create slideshows. Photo-management software, such as Adobe Photoshop Album ($49.99)and Jasc Paint Shop Photo Album ($45 download, $49 CD-ROM), lets you label your photos with keywords, and then search the labels to quickly find the photos you want. (See page 50 for overviews of these photo organizers.)
10. Is using genealogy software a good way to preserve my family photos and recordings?
Genealogy software does a great job of incorporating family photographs in charts, books and Web sites. For those purposes, low-resolution images (75 or 100 dots per inch) in compressed-file formats, such as JPG, work best because the smaller files mean your software will operate faster. You may want to crop pictures to show just a person’s head and shoulders.
If you’d like to preserve your family photographs in electronic format, it’s better to save high-resolution files (300 dpi or more) in a format such as TIFF (don’t use the compression option that appears when you save the file). You’ll also want to save entire — rather than cropped — images. See page 58 for more information on scanning and digitally preserving heritage photos.
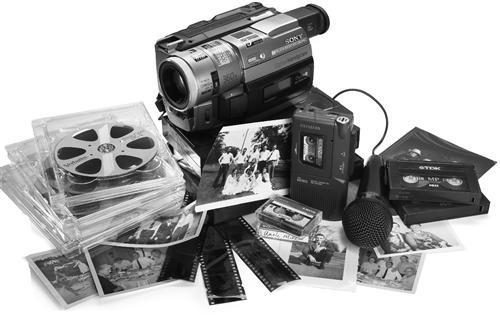
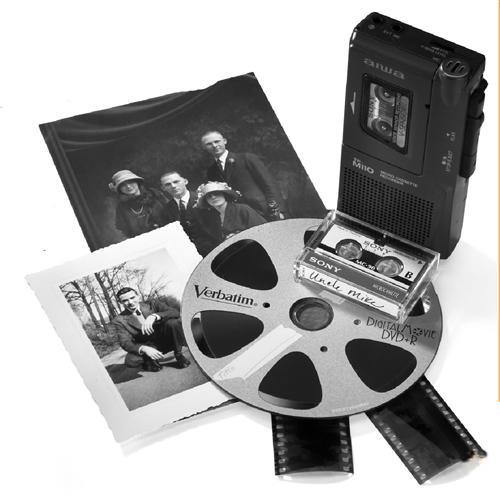
Making digital copies of your old family movies and sound recordings also is a great way to preserve them and share them with faraway relatives. Save the files in a format that maintains high quality, such as WAV for sound clips or MPG-2 for sound and video, rather than a compressed format, such as MP3 or MPG-1.
No matter what genealogy software you use, now’s the time to start taking full advantage of its multimedia features. Including photos, video clips and sound bites in your family files not only puts your primary source material at your fingertips — it also adds life to the names and dates on your pedigree chart.
Contributing editor RICK CRUME compares 10 top Windows genealogy programs on page 36.
ADVERTISEMENT
Author
A contributing editor for Family Tree Magazine, Rick Crume specializes in online research, genealogy software, DNA testing and British genealogy.