Sign up for the Family Tree Newsletter Plus, you’ll receive our 10 Essential Genealogy Research Forms PDF as a special thank you!
Get Your Free Genealogy Forms
"*" indicates required fields
Thanksgiving evening 12 years ago, my wife and I learned a tough lesson about the importance of protecting our family treasures. Upon returning to our house after a wonderful Thanksgiving gathering, we pulled into the drive and were stunned to see signs of fire. Inside, the house was dark and the light switch didn’t work; we smelled smoke and heard dripping water. I retrieved a flashlight from the car, and we walked through what was left of our house. Everything that had been on the third floor was now in an ash pile in the front flowerbed, and all the rest of our possessions were melted, smoke-damaged or water-soaked.
We’ve since replaced our lost belongings — except for our family photos and original documents. Those are gone forever. If today’s technology had been available then, we could have preserved and stored them safely for future generations.
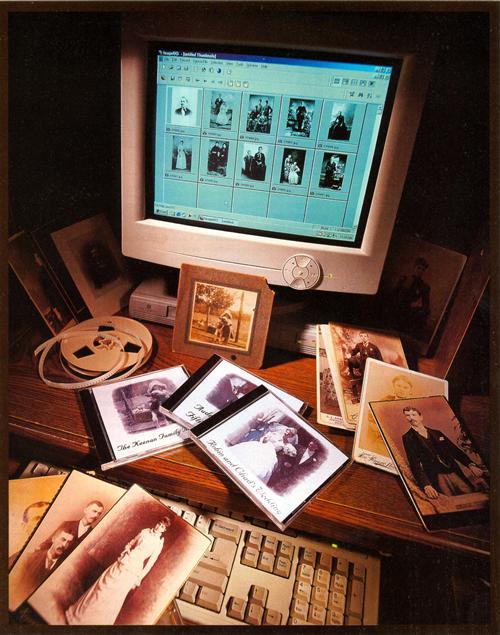
Your ancestors had photographs, personal letters, diaries and — for some lucky families — home movies to pass on. Current technology lets you organize, preserve and retrieve all of these records, storing large amounts of data with relative ease. At the same time, you can organize your own family photos, negatives, slides, documents, oral histories, home movies and videos into computer files. The files are then linked to information that tells the story of the memories contained in the file. High-quality images and sounds can be frozen in time, along with the thoughts and emotions that make them come alive.
You can arrange these files into a computer database that’s compact and relatively inexpensive to duplicate. The data can be saved on CD-ROMs or DVDs. You may have heard that some CD media had problems with the media deteriorating over time, but those early problems have been corrected. CDs are susceptible to damage from direct sunlight and excess heat; with proper storage, however, the data should be readable far into the future. This approach to the preservation of family history will allow future generations to access their heritage easily.
Of course, this digital approach doesn’t replace other forms of preservation. No one would dispute that a well-assembled and beautiful family history album has more appeal than a plastic disk. But the plastic disk, when inserted into a computer, unlocks a world of memories through motion pictures and sounds. And since computer files are relatively inexpensive to duplicate, several copies can be kept at different locations — a kind of insurance policy against the loss or damage of originals. Traditional and high-tech approaches to archiving can complement each other.
You probably already have a multimedia computer system capable of digitally archiving your family history, or can inexpensively upgrade to what you need. In particular, CD-ROM recorders — until recently, expensive tools found only at special service bureaus — can now be had for just a few hundred dollars. Even DVD recorders are beginning to move into the home. Your basic setup can be either a PC or a Mac, and should include:
• CD-ROM player/recorder
• DVD player
• Fire Wire port
• Large amount of internal memory (“RAM”), at least 256 MB
• Large-capacity hard drive, at least 6 GB
Photos and documents
Before you can preserve your family history items on a computer or CD, you need to digitize them. Gather all of your materials together and sort them for digitizing. As you sort and select material to archive, list the information you want to accompany each item. Use a single list for each item, giving the item and the information the same number. Don’t write on the back of photographs and documents; instead, write on a Post-It note and attach that to the back of image.
You’ll probably want to start your digitizing with photos and documents, for which you’ll need a flatbed scanner. For negatives and slides, either a film scanner or flatbed scanner with an adapter for film scanning will do the job. Hewlett Packard makes excellent scanners, such as the PhotoSmart S20xi ($499), a combination slide/negative and flatbed scanner; its only drawback is its maximum photo size of 5×7 inches. Nikon also makes excellent combination slide/negative scanners.
Scanner specifications talk about resolution in DPI (dots per inch), expressed both as optical resolution and software-enhanced resolution. Focus on the optical resolution number when you shop. Flatbed scanner DPI optical resolution numbers range from 300 to 2,400, usually between 600 and 1,200. High-DPI scanner numbers are very important if you plan to scan negatives and slides; for film scanners, the range is from 1,800 to 4,000.
Because negatives and slides are smaller than photos, they need to be scanned at a higher DPI. For example, if you scan a 4×6-inch photo at 300 DPI, the digital image will consist of 2.1 million dots. You need to scan a 0.94×1.43-inch 35 MM negative or slide at 1,200 DPI to get a comparable 1.9 million dots. DPI is very important when printing an image. The higher the DPI of the original, the better the quality of the print. The trade-off comes with disk storage space required for high-DPI images. I suggest scanning photos and documents at 300 DPI. Negatives and slides should be scanned at the highest optical resolution of the scanner.
Many scanners come bundled with a software program that lets you manipulate the scanned image once it’s been digitized. The leading photo-editing programs are Adobe Photoshop and Corel Photo-Paint, but these are pricey programs that may be more than you need. For the budget-minded amateur, the best choice is Adobe’s PhotoDeluxe Home Edition <www.adobe.com/products/photodeluxe/>, a stripped-down version of Photoshop that has all the essentials and costs less than $50. Make sure your software includes these functions: DPI scan level control, color correction, cropping, cutting, pasting and the ability to select a high-quality file format for saving the image information. Photos and documents will usually fit on a typical scanner (8½ ×14 inches), but if you have a larger photo or document you’ll need to scan it in segments and paste them together using your photo-editing software program.
You can save scanned images in a number of formats. Each has advantages and disadvantages, but a couple of formats appear to be universal: Bitmap (BMP), Joint Photo Experts Group (JPEG) and Tagged Image File Format (TIFF). Some of these formats allow you to compress images prior to saving, but this will reduce the quality of the image, so don’t select this option when archiving. An uncompressed JPEG file is a good choice for archiving still images.
Home movies and videos
Home movies are particularly vulnerable to damage over time. Even when stored in a location with good environmental conditions (room temperature, dark and dry), movie film tends to become brittle and colors shift and fade. Transferring these fragile records to CD-ROM or DVD is the best way to preserve them.
Video tapes can also deteriorate. Video formats such as VHS, VHS-C, SVHS, 8 mm and Hi-8 mm are analog recordings, which cause a problem for archiving quality images. When analog videotape is copied, the copy is of lesser quality than the original, a problem known as “generation loss.” This loss becomes critical when using consumer-grade video equipment for copying. With analog videotapes, the image quality can become poor after only a few generations of copying. The best option is to copy the movies and analog videos to digital video format. You won’t suffer any noticeable generation loss when copying digital video, even with consumer-grade equipment.
If you have access to a digital video camera, you can transfer movies and video yourself, but you’ll need to take a few additional steps beyond what’s required to digitize still images.
Edit your movies and videos prior to having them transferred. This step will save you storage media and money. Check each reel for footage that’s blurred, out of focus, overexposed or underexposed, or has subject matter you don’t want to keep. Remove unwanted footage along with the leaders and trailers. Splice all the film footage you want digitized onto 200- or 400-foot film reels. The 400-foot film reels run for a longer period of time, making videotaping much easier. If you don’t have a digital video camera, you can pay to have your movies digitized; these services are typically listed under “Photo Finishing — Retail” in the Yellow Pages.
You also should review all analog videotapes and carefully select segments for digitizing. Copy your videos using the analog video camera as the player and the digital video camera as the recorder. The video cameras should always be connected with an S-video cable if that option is available.
To help choose which movie and video segments to archive, you can make analog copies of your digital videos with the time code displayed in the viewing area. This time code is very helpful when compiling your “edit decision list” (EDL). Review the time-coded copies for both the videos and movies, then compile an EDL of the start and stop times (“in” and “out”) for each of the segments you want to archive. Also list all the information you want to archive with each segment of video. This information will be used later in the database when you link the in and out points of each segment using the time code from the digital tape.
After all your selected movies and videos have been transferred to digital video, you have several options for saving them on your computer. If your digital video camera and computer have a Fire Wire connection, inputting digitized video into your computer is limited only by the size of your hard drive. If your computer lacks a Fire Wire connection, you can purchase an optional video card with a FireWire and/or S-video connection to transfer digitized video to your computer. (For more on digital video, FireWire and choosing a camcorder, see the April 2000 Family Tree Magazine.) If you have many hours of video to digitize, you may want to have it transferred to DVDs because of the huge file sizes. A number of companies provide this service; they can use your edit decision list to set up the DVD.
Sound files
Your approach to digitizing oral histories and audio memories will vary depending upon your computer system and the equipment used to record the audio. One option is to simply place your computer’s microphone near the speaker on an audio player/recorder. But this isn’t the best option for quality audio because the computer microphone can pick up unwanted sounds within and outside the room.
The second option is to connect the audio player/recorder directly to your computer. Many computers come with input jacks for a microphone level and a line level input. Before connecting any equipment to your computer, check the computer’s manuals for restrictions and input voltage levels. You may need to put an audio mixer between the audio player/recorder and computer’s line level jack to control the input levels. As you digitize the audio, list the information you want to archive in the database. Choose a universal file format, such as WAV, AIF, MP3, AU or SND, for storing the sounds on your computer.
Selecting a database
Once you’ve turned your memories into megabytes, you’ll need a database program to store and organize them. Each database program has its pros and cons. Family Tree Maker and Generations Family Tree both have built-in multimedia storage capabilities. Other non-genealogy database programs include ImageAXS and Extensis Portfolio.
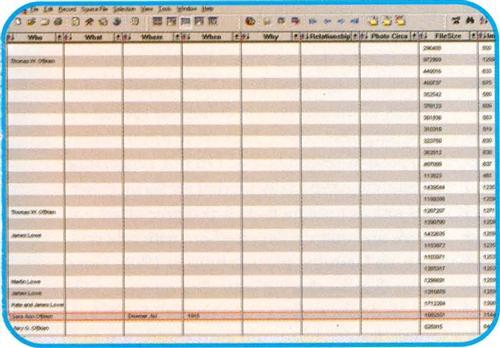
Here’s how a multimedia database works: You save a number of files on your hard drive (pictures of Great-grandma, video footage of family vacations, scanned copies of your parents’ birth certificates, etc.). Using the database program, you “point” the way to each file in an organized fashion. On the database, all you’ll see is a “thumbnail” (a small, low-resolution image) of the file. This allows you to find things quickly and easily, rather than waiting for every single file to load in its entirety. Each thumbnail looks like the file it represents: a photo thumbnail looks like the image; a video thumbnail is a still image of the first frame of the video sequence; text and sound files appear as an icon that looks like a sheet of paper or a speaker.
You may be tempted to simply put everything on your computer’s hard drive. With the cost of hard drives falling, for less than $500 you can have 70 GB of hard drive storage. But this approach could be risky: If you download a computer virus or if one of your hard drives fails, you’ll wish you’d saved your memories on CD-ROM or DVD.
Multimedia databases can grow quickly and be the cause of future frustrations. If you move a multimedia file from one folder to another, or from one hard drive to another, your database may not find that file. Avoid problems by keeping all your genealogy and multimedia files in the same folder on your hard drive. You can save and restore these files easily with a CD-ROM.
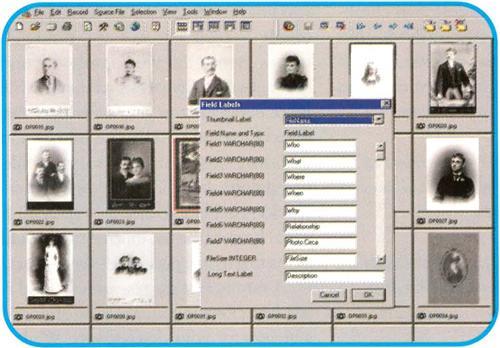
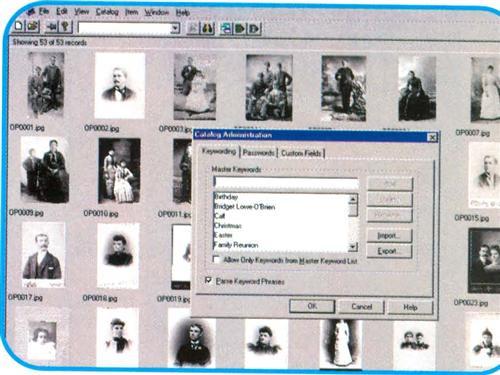
If you wish to archive hundreds or even thousands of multimedia items, a dedicated program such as Extensis Portfolio or ImageAXS is a better choice than a genealogy program. These are specifically designed to view, categorize, sort and publish your memories. These programs let you easily build a database with multiple keywords and data fields. Along with the multimedia item, you can include a text field of any size to attach memories or research. If you search keywords for “Aunt Mary” and a field for “image,” all photos with Aunt Mary will appear as thumbnails on the screen. These programs can also assist you with making CD-ROMs or DVDs that contain your database along with software to run it on any computer.
Once you’ve digitized all your cherished family memories, indexed them and stored them on CD-ROM or DVD, continue monitoring technology. Your current computer will someday become obsolete. New equipment will evolve and, for a period of time, will be able to read your media. But at some point, your CD-ROMs and DVDs will become incompatible with future technology. Before that happens, be sure to update your multimedia memories to keep up with changing technology, as many people are doing today with their 8-mm movies and cassette tapes.
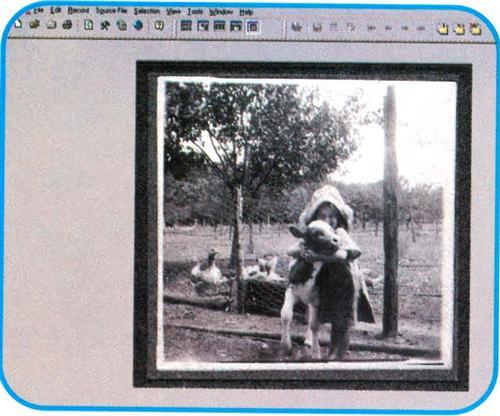
Twelve years after that disastrous Thanksgiving Day fire, I’m using technology to piece together my old documents and photos — because pieces are all I have left. My family’s CD-ROM has photos of my mother as a little girl with her pet calf, a video interview with my father as he talks about how the family survived the tough years of the Great Depression, and images of countless other pieces of memorabilia borrowed from aunts and uncles. I’m taking advantage of today’s technology to make this record for future generations of my family because — as I learned the hard way — shoebox memories won’t always last.
Troubleshooting home movies transfers
You’ll face several problems when upgrading your old home movies to modern technology — here are some fixes:
Problem: Movies have a different horizontal and vertical ratio than videos.
Solution: Choose “letterbox format,” which professional filmmakers use to show the entire visible frame. Or cut a little on each side of the frame without affecting the story.
Problem: Because movies are recorded at 24 frames per second (FPS) and video is recorded at 30 FPS, the difference in frame rate causes the image to flicker.
Solution: To compensate, professionals use a special movie projector, which runs at 24 FPS but has a modified shutter that reduces the flicker. If your video camera has the option to change shutter speed, experiment with different speed settings and choose the speed that causes the least flicker.
Problem: A movie screen surface isn’t the best material from which to videotape an image because it has glass beads that cause an irregular background, which videotaping magnifies.
Solution: A good surface to project onto instead is a flat white piece of cardboard with a matte finish, such as the foam core board sold at many art supply stores. Place the movie projector and video camera side by side on a table. Place the foam core board a few feet in front of the movie projector and project the movie image on it. The projected image should be about 1 foot high and in focus. A smaller image is brighter and has a sharper edge, so it will copy better when videotaped. Connecting a video camera to your TV can really help you adjust and focus on the movie image.
Techno mumbo jumbo
• Analog: Method of representing data using a continuously varying electrical voltage. Analog video degrades each time it’s copied or transmitted from one piece of equipment to another
• Audio mixer: Device used to select and vary the volume of different audio signals from various sources.
• CD-ROM: Compact Disc-Read Only Memory, capable of holding up to 650 MB of data.
• CD-R: Recordable CDs; you can record on these, but only once.
• CD-RW: Rewritable CDs; you can record and re-record on these over and over, much like tapes.
• Digital: Method of representing data using binary numbers. Digital data can be copied and transmitted from one piece of equipment to another without losing quality
• DPI: Dots Per Inch, measuring the resolution of an image. The greater the DPI, the higher the resolution and the larger the file size.
• DVD: Digital Video Disc, capable of holding two-plus hours of high-quality digital video; or Digital Versatile Disc, a double-sided, dual-layer disc that can hold eight hours of high-quality digital video or 30 hours of VHS-quality video.
• Film scanner: Device that captures the image of a slide or negative and converts it into a digital file that can be displayed, edited and stored on a computer
• FireWire port: High-speed serial data port; allows various types of equipment to connect and communicate with each other
• Flatbed scanner: Device that captures the image of a flat object and converts it into a digital file that can be displayed, edited and stored on a computer
• S-Video: System that uses higher-density videotape than VHS to improve picture quality; requires special video cassettes, tape media, plugs, jacks and cables.
• Thumbnail: Low-resolution representation of an image file; allows many images to be visible on the computer screen at once without affecting the computer’s performance.
• Time code: Recorded on the videotape along with the image and audio; provides a unique identifier for each frame; displayed as hours, minutes, seconds and frames (HH:MM:SS:FF). The three time code systems used for video are LTC, RC and VITC.
Tool kit
• Adobe
(800) 833-6687 <www.adobe.com> Image-and video-editing software, training material.
• Caere Corp.
(800) 736-5730 <www.caere.com> ImageAXS database software by ScanSoft.
• Corel
(800) 772-6735 <www.corel.com> Image-editing software.
• Creative Labs
(877) 653-6227 <www.creativelabs.com> CD read/write drives, sound cards and software.
• Datavideo
(888) 809-3282 <www.dvrecorder.com> VDR-1000 or VDR-3000 video CD player/recorder.
• Extensis Corp.
(800) 796-9798 <www.extensis.com> Extensis Portfolio database software.
• Florida Marketing
(800) 527-1914 <www.macacademy.com> Training material for multimedia software programs.
• Genealogy.com
(800) 567-2730 <www.familytreemaker.com> Family Tree Maker genealogy software.
• Macromedia
(800)457-1774 <www.macromedia.com> Animation, CD and Internet authoring software.
• Minerva Networks
(800) 806-9594 <www.minervanetworks.com> CD and Internet authoring software.
• Matrox Electronic Systems
(877) 628-9669 <www.matrox.com> Video capture cards.
• Pinnacle Systems
(317) 841-0332 <www.truevision.com> Video capture cards.
• Pioneer New Media Technologies
(800) 421-1404 <www.pioneerelectronics.com> DVD read/write drives.
• Roxio
(800) 442-7274 <www.roxio.com> Easy CD Creator software.
• Sonic Foundry
(800) 577-6642 www.sonicfoundry.com Sound-and video-editing software.
• TeraOptix
(888) 654-0645 www.goterapin.com Terapin video CD player/recorder.
• Total Training
(760) 944-3900 www.totalae.com Adobe training material.
• Sierra Home
ADVERTISEMENT
