Sign up for the Family Tree Newsletter Plus, you’ll receive our 10 Essential Genealogy Research Forms PDF as a special thank you!
Get Your Free Genealogy Forms
"*" indicates required fields
As author and amateur photographer Oliver Wendell Holmes once put it, photographs are “the mirror with a memory.” Your family photographs are an irreplaceable record of people, places and events of your past. Photos are the leaves that add warmth, depth and interest to the otherwise bare statistical branches of your family tree.
But these precious “mirrors” into the past are easily “cracked.” Neglect, improper storage and even well-intentioned but misguided efforts to preserve old photos can ruin them: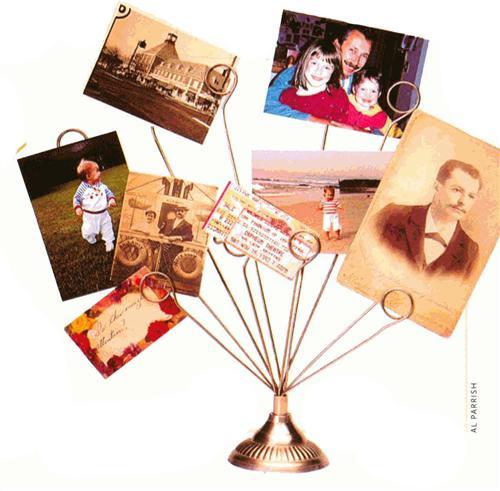
• Improperly processed photographs can become stained or faded beyond recognition.
• Improperly stored photographs can suffer from mildew and discoloration.
• Emulsions can become a meal for bugs or rodents.
• Stacked prints can stick together and tear when you try to separate them.
• Storage in contact with acidic paper or newsprint can damage images.
• Careless handling can lead to bending or breaking.
How can you make sure your photographs endure for your enjoyment and that of future generations? You must protect them from themselves, from damaging surroundings, and from natural disasters. On the following pages are a dozen simple tips for making sure your photos remain the picture of health.
1. Use quality photographers and stable photographic processes. Potential damage lies within the photograph itself! Color processes can rapidly color shift or fade. Black-and-white images face problems, too: Modern resin-coated photographic paper can show surface cracks after only a few years. Residual processing chemicals — the result of improper fixing and washing — can cause fading and staining.
Prevention is the best medicine here. For special photographs such as those of family members and events like weddings, use a commercial photographer who offers archivally processed black-and-white prints on fiber-based paper. When using color, which most of us have come to prefer, choose the longer-lasting photographic films and papers. For slides, according to The Permanence and Care of Color Photographs: Traditional and Digital Color Negatives, Slides and Motion Pictures by Henry Wilhelm and Carol Brow- er (Preservation Publishing, $39.99), that means Fujichrome and (unless you’ll be using a slide projector) Kodachrome. For color print film, Kodak Ektar, Ektapress Gold, Gold, Gold Plus and Vericolor III make the list. Amateur photographers can opt for Fujicolor Super G 200 Film, 3M ScotchColor 200 Film, Polaroid One-Film (ISO 200) and Konica Super SR 200 film, Wilhelm and Brower advise.
In printing papers, Konica Color, Ilford II-fochrome and Fujicolor, Fujiflex and Fujichrome make the cut. But Wilhelm and Brower pick EverColor Pigment Color Prints, Polaroid Permanent Color Prints and UltraStable Permanent Color Prints as the most stable color photographs of any type.
While video and digital images on CD can be a great photo sharing and viewing tool, most archivists don’t consider this a preservation medium. Unlike photographs, digital images are machine dependent — without the right gizmo, you can’t view them. Such images will eventually need to be migrated to new platforms as technologies change. With video images, you lose image quality with each transfer; digital images can be transferred with no loss of quality.
2. Protect the photograph’s base. The base of a photograph is what supports the emulsion that bears the actual image. While photographs can be found on almost anything these days, including T-shirts and quilts, standard photographic bases include metal (daguerreotypes, tintypes), glass (ambrotypes and glass plate negatives), paper (prints of all kinds) and plastic (nitrate and safety film negatives).
Can you distinguish between an encased daguerreotype, tintype and ambrotype? It’s easy. Hold a small magnet to the outer glass. If it sticks, the image is metal — a daguerreotype or tintype. Holding the image in your hand, move it about at several angles. If it appears to be on a mirror, it is a daguerreotype.
Each base holds the potential for specific problems. Metal bends, corrodes and tarnishes. Glass breaks. Paper bends, breaks, tears and crumbles. Film gets brittle and nitrate decomposes and can ignite on its own (see tip #8). When a safety negative smells like vinegar, it is decomposing, a condition called “acid syndrome.” Whatever the base material, to protect it, store materials in a safe environment (see tip #3) and handle carefully.
3. Store photographs in temperature- and humidity-controlled areas. High temperature and humidity increase chemical reactions within photos, causing deterioration. Higher humidity means damp photographs that can stick to surfaces they touch. Humidity higher than 60 percent encourages fungus. Fluctuations in temperature and humidity can make emulsions crack, peel or become brittle.
While the optimum storage for photographs would be 0°F and 25-35 percent relative humidity 75°F and 45-50 percent humidity is a more reasonable setting. Store photographs inside your home where temperature and humidity are stable. When in doubt, measure with inexpensive thermometers and hygrometers available at most hardware stores. Avoid storing your precious family pictures in attics, basements and storerooms.
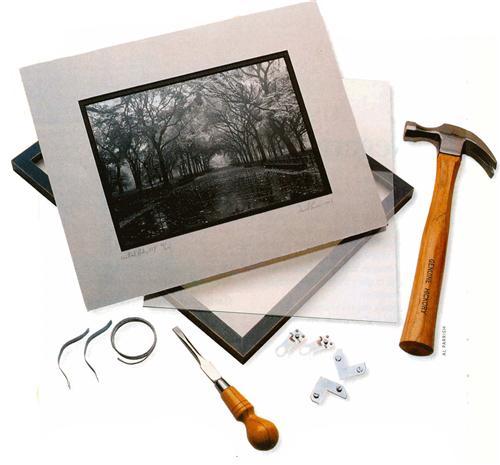
4. Allow for adequate ventilation. Air contaminants that endanger your photos can be natural or man-made. These include everything from industrial pollutants (hydrogen sulfide, sulfur dioxide, nitrogen dioxide) to office pollutants (ozone) to substance pollutants (paints, wood, cleaning supplies, insecticides, automotive exhaust, adhesives) to natural pollutants (salty ocean air, dust). Using glass in framed images helps protect from pollutants and dirt. After you paint a room, allow areas to cure for two weeks with fresh-air ventilation before storing photographs there.
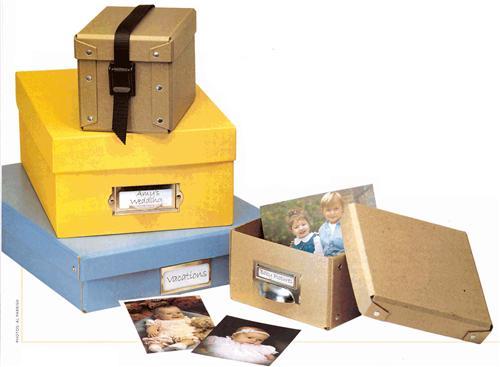
5. Use quality storage materials. Acid and gases from cheap storage materials can migrate or transfer to your photographs. Whether you use an album for storage (see box, previous pages) or prefer envelopes, folders and boxes, purchase archival quality, acid-free items that resist deterioration and provide protection for their contents.
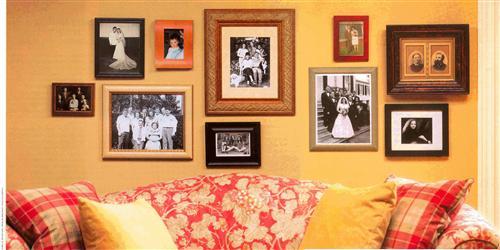
6. Avoid light. The light that illuminates our lives threatens our photos. Light causes fading, and the ultraviolet rays in sunlight and fluorescent lighting speed the damage of other chemical actions in a photograph.
To avoid light damage, keep originals in the dark and display copies instead. When having copies made of historical prints, request larger negatives — 4 × 5-inch or bigger — to capture more detail from the original and avoid graininess in larger reproductions. If you must display originals, hallways are best. In other areas use light-blocking shades and curtains. Museums and archives often use ultraviolet filters to lessen the damage of fluorescent lighting. You can achieve the same effect with conservation glass, which blocks UV and is available at many frame shops.
7. Be on biological alert. The paper base and emulsion gelatin of photographs make a ready feast for mold, fungi, bugs (cockroaches, silverfish, beetles) and rodents (squirrels, rats, mice). Insect and rodent feces will stain and fade your images. Though household pets are in a category different from pests, nonetheless they might not be able to resist loose photos or albums left within reach. Don’t tempt Fido or Fluffy with your irreplaceable pictures.
Store your images in bug- and rodent-free areas and out of the reach of your pets. If you have a pest problem, call in a professional exterminator. To prevent mold, avoid high and fluctuating humidity
8. Be prepared for disasters. Fire and water can destroy your entire collection of family photographs in an instant. Attention to common-sense precautions can safeguard these treasures: Have your home examined to insure your electrical wiring, lighting, appliances and heating are safe. Install smoke detectors. And ban smoking in your house.
Keep photographs away from potential fire hazards such as fireplaces, radiators, heating ducts, stoves and clothes dryers. Photo-preservation expert Henry Wilhelm warns that fire-resistant cabinets and safes use materials that release water vapor when heated and can raise the interior relative humidity to damaging levels.
But your photo negatives can create their own fire hazard if they’re nitrate negatives. Your negatives might be nitrate if the film is dated before 1940 and the word “safety” is not printed on the film.
Check for nitrate with this simple test: Clip a tiny fragment from the film. Place the fragment in an ashtray and hold a lit match to it. If it flames up, it’s nitrate; if it melts, it’s safety film. Nitrate negatives should be copied or printed, then discarded according to your local fire regulations.
To avoid water damage, store photos several feet off the floor, out of basements and away from water pipes. Avoid leaky roofs, sewers and sinks that could overflow.
9. Handle with care. Most photo damage results from simple carelessness or misguided handling. But what good are photographs if no one can use or enjoy them? So learn to protect photos and use them safely:
• Wear gloves (because of natural oils on your hands).
• Touch only the edges of photographs.
• Share only copies.
• Avoid eating, drinking and smoking around photographs.
10. Identify your photographs (safely). A photo collection is only as good as the depth of identification. We often don’t bother with identification because of course we know the individuals, structures and events in our pictures. But that risks leaving a mystery to our descendants.
 Identification is preservation-conscious when written on something other than the back of the image. Good options for identifying your pictures are the acid-free scrapbook page, the envelope (also acid-free!) holding the image, or numbering separate sheets of paper that correspond to numbers written in permanent black ink in a corner on the back of the photograph. If you must write on the image, use only the very edges. Never attach labels.
11. Leave retouching and conservation work to professionals. What if your photographs are already damaged? Apart from brushing off dirt with a soft brush, leave the rescue work to professionals. While most restoration should be done by photograph conservators, local professional photographers can remove stains and enhance faded images with filters and reproduce higher-quality copies. Some can enhance photographs digitally using software like Adobe Photoshop.
Robert A. Weinstein and Larry Booth, authors of Collection, Use and Care of Historical Photographs (American Association for State and Local History), offer these further cautions:
• Less is more. Retouch carefully with a light hand.
• Do only what can be undone.
• Be faithful to the subject. Don’t redraw (for example, don’t put young eyes on an old person or vice versa).
12. Simplify the task. Gather all your family photographs into one safe location. Divide them into two categories: permanent and temporary Go ahead and enjoy the temporary photographs. Look at them. Handle them. Display them in your home. Share them with others.
Narrow your scope for permanent photographs. Choose the best images of important events such as weddings, graduations and celebrations; important people such as grandparents, parents, children and close friends; and important places such as homes and businesses. Then:
• Obtain archivally processed black-and-white fiber-based paper prints and stable color prints.
• Identify your permanent photographs, and identify any new ones as they are acquired.
• Store in acid-free or inert plastic materials in a safe location.
• Display and share only copies.
Keep your “mirrors with a memory” safe and you and your descendants will be able to enjoy them even when your memory begins to fade with time.
ADVERTISEMENT
