Sign up for the Family Tree Newsletter Plus, you’ll receive our 10 Essential Genealogy Research Forms PDF as a special thank you!
Get Your Free Genealogy Forms
"*" indicates required fields
I still remember the first scanner I bought, almost 14 years ago. It was a black-and-white flatbed model, a heavy beast that took up quite a bit of desk space and scanned v-e-r-y s-l-o-w-l-y. Four years later I got my next scanner — this one in color — and what a dream it was. I still couldn’t scan in nanoseconds, but the machine produced higher-quality images. I used that gizmo to copy family photos for retouching and sharing with relatives, to save my research documents on CD-ROM for toting on road trips, and to convert typed pages into word processing documents with OCR software (more on that later).
In fact, there’s no limit to what you can scan (even clothing!) and add to your electronic family history. But deciding which scanner to buy can leave you scratching your head in bewilderment. Flatbed or photo? Eight-bit or 24? And what’s a skuzzy? Our answers to those questions — and more — will help you sort it all out.
Purchasing power
When you start shopping, you’ll find home scanners in four main categories, each designed for slightly different needs. For even more flexibility, you can use optional attachments with some models.
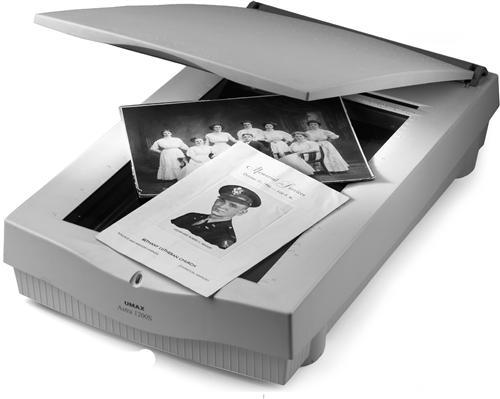
A flatbed scanner is easy to use and works well with just about anything you need to scan — tin types, modern photos, newspapers, books and oversize items. You lay the original onto the scanner’s glass, and the scanner’s “eye” moves across the item from beneath. Most flatbed scanners can handle pages up to 8½×14 inches, which means they take up quite a bit of your desk’s real estate. But don’t pile stuff on top of the scanner — it’s not made to support a lot of weight.
A transparency adapter, available for some flatbed scanners, is a device that holds and illuminates negative strips or slides while you scan them. The scanner recognizes when you’re using the adapter and adjusts the final image for the appropriate colors. Many of the latest flatbed models (and some other types) have shortcut buttons on the front panel to scan, print, e-mail or save an image to your hard drive. One-button scanning eliminates steps — you just press a button to launch the program and start the scan. Some flatbed scanners come with another time saver called a sheet-feed adapter, which lets you scan multiple pages without babysitting the machine.
The sheet-fed scanner has rollers that grab the page and send it under the scanner head. Like a copier, you often can set it to scan pages while you’re not watching — great for a labor-intensive project such as digitizing all your research documents. Drawbacks: You can’t copy pages from a book, and you don’t want to send anything that shouldn’t be bent, such as old photographs, through the sheet feeder.
Instead of laboriously transcribing documents, you can drag a handheld scanner over a page to record printed (not handwritten) words. The scanner works with optical character recognition (OCR) software to convert text into a file your word processing program recognizes. But books sometimes have ink marks that OCR software thinks should be letters, resulting in errors — so you should read the digitized copy carefully while you still have access to the original document.
In the past, handhelds were wide, but today most are pen scanners that copy a single line at a time. Some records, such as those in courthouse deed books, have letters too tall for the pen scanner. But it’s easy to transport and you don’t risk damaging a book by forcing it to lay flat, as you would for a flatbed scanner.
Photo scanners are designed especially to digitize images. Some come packaged with photo-enhancing software. Many resemble flatbed scanners and are large enough for 8½×11- inch photos — in fact, some newer flatbeds are labeled as photo scanners, so they include special photo-scanning features, but also do a good job of scanning documents. Other models, especially those that have drawers for inserting a photo, are designed for smaller images. Although a drawer protects your photos from scratches and abrasion because the image surface doesn’t touch the glass, you may have to take a tradeoff in quality: The drawer might not keep a warped photo flat enough during scanning to give you a good image. Photo scanners might be combined with a negative or film scanner that digitizes negative strips — usually 35 mm negatives, though some have attachments to handle the newer Advanced Photo System 24 mm negatives.
High-end negative scanners digitize only negative strips or individual slides. They’re usually expensive, hovering around $500. But if all your photographs are on slides, this type of scanner might merit the investment. It’s truly the best at getting good scans from negatives or slides.
Let’s interface
Your scanner “talks” to your computer through an interface cable, which attaches to a port on the back of the computer. Be sure the scanner you buy uses an interface method that’s compatible with your computer.
Most computers have a parallel or printerport, and that may be the only option for connecting a scanner to an older computer — but expect to be frustrated by the slow transfer speed.
The USB (universal serial bus) port is today’s standard interface method. You’re sure to have at least one of these ports if your computer was built in the past few years. That goes for PCs and Macs — both operating systems will easily recognize when you’ve plugged in your scanner.
After USB, Fire Wire (mercifully short for IEEE-1394 High Performance Serial Bus) is the speediest data transfer method. It’s compatible with both PCs and Macs, although scanners that support Fire Wire are less common and often more costly.
IMAGE MAKERS
You can shop for scanners from the following manufacturers:
Antec
SCANNER TYPES: portable sheet-fed
PRICE: under $50
MORE INFO: (888) 542-6832,
Canon
SCANNER TYPES: flatbed, sheet-fed, photo, negative
PRICE: under $50 to $1,000
MORE INFO: (800) 652-2666,
Epson
SCANNER TYPES:
flatbed, photo
PRICE: $150 to $2,500
MORE INFO: (800) 463-7766,
Hewlett-Packard
SCANNER TYPES: flatbed, sheet-fed, photo, negative
PRICE: under $70 to $900
MORE INFO: (800) 752-0900,
Konica Minolta
SCANNER TYPES: negative
PRICE: $280 to $3,200
MORE INFO:
Microtek
SCANNER TYPES: flatbed
PRICE: under $70 to $375
MORE INFO: (310) 687-5940,
Nikon
SCANNER TYPES: negative
PRICE: $800 to $2,500
MORE INFO: (800) 645-6689,
SmartDisk
SCANNER TYPES: negative
PRICE: $220 to $450
MORE INFO: (239) 425-4080,
WizCom
SCANNER TYPES: handheld
PRICE: $125 to $230
MORE INFO: (888) 777-0552,
Although it’s fast, SCSI (pronounced “skuzzy,” for Small Computer Systems Inter-face) requires you to install an adapter card into the innards of your computer. The card’s not truly expensive, but you may have to hire someone to put it in for you. It’s easier to use with notebook computers because it slides into the existing modem slot.
Color your world
Most scanners can handle resolution and color depth that are plenty high for your needs. When the scanner makes a pass over your photograph or document, its sensor, which is made up of many photosensitive cells, records the amount of light that bounces back. The darker the original, the less current those cells receive.
Each cell on the sensor reads a single dot on the original image. So a device claiming to scan at a resolution of 2,400 dpi, or dots per inch, has a sensor with 2,400 photosensitive cells per linear inch (5.7 million in a square inch). The higher the number, the clearer and less grainy your scan — and the more hard drive space the digital image consumes.
You may see a scanner’s resolution listed as “2,400 dpi through interpolation.” Interpolation lets the scanner’s software cheat: It fakes a higher resolution by copying some dots (also called pixels). For example, a scanner with 1,200 photosensitive cells per inch may clone every pixel, for an interpolated resolution of 2,400 pixels per inch. In that case, the clarity of the final image relates directly to how well the software duplicates the pixels. So don’t rely on interpolated resolution to judge a scanner’s effectiveness; look instead for its optical resolution, which measures the actual physical dpi.
Another important number in scanner selection is bit depth, also called color depth. That’s the number of bits (the smallest unit of computer data) needed to record color information for a single pixel — in simplified terms, it’s how many colors your scanner can reproduce. You won’t want to go below a 24-bit scanner, or you’ll see limitations in your scanned photos. Eight-bit color is fine for black-and-white line art, though.
Decisions, decisions
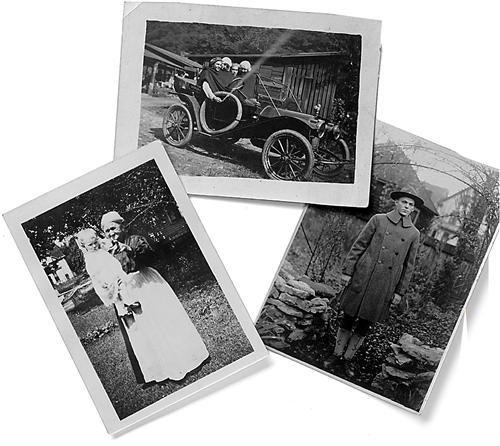
Research scanners before you get to the computer store. Too often I see sales staff pitching a product because that’s what they’ve been told to sell that week. Consult manufacturers’ Web sites for the valuable technical information about their products. Of course, those sites seldom point out any negatives, so look for objective opinions in computer magazines, on product-review Web sites and on Internet discussion boards. See the previous page for a list of popular scanner manufacturers, and look below for good review Web sites. Finally, don’t buy the scanner without trying it out at a friend’s house or the store. Bring whatever material you’ll want to scan — a book, an old photo, your grandfather’s naturalization papers — and give it a whirl.
Successful scanning
Once you get your scanner up and running, how do you maximize its potential? Follow these six simple steps to get good scans:
1.Place the pic. Lay your photo or document facedown in the upper-right corner of a flatbed scanner, aligned with the top and side edges of the glass. (If the scanner’s oriented horizontally rather than vertically, you’ll place the item in the lower-right corner — look for a graphic that shows where to position the object you want to scan.) The item’s entire surface should contact the glass during scanning. In most cases, the weight of a flatbed scanner lid is enough, but if the scan looks funny — perhaps like a ghost — you may need to lay something slightly heavier on top of the lid.
2.View the preview. After you start the scan, your computer does a preview pass to show you what the image will look like. You can use the cross-hairs tool to draw a box around the part of the image you want in the final scan. For example, if the photo shows your grandfather in front of a house, but you just want his face for your genealogy program, you’d draw a box around his face. Don’t move the photo after you do this, or you might end up with a scan of Grandpa’s elbow. Then make sure the scan is straight. If your software doesn’t let you tilt the selection area to match the angle of the image, you may have to adjust the photo and rescan.
You also may be able to adjust the scan brightness to fix a dark photo, or change the contrast to make white areas look whiter. But it’s better to save the image as is — warts and all — and work on a copy of the file in your photo-editing program.
3.Size up the situation. Your scanner will copy the photo or document at 100 percent automatically, but you can adjust that number in the preview screen. When in doubt, scan a little larger than you think you’ll need — you always can shrink a photo without compromising its appearance.
4.Get in a good mode. Change the scanner’s mode depending on what you’re scanning:
For text documents and black-and-white line drawings, choose the line art (sometimes called bitmap) mode, which uses all black and white pixels. Some drawings may appear jagged; in that case, try the halftone option.
The halftone mode uses black and white pixels to approximate shades of gray. Use it for printed images with gray areas, such as a newspaper article that has a photo.
Grayscale mode detects true shades of gray. It’s good for black-and-white photos, or for turning color photos into black and white.
Use your scanner’s color mode for color and sepia photos. You also can scan black-and- white photos in this mode, especially when you want to preserve the photo’s tones. Some scanners have multiple color modes that detect different numbers of colors. The more colors, the better your scan — and the larger your file size.
PUBLIC OPINION
Log on to these sites for scanner reviews and recommendations:
CNET Product Reviews
<reviews.cnet.com>
Flatbed Scanner Review
<www.flatbed-scanner-review.org>
Imaging Resource
DIGITAL SCANNER REVIEWS
<www.imaging-resource.com/SCAN1.HTM>
Macworld
PC Magazine
Smart Computing
ZDNet Reviews
<reviews-zdnet.com.com>
5.Make a resolution. Change the scanner’s default resolution depending on what you’re scanning and what you’ll do with the digital image. Optimal resolutions are:
72 dpi for images you’ll post on a Web site
150 dpi for halftone images
200 dpi for line art you’ll print
300 dpi for photos and other images that you’ll print without resizing
600 dpi for photographs you’ll enlarge four times the original size or less
1,200 dpi for photographs you’ll enlarge more than four times the original size
If your original is 4×6 inches and you scan it full-size at a 300-dpi resolution, the digitized image is 1,200×1,800 dpi. Many people think that when they enlarge the picture in a photo-editing program, they’re getting more dots per inch. That’s not so. They’re really spreading those 1,200×1,800 dots over a larger area, making the dots bigger and the enlarged image fuzzier. Likewise, using photo-editing software to increase the resolution by typing in a higher dpi number results in a smaller image, because the program pushes those dots closer together. I generally err on the side of a high scanning resolution so I’ll know the image is up to any project.
6.Scan and save. Hit the scan button, and the scanner will make a final pass. If you don’t like the image, play with the settings and try again. If you do like it, save it to your hard drive. Photos you’ll print are best saved in TIFF format. JPG and GIF files are smaller, so use these formats for images you’ll post online or e-mail to relatives.
Preserving vintage visages
Delicate ancestral photos and documents require special considerations when scanning. Flatbed scanners are best: Sheet-fed models may cause damage, and some old photographs have protective cases that may not fit into a photo scanner’s drawer. (Never remove the case.) If your flatbed scanner has a document-feeder lid, remove it and replace the original lid. The feeder’s too heavy for fragile items.
Scanning exposes photos to light — the higher your scanning resolution, the longer the exposure. The photographic-preservation project Safeguarding European Photographic Images for Access (SEPIA) <www.knaw.nl/ecpa/sepia> tests how scanning affects older photos. Although a few scanning sessions are fine for most, some shouldn’t be scanned (snap a digital photo instead). Consult Maureen A. Taylor’s Preserving Your FamilyPhotographs (Betterway Books, $19.99) to learn what type of image you’re dealing with, then follow these guidelines:
Albumen prints such as cartes de visite, created primarily in the 19th century, are light-sensitive. Scan them minimally. Pre 1860s albumen photos, called salt prints or calotypes, are even less tolerant — avoid scanning them altogether.
Gelatin-silver prints, the black-and-white photos used until the 1950s, are relatively stable and won’t fade from moderate scanning.
Metal tintype images aren’t predisposed to fading from a reasonable amount of scanning — provided they weren’t hand-colored. Don’t scan colored tintypes because the watercolors and organic dyes could deteriorate.
The metal in tintypes may distort the scan’s color. Try scanning the image once in color and again in grayscale mode, which sometimes shows better detail. You also may see shadows in your final scan — you can’t do much about that, except work with the image in your photo-editing software. A digital photo might give you better results.
Avoid scanning ambro types (made with glass), daguerreotypes (made on metal) and pannotypes (printed on leather or linen). Fading isn’t a big issue, but the scanner’s lid can damage the material the photo’s printed on.
Sure, technology can be a bit intimidating. But with this simple scanner advice, you’ll find the machine of your genealogy dreams.
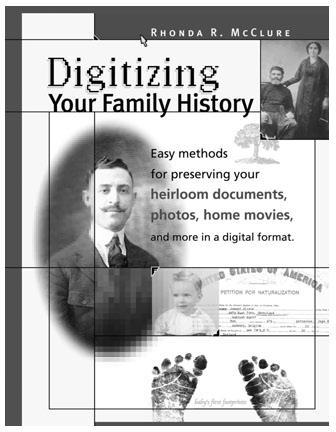
Adapted from DigitizingYour Family History (Family Tree Books, $19.99) by RHONDA R. MCCLURE. McClure is a Florida-based professional genealogist and self-proclaimed computer geek.
ADVERTISEMENT