Sign up for the Family Tree Newsletter Plus, you’ll receive our 10 Essential Genealogy Research Forms PDF as a special thank you!
Get Your Free Genealogy Forms
"*" indicates required fields

In this article:
How to remove photos from old photo albums
Preserving Victorian Photo Albums
Preserving “Magnetic” Photo Albums
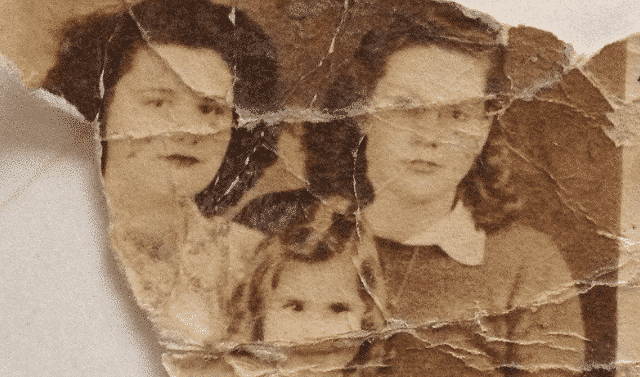
Did you inherit some old photo albums? Treat them with care by following our tips for preserving and storing your family treasure.
How to remove photos from old photo albums
Q: How can you easily remove photos that have been placed in albums that have a sticky glue-type surface without ripping the photos?
Conservators generally don’t recommend freezing, using solvents or melting the wax to free photos from the page. Instead, loosen the print from the page with a micro spatula. If the plastic page is stuck to the print, don’t attempt to remove the image. Try these tricks if photos are stuck to the page:
- Starting at a corner, gently hold the photo with one hand and work the micro spatula blade between the page and photo. Make your way around the edges of the photo, working toward the center.
- Slide regular dental floss under the photo with a gentle back-and-forth sawing motion to cut through the wax.
- Copy any caption onto the back of the photo if it’s is relatively clean, using a soft No. 2 lead pencil or an archival pen. Use a light touch to avoid indentations. Or you can place the photos in an archival paper or plastic sleeve and write the caption on the outside of the enclosure. If you want to reassemble the album, choose archival materials and mount photos with corners or photo-safe sleeves, rather than adhesive.
What is a micro spatula?
This thin, flexible tool isn’t for flipping tiny pancakes. The long, narrow blade is an archivist’s best friend for handling old photos and fragile paper: It aids in lifting photos from albums without digging your fingers underneath the edge, slipping pictures out of photo corners, turning back bent pages, removing staples and extracting photos stuck to the pages of magnetic albums. Micro spatulas are available from archival suppliers such as Gaylord Archival.
Drop-Front Archival Box
A drop-front box like this one from Gaylord Archival makes it easier to remove your album from the box and put it back in. Just be careful not to slide the album in and out of the box, which could damage the covers. Instead, open the box lid, lower the drop front and gently lift the album with clean hands.
Preserving Victorian Photo Albums
Elaborate, heavy Victorian albums gained popularity with the rise of portrait photography in the mid-19th century. Photographers saw a ready market for photo albums as families purchased multiple tintypes, large “cabinet cards” and smaller carte de visite photographs. Care for your heirloom antique album as you would any special book, with extra consideration for the photographs inside.
1. Wash your hands.
When working with old photos and albums, wash your hands first. You also could wear white cotton or nitrile gloves. Handle photos by the edges, never touching the surface with bare fingers.
2. Take note of the album’s materials.
Victorian photo albums came in various sizes, from tiny books for miniature prints to large tabletop display volumes. Velvet, celluloid, leather, metal, and fabric were used as decorative covers, held together by embossed brass hinges. Take note of the materials that make up your album and use appropriate preservation techniques. Avoid using any kind of cleaner or solvent. Keep metal parts scrupulously dry and dust with a soft, clean cloth. Don’t set anything on top of velvet or fabric books where it might leave an impression in the fabric. Dust with a soft cloth or use a screen-covered vacuum hose if needed.
3. Protect the pages.
These early albums were designed with thick, double-sided pages with gilt edges. Openings in the page or along one side allowed one or more photographs to be inserted and viewed through decorative cutout windows. You can protect the photographs and any decorative printing from abrasion by inserting sheets of acid-free tissue paper, available from Gaylord Archival, between the album pages.
4. Check the back and edges of photos.
You may want to remove each photo from the pages to check the back and edges for notes or a photographer’s imprint (which gives the name and location of the photography studio). Take care to avoid damaging the album or print. It’s helpful to use a thin micro spatula or pair of long-handled tweezers. Scan both sides of the image at a resolution of 600 dpi (dots per inch) or higher in full color (even for a black-and-white image), and replace the photo.
5. Use a digital camera to photograph pages.
Most antique albums are too large and fragile to place on a flatbed scanner for digitizing. Instead, use your digital camera to take photographs of the entire book. Place a table in front of a north-facing window for diffused natural light, and use a pillow to support the open album. Position your camera at right angles to the book on a tripod. Use a remote shutter release for a shake-free photo. Start with the covers (front, back and spine) and take close-ups of any decorative detail, then move to the inside pages. Fill the camera frame with the page, but don’t cut off the edges. When you’ve finished digitizing the album, import images to your computer for renaming with meaningful filenames and keywords. Back these up along with your other family history files.
6. Store safely.
Our ancestors displayed their albums with pride in the main parlor for visitors to admire. But you’ll want to preserve an old album away from light, dust, pests and other environmental hazards. Store it inside an acid-free, archival-quality drop-front box. Allow for an inch or two of space on all sides and prevent movement by cushioning the album with lightly crumpled acid-free tissue paper. If the binding is intact, store the box upright like a book on a shelf. Store fragile or damaged albums flat in their boxes. The best spot for the boxed album is inside a closet with moderate temperature and humidity (ideally, 68 to 70 degrees Fahrenheit and 50 percent relative humidity). Avoid temperature fluctuations.
7. Isolate foreign objects.
Acid migration and abrasion from newspaper clippings, notepaper, souvenir ephemera, dried flowers, locks of hair and other objects can permanently damage photos and album pages. If you find such items inside your album, photograph the page to show the context and then remove the item to store elsewhere (small polyester envelopes make viewing these items easy). If you wish, you can photocopy the item onto acid-free paper and include it with the album in the archival box.
8. Don’t DIY.
Resist the urge to repair loose or broken bindings and torn pages yourself. Restoring antique albums is usually a job for a professional conservator. Find one in your area using the American Institute for Conservation of Historic and Artistic Works’ online directory.
9. Consider context of the photo arrangement.
The way photos are arranged in your album can be a clue to identifying unfamiliar faces. “Portraits of husbands and wives were typically displayed alongside each other,” says British photo expert Jayne Shrimpton. “On the same or adjacent pages were often inserted pictures of any children, while photographs of other family members branched out further throughout the album.” That said, it’s also common to find family members scattered throughout the book in seemingly random order.
10. Note famous faces.
Having a picture of a famous person in your album doesn’t mean you’re related to him. Photos were sold much like trading cards, and people enjoyed collecting and sharing pictures of famous people and places.
A version of this article appeared in the May/June 2017 issue of Family Tree Magazine.
Preserving “Magnetic” Photo Albums
Almost every family has at least one old “magnetic” album, usually filled with deteriorating color prints. The combination of acidic materials, adhesives and plastic work together to damage whatever was placed between backing and plastic cover. Prints changed hue; newspapers grew brittle. The items families meant to preserve deteriorated faster than if they’d been housed in a simple paper enclosure.
These albums weren’t really magnetic. Instead, regular acidic paperboard was coated with a grid of sticky wax. Photos and paper stayed put when pressed onto the wax lines and covered with a thin plastic overlay. Unfortunately, none of these materials was manufactured for long-term preservation of the contents.
Today, archival-quality albums feature acid-free, lignin-free paper and only plastics that have passed the Photographic Activity Test. This laboratory test assures consumers that the plastic will not harm photos placed inside. Look for plastics made of polypropylene labeled “archival.” Archivists recommend quick action when it comes to old magnetic photo albums. Use these tips to rescue and preserve your precious family photos.
1. Be proactive.
Made from cheap polyvinyl chloride plastic sheets and high-acid cardboard pages, these magnetic photo albums create a toxic chamber. Plastic gases speed up photo deterioration and damage, causing color to fade and paper to become yellow and brittle. Don’t let your family memories fester any longer!
2. Take photos of the album.
Before doing anything else, preserve the context of the album by taking page-by-page photos of the entire book with your smartphone or scanning each page at 600 dpi resolution in full color. Include the front and back covers and any loose items, and capture notes and captions that might help identify unknown relatives and events. Remember to back up photos to your desktop computer, and send another copy to cloud storage. Peel back the plastic, if you can. To fit the pages on your scanner, you can carefully cut the pages from the binding using a utility knife. (The album itself is so harmful there’s no need to preserve it.)
3. Organize your digital pictures.
Instead of individual names, use a simple standard filename with sequential numbers to maintain the page order of the book. For example, smith-wedding-album_1954_001, smith-wedding-album_1954_002, etc. Create a “master image set” to help you read captions and see the photos in context.
4. Carefully remove images from the album.
Now that you’ve photographed the album’s pages, examine them to decide if photos can be safely removed.
5. Scan high-res versions of the photos.
Scan individual photos on a flatbed scanner with a resolution of 600 DPI for prints at full color. If available, use your scanner’s color restoration feature to automatically correct colors that have shifted or faded over time. A photo-scanning app on your mobile device (such as QromaScan, which uses voice recognition to add captions and other metadata to images) can be a fast alternative. For best results, use a tripod or photo stand to keep your smartphone level and steady during the photo shoot. If possible, save files in the archival TIF format. Create JPG copies for emailing to relatives, sharing and printing.
6. Store your photos.
Preserve individual photos that you’ve removed from the album in an acid-free box, or reassemble them in a new archival-quality album that has acid-free pages. Purchase archival materials from a reputable dealer such as Gaylord or Hollinger. If photos have residual wax on them, use acid-free paper between prints to keep them from sticking together.
7. Create a new photo book.
Upload your photos to an online photo-book creation service, such as Shutterfly or Snapfish. Select a book size and style close to the original then select your image as a “full bleed” photo to fill the entire page. Remember to include the covers. Add an information page with your name and contact information, and a short history about the book itself and the person who created it.
8. Write down the album’s history.
Save the story of your family photo album by writing down a short heirloom history to record the creator’s name and why the album was assembled. Include a note about the total years included in the book (e.g., “1965 through 1982”). Add an index of people, places and events, and keep a copy with the photos for later reference.
Versions of this article appeared in the October/November 2016 and July/August 2019 issue of Family Tree Magazine.
Related Reads


ADVERTISEMENT