Sign up for the Family Tree Newsletter! Plus, you’ll receive our 10 Essential Genealogy Research Forms PDF as a special thank you.
Get Your Free Genealogy Forms
"*" indicates required fields
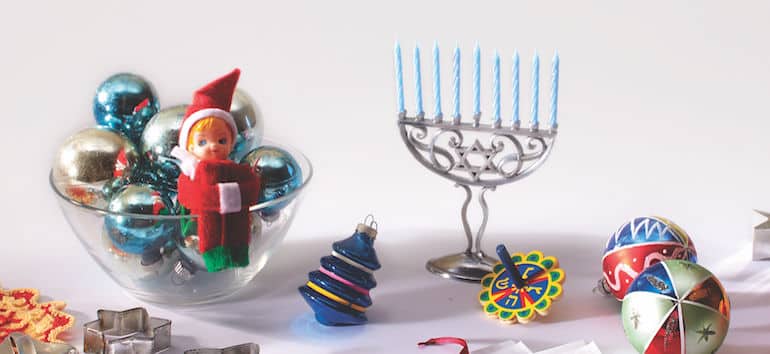
The holidays are a special time of year. No matter what you celebrate or how you celebrate it, you likely have many special heirlooms that have been held and cherished by your family for years. You want to preserve these heirlooms so that future generations can enjoy them as well.
Below are some steps you can take to ensure that your holiday heirlooms can endure many Decembers to come.
1. Plan Ahead
Unpacking holiday décor is the best time to think about storing your decorations post-festivities. Note storage boxes needing replacement so you can take advantage of holiday sales on archival supplies, and plan to give away any extra or unsentimental decorations.
2. Choose a Safe Location
Fortunately, most Christmas decorations spend most of the year tucked out of sight from heirlooms’ worst enemy: light.
Although you might store lights and garlands in the garage or basement, those aren’t the best spots for treasured heirlooms. Summer heat, winter cold, moisture, pests and other hazards can turn paper and fabric decorations brittle and cause glass to fade and oxidize.
If storage space is limited, separate special items, like menorahs, crèches and handmade ornaments (see below), to keep inside your home.
3. Use the Right Materials
Any item will have better longevity if carefully wrapped in white, acid-free tissue and stored in a clean, dry container, such as a divided ornament storage box. Inexpensive plastic bins are a good choice as well. Store boxes off the ground, away from sources of moisture.
Indeed, acid-free tissue paper is one of the most useful supplies in an archivist’s toolkit. It’s manufactured to remove damaging contaminants, and (unlike regular tissue paper) won’t become discolored and brittle over time. You can buy it in sheets or rolls from archival suppliers such as Hollinger Metal Edge, Brodart or Gaylord.
Fiberfill can provide additional protection between items and the bottom of a storage box. Use 100-percent polyester fiberfill, and trim batting to cover the bottom and extend up inside your box.
If storing silver, place it in a “silver bag” made of tarnish-resistant cloth. (Pacific Silvercloth is one option.) Carefully melt any wax or oil residue off candlesticks with hot water.
4. Say No to Newspaper
Don’t store treasures wrapped in newspaper. Not only is the cheap newsprint paper highly acidic and damaging to things it touches, but it also loses its cushioning properties as it degrades. The ink rubs off, too. Instead, use acid-free white tissue paper, such as Gaylord Archival Acid-free Tissue, or polyester craft batting from a fabric store.
5. Decide What Cards to Save
Roughly 75% of Americans continue to send holiday cards by post. After weeks of displaying and enjoying them, you’ll now need to decide which will be archived.
Those from close relatives or friends (or with quirky images) are a good start. Others worth saving might announce weddings or new babies, houses or pets. Use a pencil or archival-safe pen to add names and the year to cards that don’t already have that information, then store in an attractive box or archival scrapbook.
You might even bring out some old cards each year as a fun look-back to hairstyles and clothes. And you can treasure the memories of special people and occasions from years gone by.
6. Pay Special Attention to Fragile Items
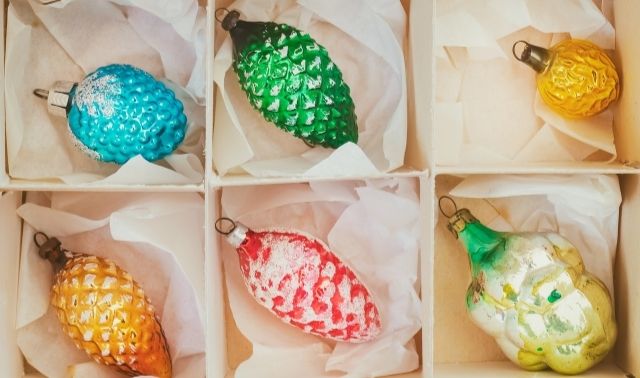
Individually wrap holiday figurines or ornaments in white, acid-free tissue paper and place inside a sturdy plastic or cardboard box. Cushion the space between items with polyester batting or divided ornament boxes.
Children-made items, such as artwork and ornaments, should be carefully curated and stored. Keep them (especially those made from non-archival-safe materials) separate from other items to avoid damage. As with holiday cards, you’ll need to make some decisions about what’s worth keeping.
7. Salvage Broken Items
Are you hanging onto beloved glass ornaments that are chipped or broken? You don’t necessarily need to throw out chipped, nicked or damaged pieces just yet. You can breathe life back into them and show off their charm with a little artful staging:
- Put them on a pedestal, hanging by the unbroken side
- Arrange them together in a bowl or vase as a centerpiece, with the damaged parts hidden and added tinsel or silver garland for extra sparkle
- Create a decorative glass box or mural out of salvageable pieces
You can find metal caps, fasteners, hangers and other replaceable fixer-uppers from companies such as D. Blümchen & Co.
8. Clean Holiday Linens
As with other textiles, holiday linens need cleaned before storing. Simply shaking them out before packing isn’t enough, as body oils, skin flakes, food particles and dust can be left behind and attract bugs. Most modern items can be safely laundered or dry-cleaned, but some heirloom pieces may need hand-washed in warm water with mild-detergent.
Store linens and Christmas stockings in a clean, dry location, preferably inside your home. Wrap stockings in white acid-free tissue paper, and place in an acid-free box or tissue-lined drawer. You can also store in a cotton pillowcase. Don’t wrap in plastic—moisture can get trapped inside and cause mildew and mold.
9. Display Select Items
You can enjoy some holiday-related heirlooms (such as silver candlesticks or Menorahs) throughout the year. Place them in a sturdy, safe location and clean with a soft, dry anti-tarnish polishing cloth to maintain their luster.
3 Ways to Safely Store and Use Christmas Ornaments
Some sections written by Grace Dobush
Most vintage Christmas ornaments don’t survive with their original boxes intact. Collectors become more interested in them once they do, and packaging can help family historians more easily identify the ornament. But that flimsy cardboard deserves a little extra care for long-term survival.
If your ancestors passed such holiday treasures to you, don’t trap them in a Tupperware container for 10 months of the year. Follow these guidelines to ensure your ornaments bring joy for many Christmases to come:
1. Display
Place cotton batting or foam padding under your tree in case an ornament falls. (You can cover it with a sheet or tree skirt.) Check ornaments’ caps and hooks before hanging them to make sure they’re strong and securely fastened. You can wrap thin hooks around branches for support, or add new wire hooks.
2. Clean
After you take down the tree, clean your ornaments. Gently dry-dust old glass baubles, since detergents and even plain water can remove paint. For paper or cardboard surfaces, wipe off dirt with a slightly damp cloth. But to prevent warping, clean a small area at a time and let dry.
Archivists advise against washing antique fabric ornaments, including stiffened velvet and crocheted decorations—take dirty ones to a professional conservator for treatment. It’s OK to polish metal ornaments if they’re color-fast. (Test a tiny area to be sure.) You can clean wax ornaments with warm water and a soft cloth, and if they’re bent out of shape, use a hair dryer on low to soften the wax and reshape it.
3. Pack
Once your decorations are dust-free, store them with care. Wrap each one in acid-free tissue paper, then place ornaments in a single layer in an acid-free box. Keep the box on a sturdy shelf, and just in case, don’t store heavy objects above it. Avoid areas with moisture and extreme temperatures—glass can crack if it’s moved suddenly from a cold environment to a hot one.
Versions of this article appeared in the January 2008, December 2014, December 2018 and January/February 2025 issues of Family Tree Magazine.

