Sign up for the Family Tree Newsletter! Plus, you’ll receive our 10 Essential Genealogy Research Forms PDF as a special thank you.
Get Your Free Genealogy Forms
"*" indicates required fields

Photo service websites such as Shutterfly, Snapfish and Blurb let you arrange photos on everything from albums to Facebook cover photo collages, mugs to dishtowels. If you’re re-creating Grandma’s preserves for the family’s holiday gifts, you even can create custom jam jar labels at VistaPrint.
The possibilities can make any family photo enthusiast’s heart race. But the single biggest mistake most people make when starting a digital photo project is to jump right into creating, without taking time to plan.
Which Family Photos Should I Use for My Project?
Spend 10 minutes thinking about the purpose, theme, tone and appearance of your project. This will make everything else easier, from deciding which service to use, to choosing templates and colors, to selecting the photos to include. Check out the these ideas for some inspiration.
If you know you want to create a fun and playful photo collage for a family reunion, for example, you’ll be on the lookout for bright colors and casual page layouts. You won’t waste time evaluating sober memorial designs, pet layouts and every other template the photo service offers.
Usually, you’ll register for a photo site, select the type of project you want to create, choose a template, upload photos and add them to the template, along with text. Having a photo workflow to efficiently organize, edit and archive images will help you when it comes time to start a project.
You’ll also want to develop a routine for executing a project. Feel free to borrow mine, refining each step as needed. Include photo backup and archiving to preserve your original files:
1. Review images with a project in mind, looking for likely candidates to include. I may flag images for a second look, or put copies in a separate folder to review (keeping the original photos where they were filed).
2. Complete a Photo Project Planning Board with the project and potential photos in mind. This helps me identify gaps in available photos and starts me thinking about design, fonts and colors.
3. Create a separate folder as a holding zone for copies of project photos (if I haven’t already done so) and name it for the project, for example, “Recipe Cards.” This folder gets backed up as part of my daily computer backup routine.
4. Find any photos or documents that aren’t already digitized, and scan or photograph them (read on for tips to do this). I put the digitized copies in my folder for the project.
5. Choose the online service for the project, referring back to your original goal for the project.
6. Create the project. This is the fun part! It’s easy to upload my photos to the project when they’re all in one place.
7. Download the finished file of the completed project if that’s an option. I archive it on an external hard drive.
Preparing Your Photos
Most photo services give you tools for minor photo editing, such as cropping and converting color images to sepia or black and white. For best results, though, I prep my photos before I upload them by doing the following:
Get a Good Digital Image
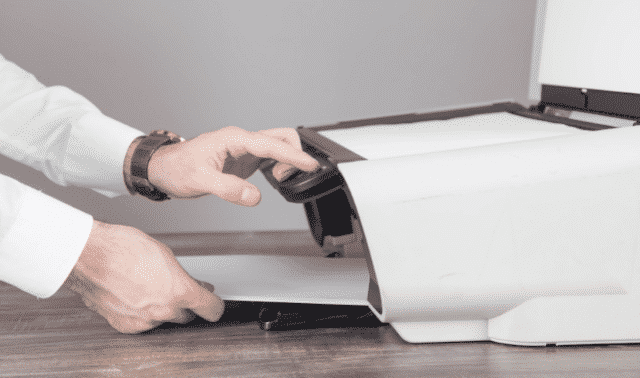
Use a scanner, smartphone camera or digital camera to digitize any photo prints or documents. Scanning is a good choice for images that may need detailed restoration or editing with photo editing software like Adobe Photoshop or Photoshop Elements.
Adjust your flatbed scanner settings to photographs, full color and at least 600 dpi (this resolution enables you to print the photo larger than its original size without losing image quality). If the resulting file size ends up too large for upload to your photo service (you’ll get an error message), save a copy at 300 dpi. Although TIFF files are the ideal format for your digital photo archive, you’ll need to save copies in JPG format—the file type most photo services require—for your project.
Smartphones equipped with scanning apps let you quickly digitize photos and documents, even if you’re at Grandma’s house. These apps crop, de-skew and adjust lighting for best results to create sharp digital images of heirloom photos and documents. If possible, output the image as a JPG; otherwise, you can choose the PDF option and convert it to JPG on your computer.
When taking pictures with your smartphone or digital camera, always use the maximum resolution available on your camera, turn the flash off and position yourself to take advantage of good natural light. For the sharpest photos, use a tripod and remote shutter release.
Rename Images
Give image files in your project folder new, simple names. If you have many, number them in the order you plan to use them for the project: recipe01, recipe02, and so on. Call your cover image something like recipe-cover.
Edit Images
When you need a quick photo filter or you want to add text or graphics to a photo, look to free online photo editors like PicMonkey or Canva. These web browser-based programs offer font styles and designs to make your images look fresh and modern. You’ll also find traditional editing features such as cropping, color adjustment, blemish removal and resizing. Always work on a copy of the original, and save your edited version in the highest available quality with a new file name to preserve the original version.
Be Selective
Play favorites and choose only the best photos for your project. If you come up short on pictures, take more or ask relatives for contributions. You also can consider alternatives such as photos of gravestones or family homes, old maps, newspaper clippings or digitized records. When a less-than-best image is the only option, try using a photo editor to crop it, enhance the color, or other adjustments.
It can be frustrating when your project is humming along and you get a warning that a photo’s resolution is too low for printing. If the perfect photo is too small to and re-scanning isn’t an option, consider creative a solution such as reducing the size and using it as an inset image for a larger photo or combining it with other images to create a collage. You also could try making it transparent and using it as a background.
Also choose photos with aesthetics in mind. One of the easiest ways to pull-together a great collage or group of images is by selecting images featuring similar colors or style. Group snapshots of people wearing bright primary colors, or formal photos with relatives all dressed up.
Odd-duck photos can stick out like the proverbial sore thumb in a group of pictures. For example, one old black-and-white image will be the focus if it’s surrounded with 1980s color snapshots. Give each photo the same attention by converting the color images to black and white (most photo services let you do this within the project), or by saving the old photo to use on a separate album page.
Consider Copyright
Family photos, like any other created work, are subject to copyright laws. The right to reprint, publish, modify and/or sell those works belongs to the creator for a number of years determined by law (most images produced before 1923, however, are in the public domain).
This means your graduation portrait belongs to the professional photographer who captured it, and reunion snapshots are the property of Uncle Richard, the gathering’s unofficial photographer. Before using a photo taken by someone other than you, get permission from that person. In addition to staying on the right side of the law, you’ll preserve family relationships. Read more in “Copyright and the Old Family Photo” on The Legal Genealogist Blog.
A version of this article appears in the October/November 2016 issue of Family Tree Magazine. Last updated: April 2025


