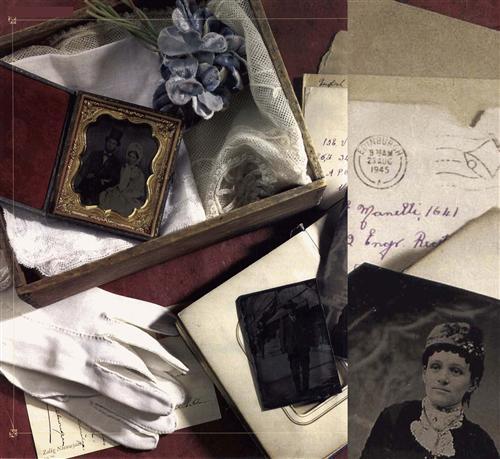
Whenever I lecture on photo preservation, someone almost always approaches me with a question about a small box or booklike item he found with the family photographs. Some people arrive with one in hand, unsure how to open it. Others know it’s a photograph, but wonder what kind it is. The images in these small cases — daguerreotypes, ambrotypes and tintypes — are not necessarily part of every family photo collection, but their beauty makes them valuable family artifacts. If you have one or two in your collection, treat them with care and respect. They are the earliest types of photographs and provide a glimpse into life in the mid-19th century.
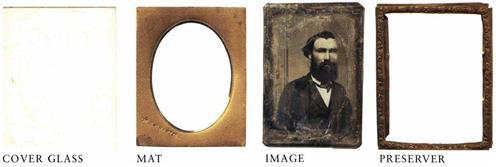
Each cased image has several parts: the case, the image, the cover glass, a mat that creates a frame around the image, and something called the preserver, a thin strip of metal with a paper seal that creates an airtight fit of the various pieces. While the glass protects the image’s surface from abrasion, the preserver prevents environmental pollutants from contaminating the image.
Unfortunately, this composition wasn’t always successful because the seal lost its airtight qualities as the tape aged. Cased images are subject to numerous types of damage, so finding one in mint condition is rare. But you can still protect the photographs in your collection from further damage. Follow these steps to determine what type of cased image you have, and then take the proper precautions to preserve the image for generations to come.
SINGULARsensation
The first daguerreotypes appeared in the United States in 1840, in the hands of Francois Gouraud, a contemporary of the French inventor Louis Daguerre. Gouraud traveled throughout the country, showing how to create this first photographic image.
A daguerreotype is a sheet of polished metal covered in light-sensitive chemicals and exposed to light. The resulting portraits were initially crude and miraculous. Never before had people seen such clear and realistic portraits of themselves. Unfortunately, the first cameras had long exposure times, so subjects had to hold their poses for a long time — one move created a blurry image.
These photographs were one-of-a-kind: The technology to make multiple copies didn’t exist. Daguerreorypists learned to make duplicates of an image by having subjects sit for additional portraits or by making copies of the original. Mass production of daguerreotypes often became the responsibility of an engraver who made prints based on the images.
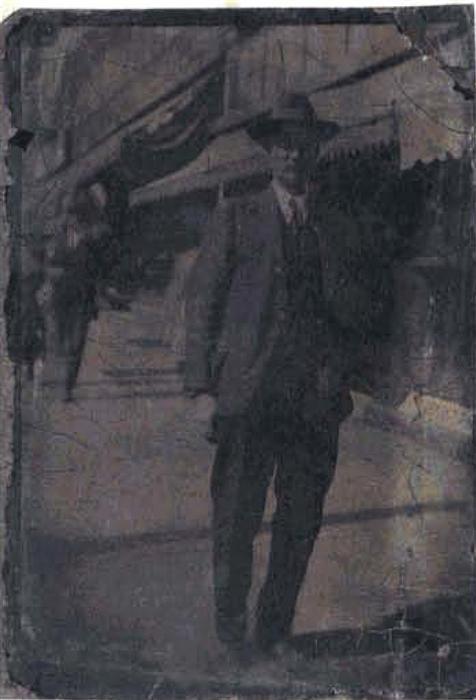
Even with this limitation, the daguerreotype became an instant success. Whole industries developed to produce the metal plates, chemicals and cases necessary for the new process. Anyone with the technical knowledge and financial resources to purchase equipment and supplies established himself as a daguerrean artist. Entrepreneurs attracted customers to their regular businesses by offering to take their pictures while they were in the store. Itinerant daguerreotypists set up portable studios on city streets and in rural areas. America’s love of the photograph was insatiable.
Daguerreotypes came in a variety of sizes, from a mammoth plate (8 ½ inches high) to the small ninth plate (2 ½ inches high). To identify a daguerreotype, look for a shiny, reflective surface (you’ll be able to see yourself reflected in the mirrorlike plate). Another clue is that you can see a daguerreotype only when it’s held at an angle under indirect light. At different angles, the image changes from a negative to a positive.
Daguerreotypes are usually kept in cases, but not always. Daguerreotypists encased the images to protect their surfaces, but you’ll often find daguerreotypes without cases. As the images tarnished, they were removed from the cases and either discarded or mistreated. Later cases, which had intricate designs, became collector’s items. Sometimes, daguerreotypes are colored or tinted. Customers wanted the images to look more realistic, so daguerreotypists applied tints to the surfaces. Pink cheeks and gold jewelry are common.
find apro
The American Institute for Conservation of Historic and Artistic Works
Conservation Services Referral System 1717 K St. NW, Suite 200 Washington, DC 20006 (202) 452-9545 <aic.Stanford.edu>
Conservation Center for Art and Historic Artifacts
264S.23rd St. Philadelphia, PA 19103 (215) 545-0613 <www.ccaha.org>
Northeast Document Conservation Center
100 Brickstone Square Andover, MA 01810 (978) 470-1010 <www.nedcc.org>
Washington Conservation Guild
Box 23364 Washington, DC 20026 washingtonconservationguild@hotmail.com <palimpsest.stanford.edu/wcg>
an open case:elements of a daguerreotype
When the photo craze hit America, itinerant photographers set up portable studios on citystreets.
ART OFglass
Another type of cased image is the ambrotype. Popular in the mid-1850s, it comprises a piece of glass coated with a photo chemical known as collodion, a mixture of gun cotton and ether. This creates a negative image that becomes positive when backed with a dark piece of cloth or fabric. The rest of the image includes the cover glass, mat, case and preserver. Ambrotypes were available in the same sizes as daguerreotypes.
it’s difficult to tell the difference between an ambrotype and a tintype because the images are similar in color. The best way to identify an ambrotype without taking it apart is to look for missing pieces or holes in the backing material. These dark areas will appear transparent. The light areas are the collodion.
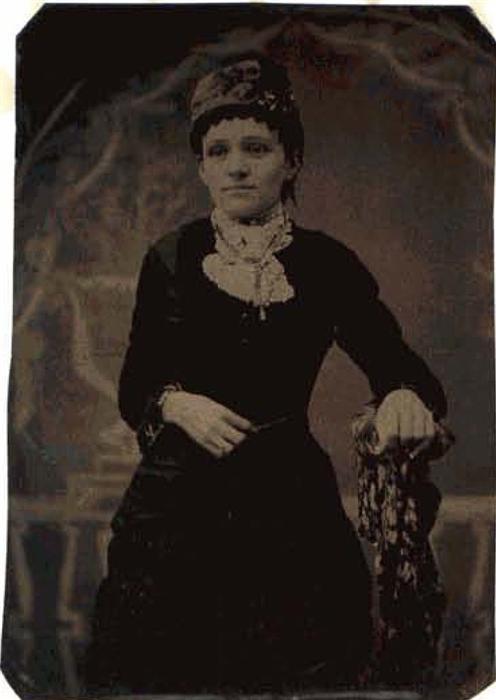
It’s not unusual to find colored or tinted cased images. Notice this woman’s rosy cheeks.
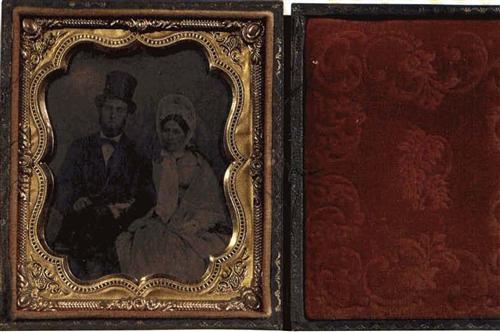
During the mid-1800s, photographers placed daguerreotypes, ambrotypes and tintypes in ornate cases. Consider yourself lucky if you have a case in perfect condition — over the years, most were damaged.
DOUBLEduty
The third type of cased photograph resembles a daguerreotype only because it’s an image on metal. But unlike the daguerreotype and ambrotype, it was possible to make more than one tintype at a sitting. And some photographers used special multilens cameras to produce additional individual exposures. These images were inexpensive to produce, and customers could walk out of a photographer’s studio, picture in hand, in less than a minute. Like daguerreotypes and ambrotypes, tintypes were not made using a negative.
The tintype has a fascinating history. It was the first photographic process invented in the United States, and its longevity is surpassed by only the paper print. An Ohio chemistry professor patented the process in 1856, and it survived until the mid-1900s. While the name suggests the metal was tin, it was actually an iron sheet cut into a standard size. (Tintypes are also called ferrotypes.) The sizes initially corresponded to those of ambrotypes and daguerreotypes so that in the early period they could be placed in cases. Other sizes were introduced later, such as the “thumbnail” tintype — literally no larger than a thumbnail — made to fit into a specially created album. Tintypes are usually found in a case, in a paper sleeve with a cutout for the image or without a protective covering.
If you have a Civil War relative, you likely have tintypes in your collection. Itinerant photographers traveled with the troops and took pictures whenever they had the chance. Soldiers often mailed these durable images home.
Don’t assume a tintype in your collection dates from the mid-to late 19th century. Paper prints replaced tintypes in standard photography studios, but tintypes stayed popular at tourist resorts until the early 1900s.
To identify a tintype that’s still in its case, you’ll have to use the process of elimination. If the image isn’t reflective or missing pieces of backing, it may be a tintype; however, ambrotypes in pristine condition will have a similar appearance.
MAKINGcases
The variety of case designs in the mid-19th century was amazing. In the 1840s, cases consisted of wooden frames and leather embossed with a design. A simple hook and eye acted as a clasp. When opened, the side facing the image was velvet in a rich color, such as red, purple or green. These cases can still be found in good shape.
A more fragile case consisted of papier-mache, Manufacturers tried to make this case waterproof and fireproof by adding chemicals, but unfortunately, the chemicals also quickened the papier-mache’s deterioration. Few papier-mache cases have survived intact.
The most durable case — and the one most likely to survive intact — is the union case. Patented by Samuel Peck in 1852, it consisted of gum shellac and fiber (wood and other types). At first glance, these beautiful cases appear to be made of plastic. The materials used to manufacture the cases could be molded into any shape and had elaborate designs. As cased images became less common, the cases themselves became collectible and usable for other purposes. For this reason, many people removed daguerreotypes, ambrotypes and tintypes from these cases.
While you can find examples of cases in perfect condition, the vast majority were damaged. The most repairable cases are the union cases, whose hinges need replacing. Papier-mache usually crumbles and cracks when handled. Unless you consider the case an important family artifact, you probably want to spend your time and money on proper storage, rather than conservation.
archival.accessories
Conservation Resources International
5532 Port Royal Road Springfield, VA 22151 (800) 634-6932 <www.conservationresources.com>
Gaylord Bros.
Box 4901 Syracuse, NY 13221 (800) 448-6160 <www.gaylord.com>
Light Impressions
Box 787 Brea, CA 92822 (8oo) 828-6216 <www.lightimpressionsdirect.com>
Metal Edge
6340 Bandini Ave. Commerce, CA 90040 (800) 862-2228 <www.metaledgeinc.com>
University Products
517 Main St. Box 101 Holyoke, MA 01041 (800) 336-4847 <www.universityproducts.com>
HIDDENidentity
When the primary identifying characteristics aren’t apparent, the only way to discern the type of cased image is to take it out of the case. To do so, consult a professional conservator (see box, page 10). Removing images from their cases can expose them to deterioration factors in the environment.
Occasionally, there’s a surprise waiting for you when the conservator removes the image from the case: the name of the photographer or other identifying information. For example, Silas Brown of Providence, RI, included an advertising card as part of the backing in the ambrotypes he created. Some photo owners have found the names of people in the portraits written on the backing. In other instances, the original owner of the image inserted a small slip of paper in the case, so you can see the name when you open the case. In the vast majority of cased images, however, the identifying information is lost.
HANDLING & storing
Don’t attempt to clean cased images yourself. The dust on the glass of an ambrotype or daguerreotype just seems to be sitting on the surface. It looks easy enough to take one apart and even simpler to clean it. Though it’s tempting, don’t open it. Attempts to clean cased images often have disastrous results. You can inadvertently cause irreparable damage to the image and lose it forever. What looks tike dirt on the glass could be a sign of major deterioration. Contact a professional conservator before attempting any restoration work yourself. The fragile surface of a cased image makes it difficult to assess how damaged an image really is.
Seek out a storage space with a moderate temperature and relative humidity. Avoid basements, where the humidity and possibility of a flood are high, and attics, which experience extreme temperature fluctuations. Garages also can expose your photographs to high humidity, temperature fluctuations and toxic fumes.
Store cased images in individual boxes with reinforced corners. These can be purchased from archival suppliers (see box, below left) or created from acid-and lignin-free heavyweight paper folded to overlap the case. Cased images don’t need the covering, but since the case is also an artifact and identifier, you’ll want to protect it. Plus, you can write a caption on the box, so you’ll have to look at the image less often, thus reducing wear and rear on the case.
Images no longer in cases need extra protection. Cover the photo with acid-and lignin-free paper to prevent abrasion and breakage, then place the object in an acid-and lignin-free envelope. Ambrotypes that are not in cases should be treated like glass negatives. Consult a conservator for assistance.
From Family Tree Magazine‘s September 2003 Preserving Your Memories.

