Sign up for the Family Tree Newsletter! Plus, you’ll receive our 10 Essential Genealogy Research Forms PDF as a special thank you.
Get Your Free Genealogy Forms
"*" indicates required fields

Leaf through an old family album, and you’ll instantly understand the allure of scrapbooking. Just a few photos can evoke a vivid sense of the past. That’s where scrapbooking and genealogy intersect, why researchers want to compile their family histories into albums they’ll treasure and share with others. But these days, scrapbooking seems to entail a lot more than plopping pictures onto pages—with all the fancy papers, pens, scissors, punches and other special tools to choose from, a family album might feel like a project better suited to a graphic designer than a genealogist.
Don’t let all those options intimidate you. A family scrapbook can be sophisticated and simple, beautiful yet budget-conscious. You don’t need to spend a fortune on doodads and die cuts. You don’t have to worry about wrecking your precious photos and keepsakes, either. All you need to create your first heritage album is a few basic supplies, a little safe-scrapbooking savvy and plenty of preparation. This step-by-step guide will get you started.
A. Consider your style.
First, answer some questions: What scrap-booking style do you like best? Lots of embellishments, or a simpler look? Page through idea books and others’ heritage albums to get a feel for different styles. Old photos lend themselves to an understated look—a simple white background with handwritten notes, or just a few of the many old-fashioned embellishments on the market. How much time and money do you want to spend? How confident are you in your crafting abilities? (If your answer is “not very,” acquaint yourself with the tools and techniques by scrapping last week’s photos before tackling last century’s.) These questions will help determine how elaborate your heritage album will be.
B. Get organized.
Think of your family history scrapbook as an interpretation of the cold, hard facts you’ve collected during your research—a way to give life to the names and dates by turning statistics into stories. We suggest keeping ancestral documents, such as ship registers, birth certificates and land records, in a separate binder (perhaps copying significant papers such as marriage certificates for your scrapbook) that’s a companion to your heritage album.
Decide which photos and mementos you will scrapbook. Plan to include pictures of 3D heirlooms, such as Great-grandma’s tea set. But don’t try to use all your photos—choose the best (or most appropriate) and store the rest safely. Group all items by family and set them aside in acid-free page protectors, file folders or boxes.
Now consider how you’ll organize your album. The most common arrangement is by family, one generation at a time, starting in the present and working backward. For example, your pages or “chapters” might appear like this:
- your immediate family
- your father’s family
- your mother’s family
- paternal grandfather’s family
- paternal grandmother’s family
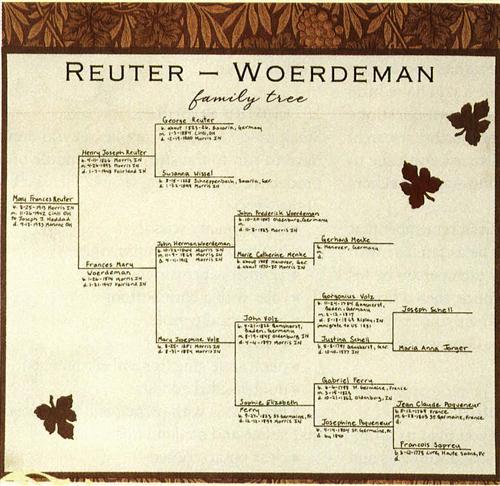
And so on. Arrange the folders in this order. Starting your album with a pedigree chart and table of contents will help readers understand the way you’ve organized it. If you have too much information for one album, divide it into two chronological albums (1800 to 1849, 1850 to 1899 perhaps) or separate scrapbooks for different family branches. Treating your father’s family and mother’s family separately often makes sense in scrapbooks, much as it does in your genealogy software, since these family branches intersect at only one point—you.
C. Pick an album.
Now that you know how much “stuff” you’re dealing with, it’s time to select your album. The post-bound and strap-hinge varieties are good choices: You can add or reorder pages as you uncover more information, and you can insert the pages into protective plastic covers. Both types come in 12 x 12- and 8½ x 11-inch sizes. Larger albums hold more information per page, but you might find the smaller size easier to store and handle. Other options, such as three-ring binders, will work, too. But stay away from magnetic albums — even ones labeled acid-free or photo-safe. Their plastic overlays deposit sticky residue onto your photos, which will make the images deteriorate faster.
D. Choose colors and embellishments.
Look through scrapbooking magazines and others’ albums for color schemes you like, or consult Pantone. A tried-and-true tip: Choose three colors, one for your background paper and two for photo mats and other accents. Add a pattern or two if you want. Many scrappers stick with neutral hues such as beige and black, muted colors such as sage green, or jewel tones such as navy and burgundy to complement their heritage photos.
To easily coordinate your album, use the same color scheme and embellishments throughout. If you want more flexibility, you might use the same basic scheme with different accent colors. Some people pick a different color scheme for each branch of the family; if that’s you, try to select schemes that coordinate with one another. Purchase extra papers and accents to allow for errors and new pages (see step j) and, most important, make sure your materials are acid-free and lignin-free. A hint: Before starting to scrap, test your background paper in your album’s page protectors—papers aren’t always exactly 12 x 12 or 8 ½ x 11—and trim your background papers if needed.
E. Write it down.
One of your heritage album’s most essential elements is journaling—the written descriptions of the photos, records and keepsakes you’re attempting to preserve. You’ll have to decide whether to handwrite or computerize the journaling in your scrapbook. Handwriting adds a personal feel and style. But if you don’t like yours, you can type your journaling and print it on acid-free paper to be cut out and mounted on your scrapbook pages. Or combine typed factual photo captions with handwritten memories—it’s up to you.
Print or type the journaling (including page titles) you’d like to appear alongside each photo or memento. This can be just names and dates, or expand your descriptions to include personality profiles, interview transcripts, family stories and your own memories. Consider adding historical information: maps of the family’s hometown, newspaper clippings and tidbits about pop-culture trends. For families you have little information about, write down questions you hope to answer through further research. If you’re not a good speller, ask someone to proofread your journaling—spellcheckers don’t catch everything.
When identifying relatives, remember that future generations won’t be as familiar with them as you are. Identify each person by his or her full name at least once, then a first or pet name if you wish. When you use terms such as Great-grandpa, be clear whose great-grandfather you mean.
F. Lay out your album.
Gather all the materials you plan to scrap-book—photos, memorabilia, documents and journaling—and start deciding what will go on each page. Place each grouping in an archival page protector. To guide your scrapbooking, sketch your arrangement for each page on paper.
G. Gather supplies.
Stock up on essential supplies so you don’t have to run to the store in the middle of a productive scrapbooking session. Here’s a list of the basics:
- sharp, pointy scissors
- X-acto knife and cutting mat
- 12-inch paper trimmer
- ruler with a cork bottom
- mechanical pencil
- gum eraser
- photo-safe glue (for embellishments)
- double-sided adhesive
- black pens with permanent, waterproof ink, in fine and medium tips
- clear photo corners
- un-du adhesive remover (for glue and sticker mistakes)
H. Put it all together.
At this point, you should decide on any final changes to your album layout and note them on your sketch from step 5. It might help to cut out the pieces for several pages, arrange them with photos on the background paper, then set them aside and see how you like them the next day.
The key to a lasting heritage album is applying preservation-savvy techniques. Here’s a rule to scrap by: Don’t do anything to irreplaceable photos and keepsakes that you can’t undo. For example, make sure your photo-mounting methods are reversible. Use color copies instead of originals, especially if you plan to crop or permanently affix them. If you must include original photos, affix them with Mylar sleeves or corners (handmade or purchased). Mylar sleeves and corners are safe for mementos, too; you can place bulkier items in special keepsake pockets and slim boxes designed just for scrap-books. Handle photos as minimally as possible, wash your hands frequently and consider wearing white cotton gloves to keep skin oils off the photos.
Now for the fun part: Work on one two-page spread at a time, using your layout sketch for guidance. In a clean, well-lighted work area, first mat your photos, then make embellishments, titles and journaling “plaques” (to accent written descriptions). Arrange everything on your background paper and lightly mark the placement. If you plan to journal directly on the background, do so now (draw faint pencil lines to guide your writing; erase them later). Finally, adhere it all into place. Gently wipe photos with cleaning fluid and a soft cloth.
I. Store your album safely.
Your family heritage album is the result of hard work researching, organizing and crafting. You want to share it with others, but you also want to preserve it. And you can do both! First, purchase an archival-quality box to keep out dust and light. (Archivists don’t recommend slipcovers, as they expose the spine to light.) Store your album in the box on its end (like a book), away from sunlight, but in an area with stable temperature and humidity levels — that excludes most basements and attics.
Show the scrapbook to your kids or grandkids so they learn about their heritage, but teach them to view it only in your presence. Maintain no-touching and no-eating-or-drinking-while-looking rules. If you expect the book to get a lot of use, consider making color copies of each page for everyday viewing and save the original for special occasions. For extra security against fire and natural disasters, store your finished album in a safety-deposit box.
J. Leave room to grow.
You always have more ancestors to discover. If you use a post-bound or strap-hinge album, it won’t be difficult to include them at the appropriate place in your album. Just make a new page and insert it. You could also take apart an existing page (because you used non-permanent adhering methods, of course!) and re-create it with the new material. Add these ancestors to your album’s pedigree chart or make a new chart — but keep the old ones to remind yourself how well your genealogical research is progressing.
How to safely scrapbook different mementos
Not sure about the smartest way to scrapbook different mementos? Adhere to these guidelines for common heritage-album keepsakes:
- Pressed flowers: Enclose in a Mylar sleeve.
- Newspaper clippings: Treat with a deacidification spray and encapsulate, or use a color photocopy.
- Letters: Treat with deacidification spray. To make both sides readable, place in a separate page protector, in a keepsake pocket, or color copy important passages for display.
- Cards and programs: Treat with deacidification spray and place in a keepsake pocket. If you want the inside to be visible, open the card and place a length of ribbon vertically along the inside fold. Then fasten the ribbon to the background paper just above and below the card.
- Polaroids: Use color copies.
- Fabrics: Encapsulate, color copy or photograph wool or silk items. Hand-stitch other items to your page.
- Coins: Place in keepsake pockets. Arrange so they’ll stay in a single, flat layer.
3D danger zone
The “layered look” is popular in scrapbooking, but certain embellishments can damage photos or attract insects. Employ these items sparingly or avoid them altogether:
- metal (wire, eyelets, foil, glitter)
- silk
- wool
- acetate ribbon or fabric
- any fabric or ribbon with dye that runs
- wire-edged ribbon
- thick pieces (polymer clay, buttons, beads)
- pressed flowers or leaves
If you want to use 3D embellishments, stick to safe-scrapbooking rules: Don’t let them touch photos. Enclose mementos in plastic sleeves or keepsake pockets, so they don’t harm your pictures, either.
Family scrapbook page ideas
Fun page ideas for your family heritage album:
- pictures of family members with a similar trait, such as a cleft chin
- photos of a family heirloom with journaled stories about its owners
- a then-and-now page with photos of Grandma’s home, or your daughter and her grandmother as babies, wearing the same dress
- life in the 1920s (or whenever) with information about the era — news headlines, clothing styles, home appliances, popular music and so on
- Grandpa’s favorite sayings
- a profile of a famous (or infamous) ancestor


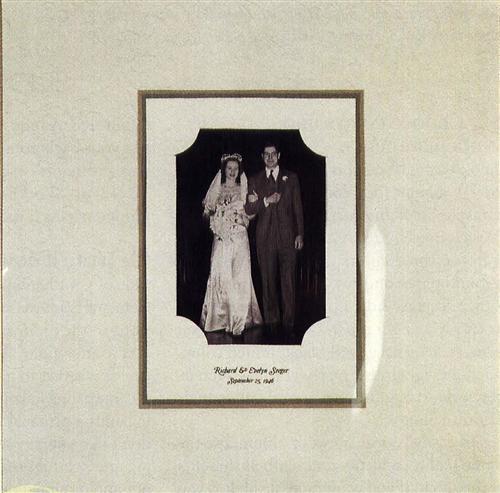
A version of this article appeared in the April 2003 issue of Family Tree Magazine.

