Genealogy as Jo Autrey of Dallas knew it changed on July 18, 1998. That’s when Andrea Autrey of Seattle launched a Web page for all variations of the Autrey surname <homepages.rootsweb. com/~autry/> (the women aren’t related). After the two connected electronically, Andrea helped Jo set up her own simple site.
A few months later, while researching her Texas ancestors, Jo met Kristy Williams of Stafford, Va., a coordinator of several US GenWeb <www.usgenweb.org> pages. When Williams learned that Jo’s Internet Service Provider (ISP) was going to charge $50 an hour to improve her site, she offered to revamp it for free <members.tripod.com/~JoMAutrey/>. Jo was so impressed with her friend’s skills that she encouraged Williams to start her own Web design company, KD’s Designs <www.KD~Designs.com>.
Today, Jo Autrey is learning Web publishing herself with the help of another genealogy friend met on the Internet, Becky Cowen-Cornelius of Willow, Alaska. Since she launched her own family history Web site, Jo has been contacted by hundreds of fellow researchers, found new relatives and gotten leads to fill in her family tree. But what she values most is the friendships her site has cultivated. “Being the owner of a Web site has been a multifaceted blessing,” she says.
A genealogy Web site can bring you the benefits Jo Autrey — and tens of thousands of other family historians — have already experienced. (RootsWeb <www.rootsweb.com> hosts more than 13,000 independently authored genealogy sites; a HotBot search for “family Web page” generates more than 10,000 hits.) It’s a way to connect quickly and easily with other researchers looking for similar information — or maybe with relatives you never knew you had.
Your site can also help preserve today’s family history. Besides pedigree charts and surname lists, your site can be a place for family photos and stories, an online “home” where you connect with far-flung family members. Kathy Mast of Quincy, Ill., used her family history site <www.homestead.com/mastfam/mast.html> to introduce her husband and stepchildren to cousins they never knew existed. “It’s really good for the children to ‘hear’ from relatives not only across the US, but also to touch the lives of relations in other countries,” says Mast. “It broadens their perspective on life in general.”
And the results are much more immediate than traditional paper and postage or telephone calls. “In its first month, our first Web site received over 2,000 hits,” says Mike Choppin, who coordinates The Family Celle site <www.homestead.com/thefamilycelie/Celle.html> with his wife, Carolyn.
As Jo Autrey’s story shows, you don’t have to be a computer whiz to reap the rewards of a family history Web site — in fact, you don’t even have to know HTML, the Internet’s programming language. Web publishing software has made creating a site a snap. And if you’re already using a genealogy software program, it will probably convert your files into Web pages in just a few clicks.
Best of all, you can do it for free. From software to server space, the Internet is full of free tools for your family history Web site.
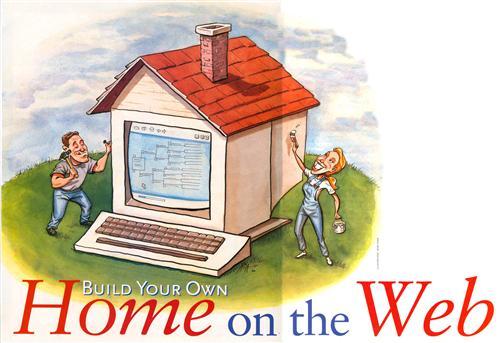
So are you ready to break ground on your new online home? These 10 steps will get you started.
1. Research.
Web publishing has been surrounded by a haze of techno-speak, which can seem intimidating to newcomers. But publishing on the Web really isn’t much tougher than surfing it — as long as you plan ahead. Before you stress over hyperlinks and transfer modes, start with what you already know.
You’re probably an expert at the first step: surfing. This time online, however, focus on structure as well as content. Visit your favorite genealogy sites and see how they’re laid out. Check out personal genealogy pages and see what kind of information others have posted. Pay attention to how information is organized and if it’s easy to navigate.
Look at page design, too. Consider color schemes, graphics and type. Designing for the Web is different than for paper.
As you surf, save the addresses (“URLs”) of well-done sites so you can refer to them later. All these sites should be giving you ideas for your own — but don’t steal! Copyright still applies to the Web. Besides, plenty of sites offer free graphics — even ones related to genealogy (see step 4).
Next, learn some basic HTML. “Wait a minute,” you’re probably protesting, “I thought I could build my site without any confusing code!” That’s true, and you don’t have to use HTML to publish your Web site. But it’s a good idea to know some bare-bones code so you understand how the process works.
Check out Cyndi’s Genealogy Home Page Construction Kit (from Cyndi Howells of Cyndi’s List fame) <www.cyndislist.com/construc.htm>, a great reference for links that will help in all the stages of creating your site, from learning the basics to promoting the finished product.
2. Pick your method.
Next you need to decide how you’re going to create your site. The obvious choice is HTML, which, again, isn’t as scary as it might seem. HTML (“Hyper Text Markup Language”) operates using a series of “tags” surrounded by angle brackets like these <> that tell a Web browser what to display. The first tag tells the browser to turn a function on, and the end tag contains a slash that tells it to stop. So to make a sentence bold, you’d insert a tag at the beginning and a tag at the end. You can look at the HTML code of any page on the Internet by using your browser’s “View Source” command. See page 30 for a list of books and Web sites to get started learning HTML.
Besides tedious coding, a drawback of HTML is that you don’t see what the pages look like as you’re creating them. For that you need WYSIWYG software (pronounced “wizzywig,” short for “What You See Is What You Get”) such as Claris Home Page or Microsoft FrontPage. These programs let you create and edit a Web site much like a word processing document — you type in your text and change the fonts, colors and sizes using toolbar buttons or menu commands. With WYSIWYG software, you immediately see how different formats affect the look of your page. Some programs also include templates that provide a basic design for your page; you fill in the appropriate text and pictures, then embellish.
If you want to use a WYSIWYG program but don’t want to shell out any money, you can get the tools you need on the Web. AOL users and customers of national ISPs such as Earthlink <www.earthlink.net> can use online tools to create basic sites — no coding required. You can download Netscape Composer for free at <www.netscape.com/computing/download/index.html?cp=homo3X4> or try Homestead <www.homestead. com>, a Web site that lets you create your own pages there with its tools.
Kathy Mast chose Homestead because she had no HTML experience and wanted an easy way to create and maintain her site. “Point, click and you’re done,” she says. “This way I get to spend my time researching my family tree, not creating the Web pages to display it.”
Homestead offers templates related to different subjects (business, hobbies or family, for example) or you can start with a blank page. You can even download the tools to work on your site offline.
3. Find a home for your site.
It’s helpful to know where you’re going to post your pages before you create them. The “host” you choose can affect your entire site, from the address (URL) to the appearance (advertisements).
Shop around. A logical first place to look is your ISP; many provide free Web space to members. You might also have space from your genealogy software company or favorite genealogy site.
As you’re shopping, find out the requirements for various hosts — and make sure you can live with them. For example, if you find pop-up ads horribly annoying, you probably don’t want to pick a host that foists them on you in exchange for hosting your site.
Space should also be a consideration. Because Web pages are simple text files and Web images are scrunched to minimize download times, you can have dozens of pages and photos and still only take up a few megabytes. Just be sure you’ve got room to grow. Your ISP’s 2-MB limit could be a problem if you’ve already got a lot of stuff; a host such as Roots Web, which offers unlimited space, would be a wiser choice.
Don’t forget to account for technical issues associated with Web publishing programs. For example, if you have Microsoft FrontPage and want to use all its bells and whistles, your host must support FrontPage “extensions.”
You can also get your own domain, such as <www.smithfamily.com> (sorry, that one’s taken). Some sites offer free registration, but ownership of a domain typically costs $35 a year. Visit <www.networksolutions.com>, <www.myinternet.com> or <www.domaindi~rect.com> to learn more.
4. Plan your content and design.
Now it’s time to decide what you’re going to publish on your site and how to organize it. Your site’s content is up to you — some people stick strictly to their GEDCOM files (the universal file format for genealogy data), while others add many tangential topics. Jo Autrey has links, photos and recipes on her site, while Andrea has categories for “crests and coats of armor” and “castles and counts.” Mike and Carolyn Choppin include monthly family profiles, a query board and a section for “breaking news.” Kathy Mast publishes historical documents about her ancestors and describes her family today. Your categories will be as unique as your family.
Organize your site with those different categories, which can also be divided into separate subcategories. Think of your site like a pedigree chart: You start with one branch — that’s your home page. Under that is a branch for each main category, and under each of those are more for each subcategory. YourFamily.com, a site for family home pages, suggests graphing out your site on paper so you can see where all the links need to go. This will also help you when you’re uploading your pages to the Internet (see step 7). Look for more site-organization tips at <www.yourfamily.com/making_hp.shtml>.
Once your site is in order, think about appearance. Decide what graphics, photos and backgrounds to use. You’ll find freebies at Kristy Williams’ site and links to others in Cyndi’s Genealogy Home Page Construction Kit. Remember, images have to be in digital format to use on the Web. If you don’t have a digital camera or a scanner, most photo labs can create a photo CD for you.
5. Create your pages.
The exact steps you’ll follow depend on what method or particular software you’re using. A few things to keep in mind as you’re constructing:
• Home page elements: Include a title (or logo), a paragraph explaining the site, links to each of your main categories and, most important, contact information for you. This can be as simple as an e-mail address. (If you want to avoid automated detection by junk e-mail “spammers,” make your e-mail address into a graphic element; insert dummy text that human eyes would know to ignore, such as “yourname@nospamyourisp.com”; or write “at” instead of the telltale “@” sign.)
• Links: Not everyone will enter your site through the home page, so include a link back to it on every page. It’s also helpful to have links to all your major categories and e-mail at the bottom of each page. If your pages are long, insert “target” links (they jump to another point on the same page) so visitors don’t have to scroll far to find what they’re looking for.
• Naming: Keep in mind that you’ll use your file names to create links; if you rename a file you have to change all the links to it on other pages, too.
• Images: Most Web graphics are either “GIF,” which works best for line art, or “JPEG,” which is ideal for photos.
• Converting your genealogical data: Genealogy software does this easily; many programs will convert your GEDCOM files into Web pages with just a few clicks. With Legacy Family Tree, for instance, selecting “create Web pages” brings up a menu that lets you choose what files, individuals and formats you want. For even more control over pages’ appearance, you can go back and edit them with a WYSIWYG program. (For a comparison of nine top Windows genealogy programs, including each software’s Web publishing features, see the June 2000 issue of Family Tree Magazine.)
If you don’t use genealogy software, other shareware programs will do the file conversion:
CED2HTML <www.gendex.com/ged2html>
CED2WWW <www.lesandchris.com/ged2www/>
GEDPage <www.frontiernet.net/~rjacob/gedpage.htm>
The downside to these “converters” is that you have to create your GEDCOM first, and they usually don’t handle photos well.
Richard Wilson’s Publishing Your Family History on the Internet (Compuology) gives step-by-step instructions on converting GEDCOMs with various genealogy software and shareware programs. He’s also got examples of pages created on several different genealogy programs at his site <www.compuology.com/richard>.
• Leave out the living: You wouldn’t want your vital stats paraded through cyberspace, so respect the privacy of your relatives. Your genealogy software might let you exclude information on living people, or filter your files with one of these shareware options:
GEDCIean <www.raynorshyn.com/gedclean/>
CEDLiving<www.rootsweb.com/~gumby/ged.html>
CEDPrivy <members.aol.com/gedprivy/index.html>
ResPrivata <www.ozemail.com.au/naibor/rpriv.html>
• Sources: A major complaint about genealogy Web pages is that too few provide documentation. Take advantage of most software’s option to include sources and notes.
The National Genealogical Society recently approved a set of guidelines for family history Web pages. Read its list of do’s and don’ts at <www.ngsgenealogy.org>.
6. Test and proof.
The whole world can see your site, so you don’t want any typos, text sizing errors or features that don’t work. Proofread each page carefully, checking for problems and making sure you’ve removed details on all living people. Have other people read it; they can give you feedback too, before it goes “live.” Look at your site on different computers.
7. Publish.
Web pages make their way from your computer to the Internet via File Transfer Protocol (FTP). You may need to get exact specifications from your ISP or other host for the address to FTP to (such as “ftp-www.yourisp.com”) and other procedures. If you’re using WYSIWYG software, FTP is probably included — and simple. With Netscape, you just click the “Publish” button on the toolbar and type the address where you want the page to go. If FTP isn’t part of your software, you’ll find links to shareware FTP programs at <personalweb.about.com/internet/personalweb/msub24.htm?rnk=r3& terms=FTP>.
FTP programs usually let you organize your files in directories (or folders) and subdirectories just as you would on your computer (remember the categories you sketched out in step 4). Organization determines each page’s Web address. Your site usually gets a directory under the server’s domain; your home page might have a URL such as “www.yourisp.com/smith/index.html.” Often these addresses include a tilde (~), such as “www.yourisp.com/~smith/index.html.” Then if you have a page for “pies” under a larger “recipes” category, the URL for that page would be “www.yourisp.com/~smith/recipes/pies.html.”
8. Check everything.
Once your files are up, try out your new site. Check all your links and verify that all your elements look as they should — and be thorough. If you don’t find mistakes yourself, you’re sure to get e-mails if any visitors do.
9. Promote.
You’ve worked hard on your site, so show it off. Tell family. Post it on message boards. The more promotion you do, the more people you can attract to your site and the better chance you’ll find people who have information you want.
Don’t overlook the tools you already use. Your host may have a list of links to member pages. “My site is on the Roots Web server, which is in and of itself a promotion,” says Andrea Autrey. “I’ve also gone to many search engines and submitted my page’s name and address.”
You can simultaneously register your site with 40 search engines for free at <www.submitexpress.com>. To submit your site for consideration at the popular Cyndi’s List of genealogy links, go to <www.cyndislist.com/faq/submit.htm>. Add your Web address to your e-mail signature, too.
Once you get people to visit, your site should promote itself. “Make it relevant to others,” says Mike Choppin. “The most important thing is the value and content of our site. Only by having something to offer can we hope to have our visitors return over and over again.”
10. Enjoy.
A Web site is a work in progress; you’ll continually be updating your data and adding new features as you learn them. But this is when the typing, testing and tweaking start to pay off — whether you get 20 visitors or 2,000. “In the long run, you will find many researchers who will become dear friends, hundreds who will touch your life, and a few who will leave you a changed person,” says Jo Autrey. “That will make it worth the time and effort of having a Web site and make you glad you are part of the process.”
From the October 2000 issue of Family Tree Magazine

