Sign up for the Family Tree Newsletter! Plus, you’ll receive our 10 Essential Genealogy Research Forms PDF as a special thank you.
Get Your Free Genealogy Forms
"*" indicates required fields

Part of the reason you research your ancestors is to learn their part in history, their contributions to the life you know today. You probably don’t intend for the family legacy you’ve discovered to remain locked and unknown in a file drawer. You want the world—or at least your relatives—to know the sacrifices and accomplishments of their forebears. Of course, it wouldn’t hurt if some of those relatives enhanced this legacy with their pieces of your family’s past.
I wanted to pay tribute to my great-grand-uncle Robert S. Austin, who drowned in Long Beach, N.Y., in 1924 while trying to save a child from the same fate. Although I have a photo of him in his US Navy uniform, my research gaps include a lack of documentation about his military service. I used the free platform at Fold3 to create a “memorial page” that honors Uncle Robert. The site’s military bent makes it especially good for honoring those who served in the armed forces.
Not only can you upload your digitized photos, records and stories to an ancestor’s Fold3 memorial page, but you also can let others help you fill in the blanks with their own content.
Follow these steps to create a memorial page that pays tribute to your ancestor’s military service.
1. Set up a Fold3 Account
If you already have a free Fold3 account or a paid subscription (which gives you access to the records on the site), you can skip this step.
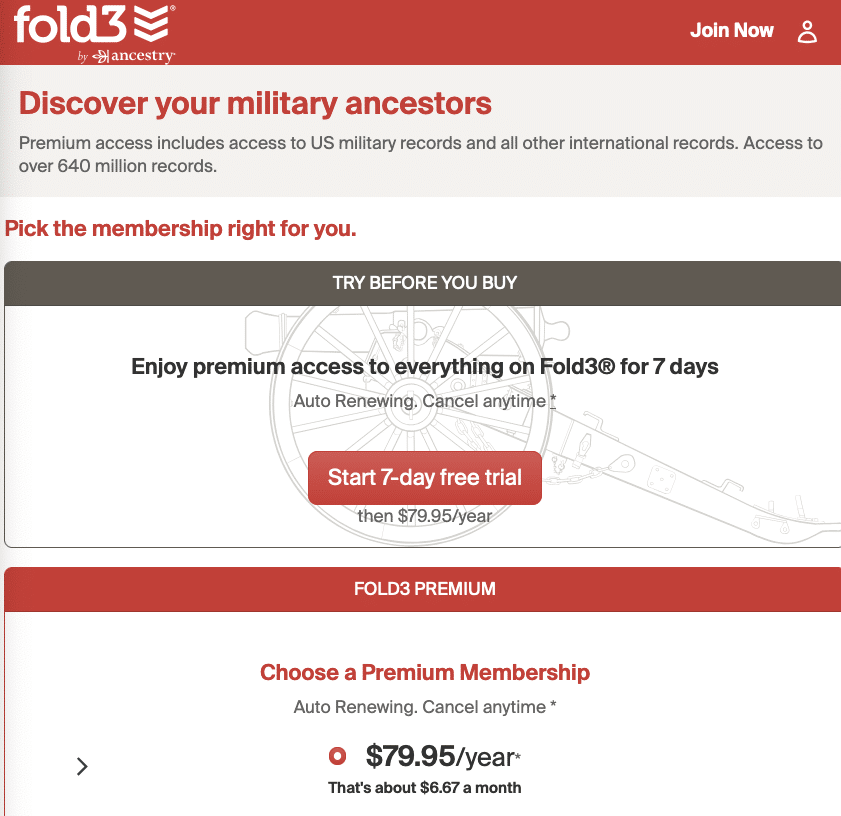
Otherwise, visit Fold3 and click the Join Now button to sign up for a basic free account. Besides being able to create a memorial page, you’ll get access to free record collections on the site. You’ll provide an email address and password, then agree to the Terms and Conditions. You’ll need to choose a Premium Membership; you won’t be charged until your free trial runs out.
2. Check for Existing Pages
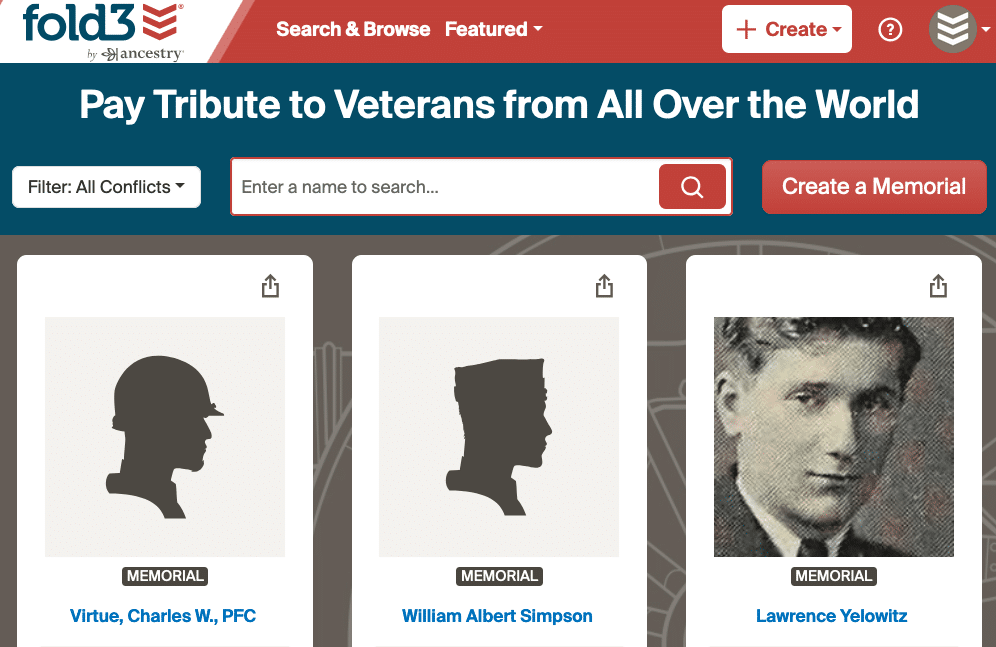
Before you spend time creating a new memorial page, make sure one hasn’t already been created for your person of interest. From Featured > Honor Wall, find the above search field where you can run a keyword search of existing pages. Enter a name, and (if you’d like) filter to a specific conflict.
Click a name in the results page to view the memorial page. There, you can view facts, stories, media files and sources to determine if the profile is a match for your ancestor. If you’d like, you can contact the “owner” of the page—generally, the user who created and manages the memorial—by clicking the blue username. You may need the owner’s permission to add or edit information on the memorial page.
Note that the site automatically created some memorial pages based on information in the Social Security Death Index (which consists mostly of deaths from 1962 and later). These are basic pages with no photos or documents—just generic timelines and facts taken from the Social Security or WWII database. They’re “owned” by Fold3, and any Fold3 user—including you—can contribute to them.
3. Create a New Page
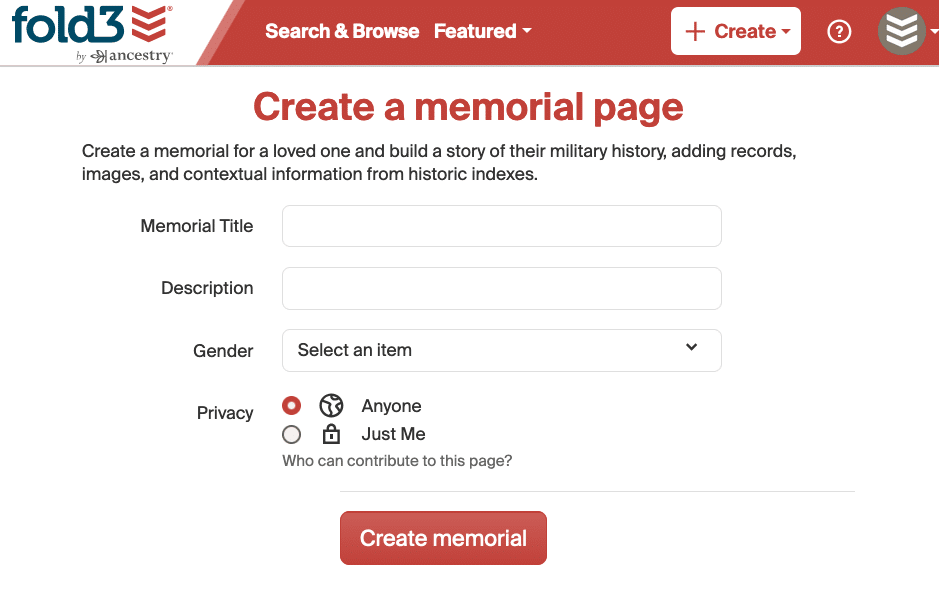
If you didn’t find a page for your ancestor (or you want to create your own anyway), make sure you’re logged in, then click Create > Create a Memorial Page from the top menu.
Enter the name of the person you’re honoring and a brief description—perhaps life dates, where he was born or died, and the wars he served in. This will help distinguish your ancestor from someone who had a similar name. You can specify whether you’d like any Fold3 user to make edits to the page, or if you want just you (and others you approve) to have that ability.
From the Create button, you can also publish pages for other subjects: events, organizations, places and more.
4. Add an Image
Next, decide what information and content you’d like on the memorial page.
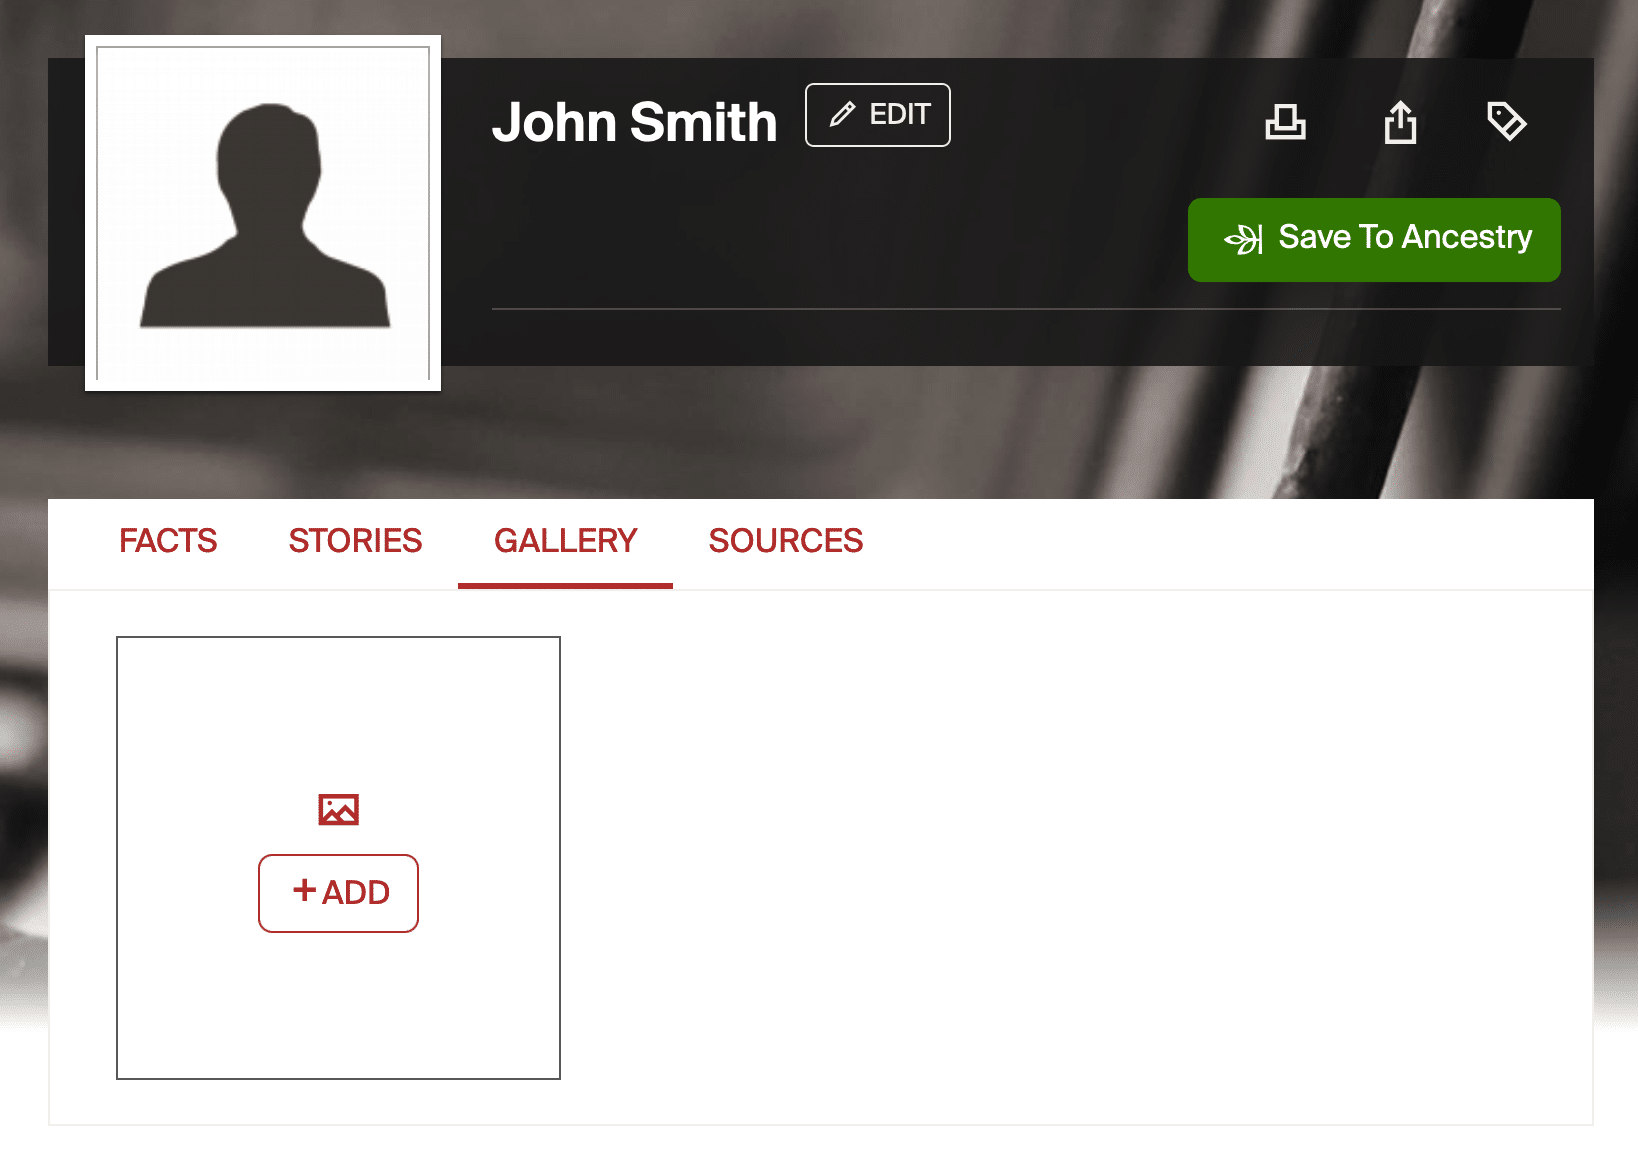
Many users start by adding a photo of their ancestor. To quickly upload one, click the ancestor’s profile picture, then select a file from either your gallery or your device. Alternatively, you can select a file that you’ve recently viewed on the site. Enter a title and description for the image. You can easily edit the photo by clicking on it from the Gallery, or by clicking Edit next to the person’s name. At the latter, you can also set a background photo for the page.
Remember that the information you post in a person’s memorial is publicly available. So don’t upload photos or data that you’re uncomfortable with others seeing.
5. Fill in the Details
You can enter more data under the Facts, Stories and Sources tabs. Review your research for records, photos, newspaper articles, letters, diary entries and more. Start with facts and stories, which help populate the timeline.
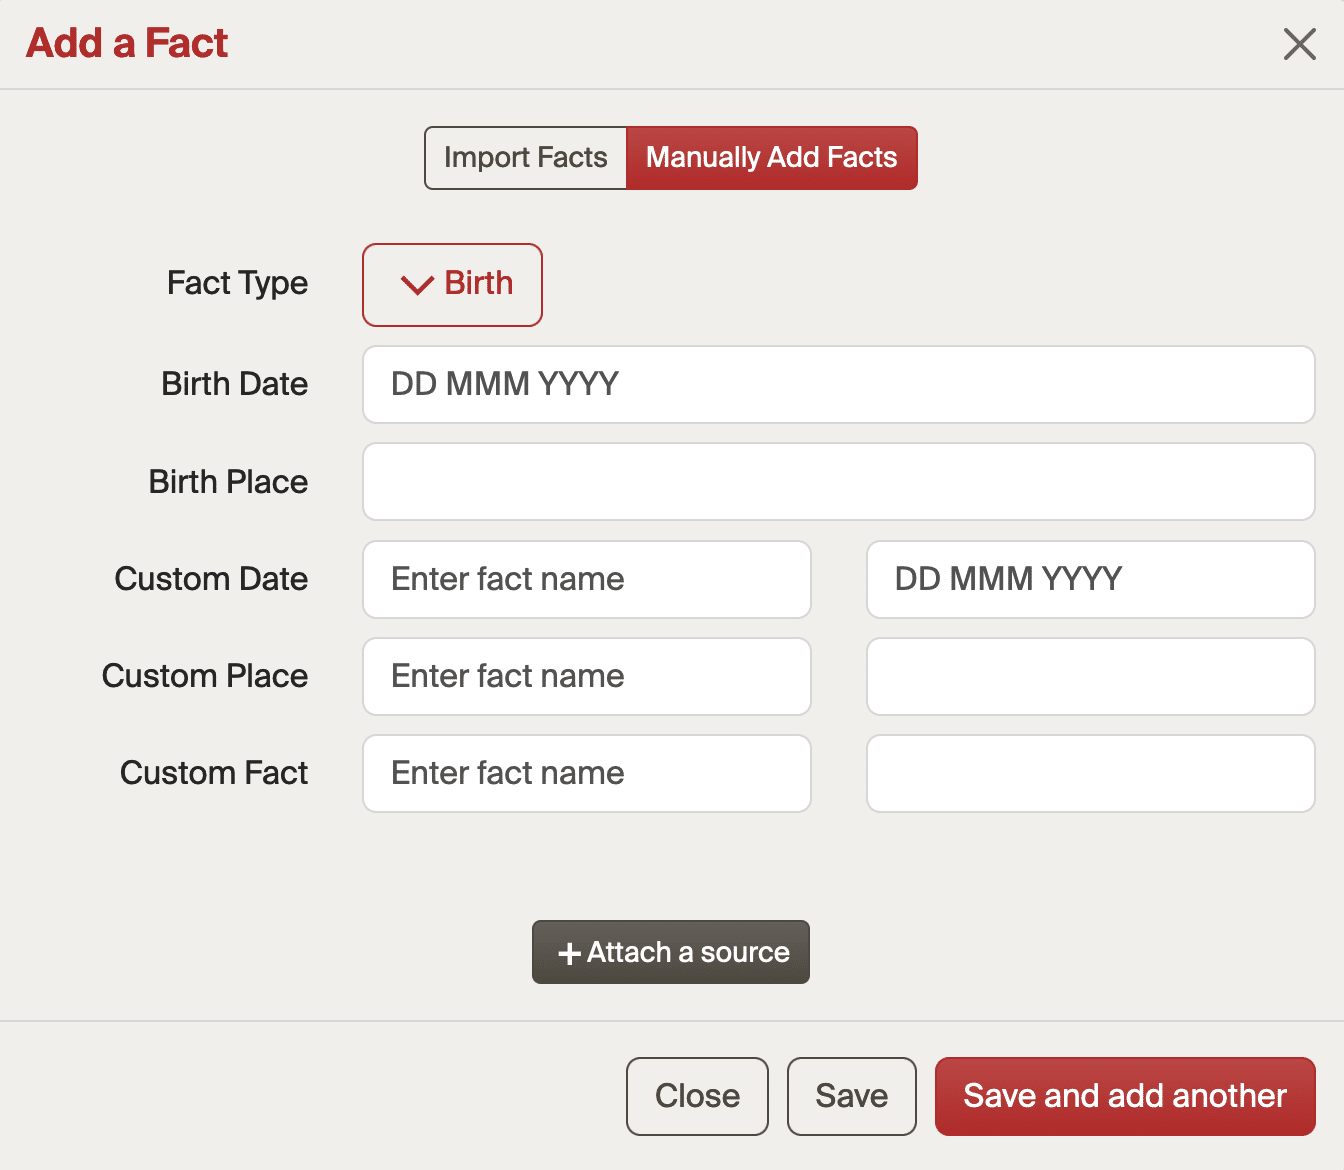
Under Facts > Timeline, click Add. You can either import facts from elsewhere on Fold3 or from sister sites Archives.com, Newspapers.com or Find a Grave, or you can manually add them.
For the latter, you can select from a variety of pre-formatted Fact Types—Birth, Death, Enlistment and more—or customize your own by selecting Other. Then fill in the relevant fields, which Fold3 generates based on fact type. Click Attach a Source if you can provide a citation, then Save Fact.
For consistency’s sake, I use a standard format for places (such as city, state spelled out, county, country: Chicago, Illinois, Cook, United States) and dates (day, month spelled out, year: 26 October 1911).
Facts show up in your memorial’s timeline; you can see any sources by clicking the drop-down. Find boxes for editing or adding facts at both the top and bottom of your timeline.
The Stories tab likewise provides a place to enter information about your ancestor, albeit in a more narrative format. Many family members find the stories about ancestors more engaging than cold facts. Click Stories > Add a Story, and you’ll work with a text editor. Type your story, then add a title, place and location. Fold3 collects your stories into a kind of table of contents at left. Click a story name to jump to that part of the page.
6. Use More Features
Take advantage of these other tools offered by Fold3:
Adjust privacy controls
Click the Edit button next to a person’s name to tweak basic information about the page—including who has access. (“Anyone” is the default setting for “Who can contribute to this page?”) From here, you can also delete the page. Note that you’ll need to delete images and other digital content separately.
Add your relationship
Under Sources, click I’m Related to indicate your relationship to this person. This will show up for all other users to see, opening the possibility that you’ll connect with a cousin on the website.
You’ll also see these relationships from the Facts page, under “Connections.”
Keyword-tag pages
Buttons at the top of the page let you print the page, share via URL or social media, or add tags. You can also save the page to a relevant Ancestry.com profile.
Tags are helpful, as they allow you to keep tabs on the memorials that you’ve created—or that others have made and you want to bookmark. You might also tag a page by surname, military conflict, or location.
Find more records
From the Facts page, you’ll see a “Find More Records” button. This directs you to Fold3’s search page, with your ancestor’s information entered. Even if you don’t have a paid subscription to the site, you might still be able to view results if they’re among Fold3’s free collections.
The site also provides record suggestions under your timeline. These are sourced from Fold3’s sister sites, and you’ll need to have any relevant subscriptions to view “hits” that are behind paywalls.
Once you’ve mastered memorial pages, you’ll have a new way to share your research. You might even catch the “tribute bug” and start building memorial pages for all your ancestors. All the better: Stepping back to see what you’ve discovered will help you get motivated to learn even more.
Related Reads
A version of this article appeared in the January/February 2013 issue of Family Tree Magazine. Last updated: November 2024

