Sign up for the Family Tree Newsletter! Plus, you’ll receive our 10 Essential Genealogy Research Forms PDF as a special thank you.
Get Your Free Genealogy Forms
"*" indicates required fields

Google has several powerful tools that you should add to your genealogy toolbelt. Search, of course, helps you find valuable genealogy resources, and you can organize your data using Google Sheets and Google Drive. Google Maps is another fantastic feature you can use for your genealogy research. You can view images of locations your ancestor lived or worked in, as well as create a timeline of various moves and migrations throughout their lifetime. We’ll show you how.
View images of locations, past and present
First, use Google Maps to view locations as they were in years past.
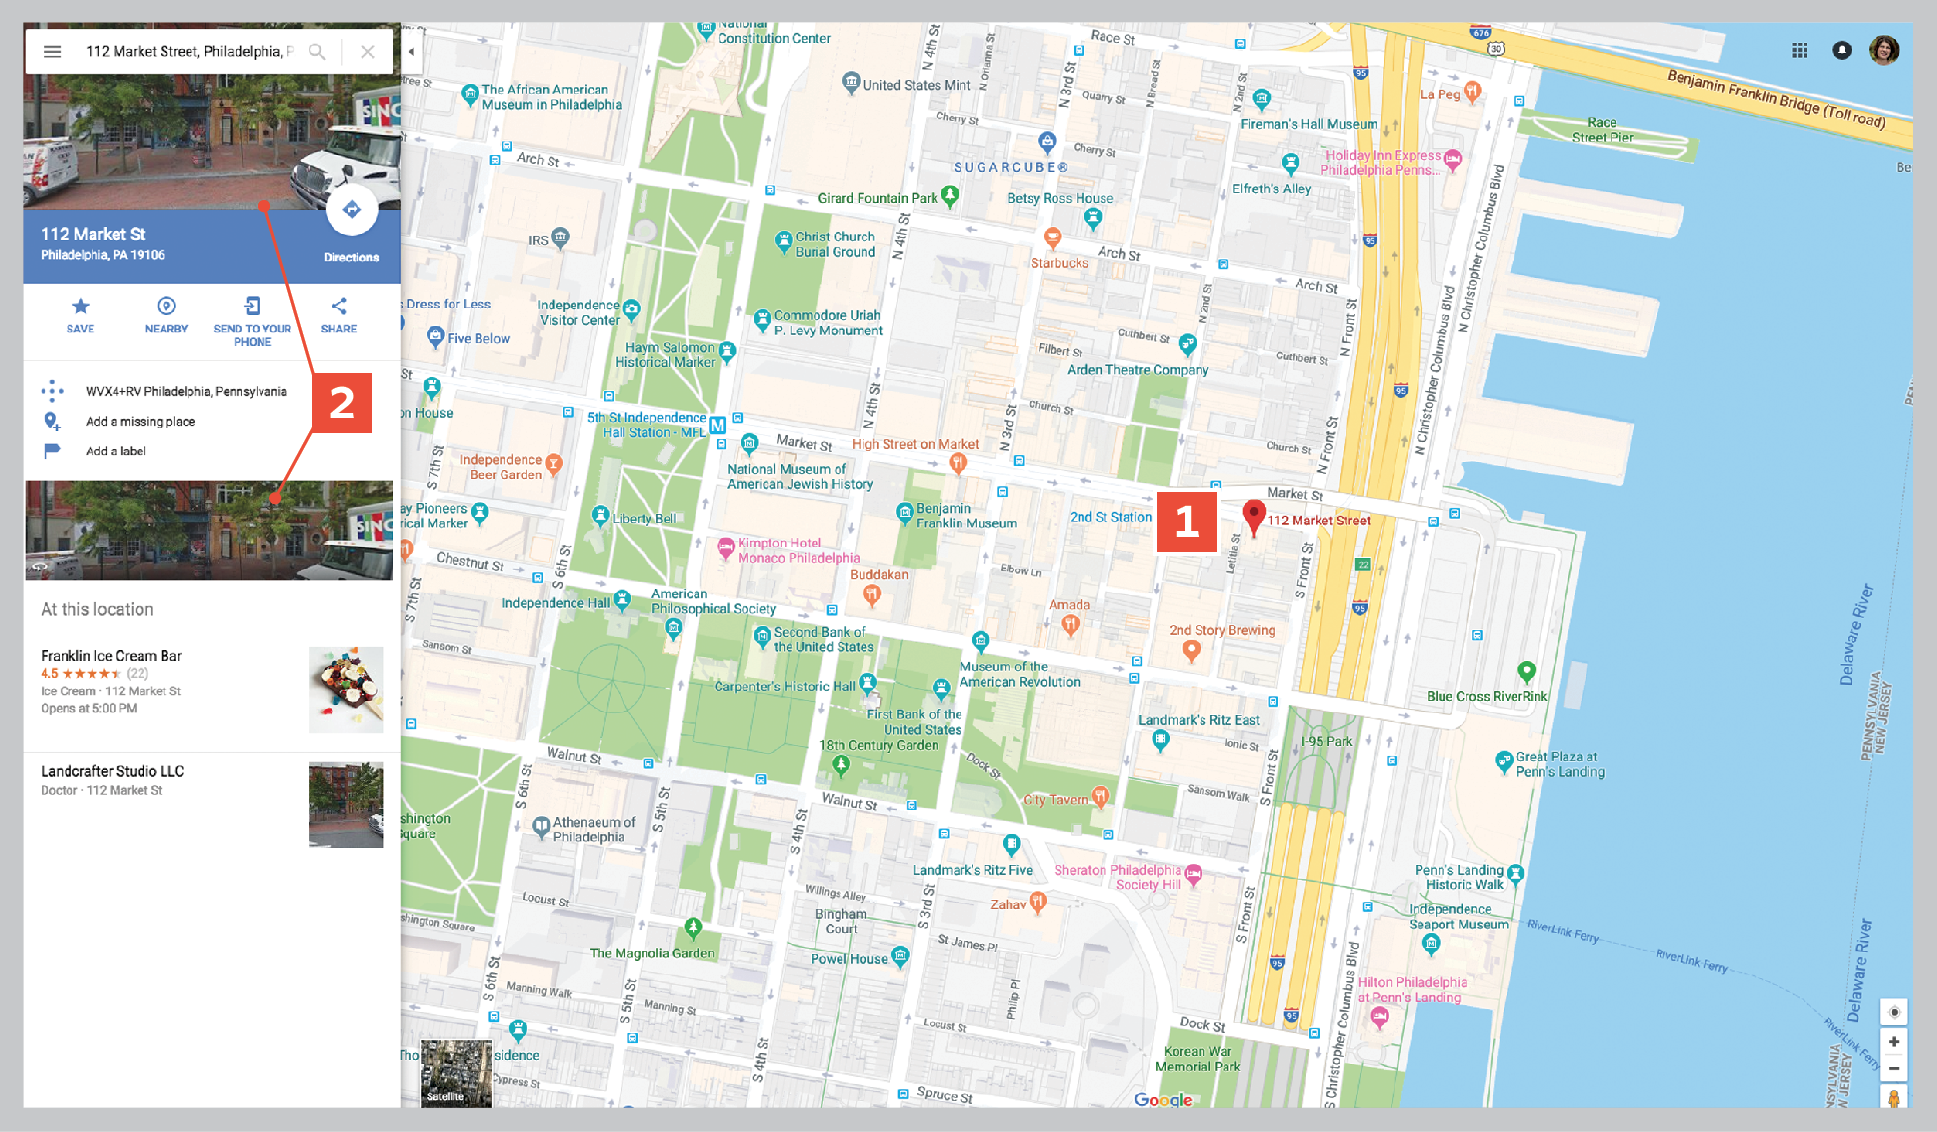
Let’s look at an example: Samuel Jones’ widow, Ann, left Wales for Pennsylvania in about 1819 with her children and grandchildren. City directories show that she sold dry goods from her home at 112 West High Street, also known as Market Street, where she died in 1852. I searched Google Maps for 112 Market Street, Philadelphia, PA to find that location.
1. A red pin marks the location on the map.
2. Click on either picture of the street on the left to go to Street View.
3. The building at this address is undergoing construction and looks fairly new.
4. This photo was taken in July 2017. Click the down arrow by the clock icon to see other dates available for this address.
5. Click on the earliest date, 2007, to see that image. Click the image to make it the main view. This photo shows an earlier building at 112 Market Street, and it might be the one where Ann Jones lived in the 1840s.
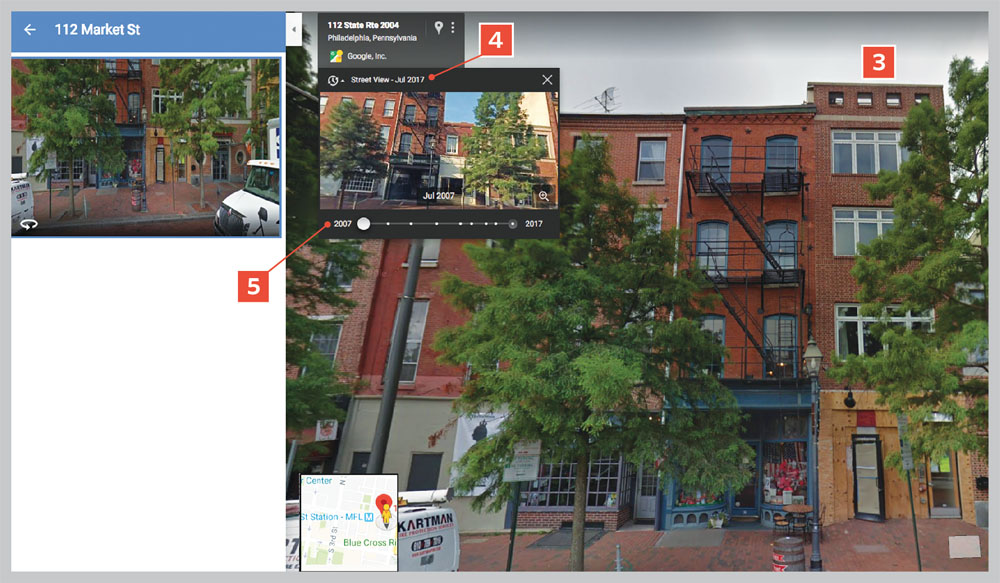
Google Maps will only show you how locations have changed since Google began mapping streets in the mid-2000s. But having another view of the locations important to your ancestors can still provide useful information, particularly if (as with this example) recent renovations have changed the site.
Rick Crume, from the March/April 2019 issue of Family Tree Magazine.
Create a migration timeline for your ancestor
Timelines are among your best genealogy tools. In addition to helping you easily share genealogical information, they let you:
- get an overview of a person or family in historical context
- sort out a confusing jumble of information you’ve found in records
- spot problems (why was Great-grandpa here and Great-grandma over there?)
- note periods of missing information
- brainstorm answers to research questions, such as why a relative immigrated or where your great-grandparents met
Diane Haddad
How to create a migration timeline using Google My Maps
Google My Maps allows you to create and share your own maps. This is a great way to track and create a timeline of an ancestor’s moves to various addresses or cities.
To get started, head to the My Maps main page, then click the red Create a New Map button in the upper-left corner of your screen. Edit the map title and description by click on the Untitled Map window on the left.
In the search bar at the top, enter the location you want to find and click the search icon. Clicking on the pin Google drops at the location will bring up a box listing the address. Here, click Add to Map to save the location on your map. You can also use this window to change the style of the pin, edit the location, add an image or video, get directions to the location, or delete it from your map.
Adding different map layers means you can color-code the map pins. You may, for example, want to notate an ancestor’s moves prior to marriage as one color and after marriage a different color. To add layers, click on Add Layer in the window on the left. Edit the names of the layers by clicking on Untitled Layer. Continue adding locations and layers until you have a complete map of your ancestor’s movements.
You can use numbered pins for tracking moves chronologically by using using these free numbered place markers downloaded from here (Google’s pin options don’t include numbers). To use the custom pins, add a generic place marker to the map and click the paint can to edit the style. Choose More Icons, then Custom Icon, and select the marker image file from your computer.
If you’d like to change the appearance of your map, click Base Map and choose from nine different map styles and color combination.
Now you can choose to share, copy, trash, get an embed code, or print your map. To share it, click on the Share icon on the map window. The other options can be found by clicking the three vertical dots to the right of the map title.
Courtney Henderson
Google My Maps ancestor migration timeline example
Former Family Tree Magazine editor Diane Haddad created a custom migration map using Google My Maps. She included a copy of the map in a family history photo book. Here, she describes her timeline project.
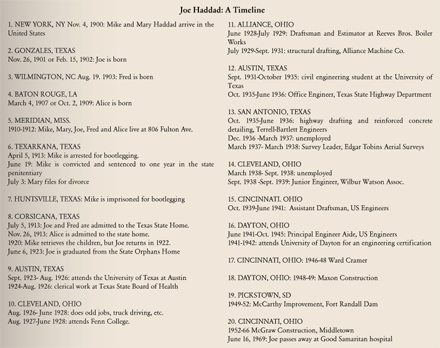
“My grandfather Joe moved around a lot during his lifetime: Texas, North Carolina, Louisiana, Mississippi, back to Texas, elsewhere in Texas, Ohio, more places in Texas, various Ohio cities, South Dakota, Ohio again.
Timelines organize an ancestor’s or a family’s family tree data—dates, places of residence, jobs, historical events, children’s births—in an orderly fashion. I love them.
So when I was making a photo book about my grandfather as a Christmas present for my dad, I thought a timeline was just the thing to help summarize all those migrations. Matching up the timeline with a map of all the places would be even better.
Here’s the timeline and map I came up in the photo book:
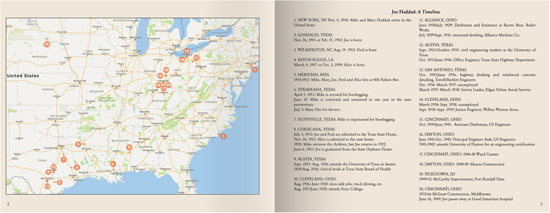
The right-hand page lists each place Joe lived, with dates and details about what he did in that place. The information comes from my research in censuses, city directories, newspapers and other genealogy records. I’m lucky to have copies of a job application my grandpa filled out with his work history.”
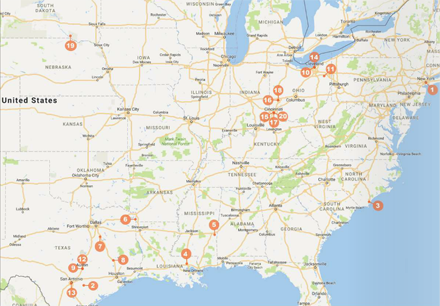
To add it to my photo book, I exported it as a .JPG file and then uploaded it to my photo book project.”

