Sign up for the Family Tree Newsletter! Plus, you’ll receive our 10 Essential Genealogy Research Forms PDF as a special thank you.
Get Your Free Genealogy Forms
"*" indicates required fields
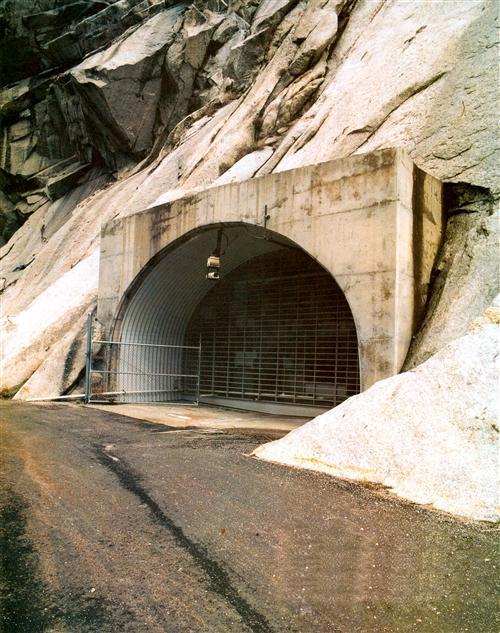
Your family’s history may be in a vault buried in the mountains near Salt Lake City, Utah. Since 1938, the Church of Jesus Christ of Latter-day Saints — popularly known as the Mormons — has been gathering and archiving millions of records about people of all faiths. Church archivists travel the globe, microfilming original documents in churches, courthouses and libraries to bring back to Utah. For anyone hoping to trace a family tree, the storehouse of data in the Granite Mountain Record Vault — information on some 2 billion people — is, well, a godsend.
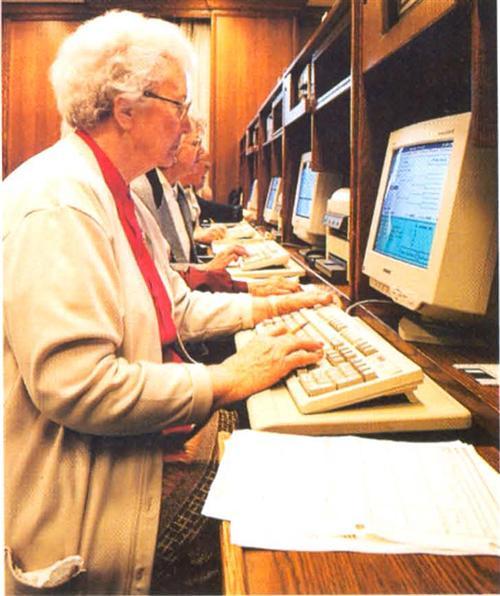
But you don’t have to trek to the mountains to start using the world’s largest genealogical library. You don’t even need to visit the five-story, 142,000-square-foot Family History Library in Salt Lake City, where the church makes copies of the archives in its vault available to the public. This vast library has an equally vast system of branch libraries called Family History Centers. With more than 3,400 Family History Centers (“FHCs” for short) across the country and around the world, you’re almost certain to find a genealogical treasure trove right in your own backyard.
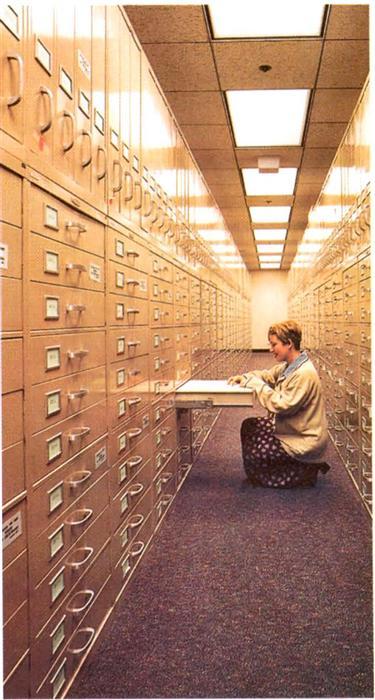
These local centers let you access the Family History Library’s more than 2 million rolls of microfilm and 700,000 microfiche records containing copies of original records from more than 100 countries. These include vital, census, church, land and probate records and other records of genealogical value. An additional 5,000 rolls of microfilm are added each month.
Family History Centers are staffed by church and community volunteers to help you search for your family roots. You don’t have to be a church member; the centers are open to the public.
As a former director of a Family History Center, I was frequently asked why the LDS Church would gather this wealth of family history resources and make it available to the public for free. The best explanation is a simple one: a belief in the importance of the family. “We believe that families can be united in the most sacred of all human relationships — as husband and wife and as parents and children — in a way that cannot be limited by death,” a church brochure explains. “To share these blessings with our deceased ancestors, we also perform marriages and sealings (uniting families for eternity) in their behalf should they choose to accept them in the next life.”
To get a taste of the records you can access at your nearest FHC, explore the Family-Search Web site <www.familysearch.org>, also sponsored by the LDS Church. Ultimately, this site will let you search records on 600 million names, and it can give your family tree research a valuable jump-start.
But to access all the secrets buried in Granite Mountain and to see most of the actual records indexed on FamilySearch, you need to visit your local Family History Center. See the box on this page for details on finding the center nearest you.
Each Family History Center has a staff of volunteers who can help you get started. Ask a staff member for a copy of “Where Do I Start?,” a brochure that explains five simple steps to help you identify your ancestors. (You can find a version of this brochure at <www.lds.org/farruhis/how_do_i_beg/2-What_Can.html>. It’s helpful if you’ve already done step 1 and step 2 before visiting a center.) “Where Do I Start?” also shows you how to begin looking at actual records, such as wills, deeds and marriage, birth and death certificates. Staff members will be glad to show you information about which records to search and how to search them.
Here’s how to get started:
STEP 1: IDENTIFY WHAT YOU KNOW ABOUT YOUR FAMILY.
Before visiting a Family History Center, start your research at home by taking a shoebox or folder and collecting family papers, such as newspaper clippings, vital records certificates, military discharges, school report cards and even Christmas card lists. Organize the information by writing what you know about your ancestors on a pedigree chart (you can download this and other charts at <www.familytreemagazine.com/forms/download.html>). Start with yourself and work backwards. If you don’t know exactly when something occurred, estimate and use abbreviations such as “abt” or “ca” before the date: “abt May 1885.” If you don’t know an exact place you can make a guess at that, too.
Gather more information from family members and relatives. Look at family Bibles, journals, letters and postcards, obituaries and other newspaper clippings, old photos and so on. When you discover new information, record it on your chart.
STEP 2: DECIDE WHAT YOU WANT TO LEARN ABOUT YOUR FAMILY.
Choose an ancestor from the pedigree chart you’d like to know more about. Pick somebody from the most recent generation where your known family records start to get a bit thin, such as a grandparent or great-grandparent: What information is missing? Do you know when and where he or she died? When and where he or she was married? Choose one question as a research goal. Work backwards in time from the present to the past. Usually you’ll find out an ancestor’s death before a marriage, and the marriage before the birth. Start a research log to keep track of your goal: Write your ancestor’s name, the objective (the event in question), the approximate date of the event and the locality (the place of the event).
STEP 3: SELECT RECORDS TO SEARCH.
Family history records can be either primary sources (also called original records), created at or near the time of an event, such as birth, marriage and death records, or secondary sources, compilations of information found in original records, such as biographies, family histories or genealogies. Generally, when selecting records, search secondary or compiled sources first, then search primary or original records. The easiest place to track down the availability of a source is to visit a Family History Center.
If you haven’t already tried FamilySearch on the Web, you can tap this computer database right at the Family History Center. After exhausting computer resources, the next step is to study microfilm and microfiche. Microfilm is sent on temporary loan from the Family History Library in Utah to Family History Centers worldwide, and takes a few weeks to arrive. The film remains at your local center for 30 days and can be extended for a longer period if you haven’t finished reading it. Microfiche, however, remains at the local centers instead of being returned to Salt Lake City. If a record is available both ways, order the fiche: It’s usually less expensive than a reel of microfilm, and you don’t have to worry about it being sent back before you’re done with it.
Some Family History Centers also have a book collection, which will vary in extent and subject matter, depending on local needs.
After you find records you want to search, write down your selections in your notebook or research log. Ask a staff member to help you determine whether the records are already on hand at the center or if you need to check the Family History Library Catalog to see if the record can be ordered. Most FHCs have this catalog on both microfiche and CD-ROM. The catalog is organized by US state or Canadian province, then the county, then the town or city. Find the specific locality where the event took place and the type of record — for example, “New York, Monroe, Rochester — Vital Records.” Other countries can be searched first under the country, then under each smaller administrative area — for instance, “England, Yorkshire, Sheffield — Civil Registration.”
Look for records such as vital records or civil registration (births, marriages and deaths), cemetery, census, church, immigration and probate records. If you’re searching a US state, it helps to have a copy of the Research Outline for that state to follow along to see which records exist for different time periods. You can also use editions of these Research Outlines for Canadian provinces and many other 
STEP 4: OBTAIN AND SEARCH THE RECORD.
Use the call number from the Family History Library Catalog to locate a microfilm, microfiche or book. If the film or fiche needs to be ordered, you’ll have to wait a few weeks for it to arrive. You need to ask a staff member to help you place an order.
Books not on microfilm don’t circulate to Family History Centers, but you can order photocopies of specific pages from the Family History Library. Ask a staff member for the form “Request for Photocopies — Census Records, Books, Microfilm or Microfiche” (form 31768). You can order up to 8 pages for 25 cents a page. If you aren’t sure what pages you need, you can also order part of the book index for specific surnames to see where and if your family is included. Mail the form and payment to the Family History Library and the copies will be sent to your home.
Once you have the record, instructions for operating microfilm and microfiche readers are on the machines. You’ll also find instructions that explain some of the records.
As you study the record you’ve retrieved, look for facts and clues. Search broad time periods. Check for spelling variations. For example, if your family name is Snyder, you should also look under alternate spellings such as Schneider, Sneider and so forth. If you think your grandfather was born about 1890, look at the records from 1885 to 1895. When you look at vital records, always check if the maiden name of the individual’s mother is recorded; this may be the only place her full name was ever written out.
Remember to record your results. Make notes in your research log or on your laptop computer. You may want to make photocopies of what you find. Always label your photocopies from microfilm with the film number so you can retrace your steps. If you don’t find anything, write that down, too, so you won’t look in the same place again.
STEP 5: USE THE INFORMATION.
First, evaluate what you’ve found. Did you find the information you were looking for? Is the information complete? Does it conflict with other information you already have?
Then, copy new information onto your pedigree chart or enter it into your software program. If you’re using forms, be sure to note your sources on a Family Group Record form (available at Family History Centers or at <www.familytreemagazine.com/forms/download.html>). If you’re using a genealogy program, record your findings in the appropriate screens, noting the source for each.
Next, organize your new information. File your photocopies or source notes by family or by locality so you can find it when you need to use it again.
Finally, share what you’ve learned. Your genealogy software program can help you do this by creating a special type of file called a GEDCOM (“Genealogical Data COMmunications”) file. Most genealogy programs, including the LDS Church’s PAF, can read and create GEDCOM files. You can also submit GEDCOM files to the FamilySearch Ancestral File, accessible through your local FHC or via the FamilySearch Web site. The Ancestral File helps you coordinate your family history research with others working on the same family lines, reduces the chances of duplicating your research efforts, and makes your family information available to researchers worldwide.
Next it’s time to start the process again with Step 2. Select a new research goal based on what you now know about your family, and plan another trip to your Family History Center. By going back and following these steps again, you will find new branches growing on your family tree.


