Sign up for the Family Tree Newsletter Plus, you’ll receive our 10 Essential Genealogy Research Forms PDF as a special thank you!
Get Your Free Genealogy Forms
"*" indicates required fields
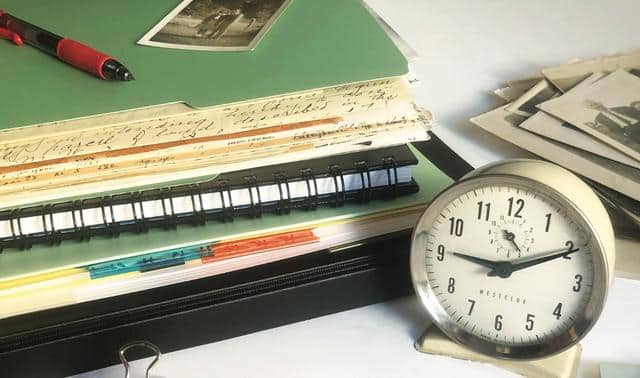
When it comes to genealogy, there are never enough hours to do research. And to make matters worse, we can easily get distracted from our work when we do find the time by bright shiny objects (also known as “BSOs”) such as automated record hints.
What’s a family historian to do? To best streamline your research, you’ll want to develop a system to log—and save for later—the seemingly endless genealogy “to-do” items that crop up as you learn more about your ancestors. And when you finally do handle those tasks, find a way of logging what you found there to prevent repeating yourself in the future.
Enter Trello, a free online collaboration tool that organizes projects and ideas into easy-to-navigate boards, lists and cards. By using Trello and its various “Power-Ups,” you can accomplish several genealogy projects. Here are just a few:
- Storyboarding writing projects
- Organizing unidentified family photos
- Creating reminders for genealogy tasks
- Brainstorming new ideas for research
- Building a travel itinerary for a vacation, research trip, conference, etc.
- Outlining and scheduling blog posts or podcasts
- Collaborating with others on a project
- Keeping track of client work
- Planning reunions or newsletters
- Constructing a virtual cemetery
If you’re ready to level up your genealogy research plan, follow these six simple steps to use Trello for genealogy and improve your workflow.
Step 1: Set Up a Free Account
Go to Trello’s home page to sign up using an email address or a pre-existing Google, Microsoft or Apple account. The default free account will be sufficient for most users; it gives you access to unlimited cards and up to 10 boards.
Trello’s paid plans—Standard, Business and Enterprise—start at $5/month and give you access to more features and unlimited boards. Learn about Trello’s plans.
Once you’re logged in, you’ll be prompted to give a name (for example, “Lisa’s Genealogy Team”) and select what kind of work you’ll be doing. Returning users of the site might not recognize this—Trello recently added this feature to emphasize collaboration. These are called Workspaces, and you have the option of adding other users to yours, if you like.
Click “Let’s Go” to begin. Trello has a handful of Getting Started tasks, the first of which is creating your first board. You can either follow the prompts or do things at your own pace—consult the Trello Guide at any time.
Step 2: Create a Board
Trello boards form the framework of your project, and contain multiple lists. (Lists, in turn, are made up of units called cards.) You can use a Trello board to manage tasks, record information or organize ideas.
Create a board either by clicking that item in the Getting Started menu or selecting Boards from the menus. You can choose from a number of Trello’s project templates, or click “Create new board” to make your own. Your board should have a descriptive name that captures your project—for example, “Alzo Genealogy” or “The Accidental Genealogist Blog.” You can manage boards from the Boards tab of the main menu.
Boards have different levels of visibility. Private boards can only be seen by you, the user. Team boards can be viewed by users you invite to it, while Public boards are viewable to anyone on the internet. Note that free accounts can only allow have 10 non-Private boards, so use them wisely.

Step 3: Add Lists
Boards are made up of lists—collections of items (cards) that you can group by subject and organize vertically. If you create your own board (i.e., don’t choose a template) the lists are labeled by default: To Do, Doing and Done. But you can customize them by clicking their names, or add your own by clicking Add Another List to the right.
What you name your lists (and how many you have) will depend on your project. But you want each list to represent a different subject related to your project. For example, you may create a list about correspondence about an ancestor, and another about source citation templates.
You can also use lists to track progress of specific tasks using that default To Do/Doing/Done system. Let’s say you have requested a pension file for your ancestor from the National Archives Records Administration (NARA). You can create a card for that task (see Step 4), then move it from the “To Do” list to the “Doing” list. Once you receive the file, you can move it to the “Done” list.
Step 4: Create Cards
Lists contain cards, which are the basic units of a board that represent specific tasks or pieces of information. Cards can include due dates, checklists and attachments (both files and URLs). In genealogical terms, a card might be a surname, record type, place or research task (such as requesting a file from NARA, which we discussed in Step 3). Click beneath a list to name a new card, then click the card itself to edit it. You can also move cards from one list to another by dragging and dropping them.
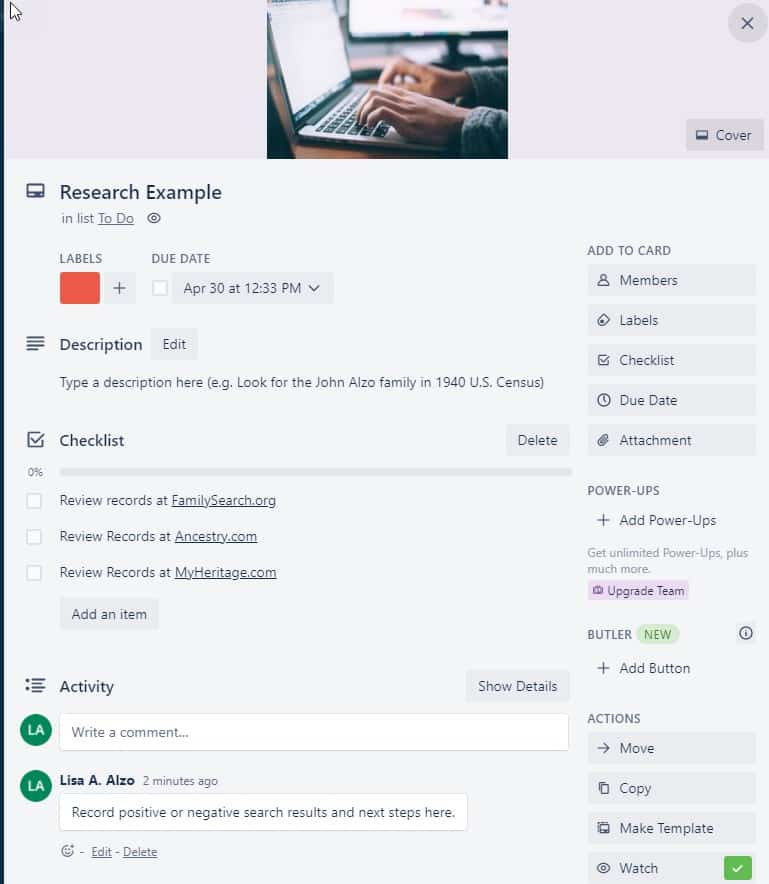
Trello keeps track of all your activity and records everything that’s happened on a particular card, including additions, changes and comments. Under Activity, you can see which users made what changes to the card, and when. Even if you’re working in Trello solo, this feature provides a nice sense of security and clarity, especially if you start a project, leave it for a week, a month, or even longer, and then come back to it wondering where you left off.
Step 5: Customize Your Project
Every genealogist approaches the research process in his or her own way. Trello makes it easy to customize boards for your needs. For example, if you’re a visual planner, you can color-code cards using customizable labels. You can then search for cards that have a certain label using the Menu at right, under Search Cards. And if you like deadlines, simply add a due date to a card. Keyboard shortcuts and notifications give you additional tools to make Trello your own.
When you no longer need a card or list, you can archive it and retrieve it later. You can also close boards you are not currently using.
While Trello is designed for working online, export and print features can take your board offline. Go to the board, then click Show Menu > More > Print and Export. The file export format is JSON (JavaScript Object Notation), which lends itself well to technical usages but doesn’t load into common programs like Excel.
Trello also offers a handy “Email to Board” option that works great for saving email correspondence from relatives or contacts at an archive. Go to Show Menu > More, then look for “Email to Board Settings” and copy the email address there. You can then forward an email to that address (which is specific to your board); direct Trello to the appropriate list and card position (top or bottom) using the respective options. And when writing the email, put the card title in the subject and card description in the body. Remember: Don’t share this email address, since anyone who has it can add cards.
Step 6: Boost Your Productivity
Trello offers the ability to add Power-Ups—little helper applications that add features to your board such as a calendar or integrations with popular programs such as Dropbox, Evernote or Google Drive. Free accounts get one Power-Up per board.
Enable Power-Ups by selecting “Power-Ups” from the board menu. Find the Power-Up you would like to use in the directory and click “Enable” to activate it. You can also list all Power-Ups currently enabled on the board by clicking on “Enabled” in the top left corner. To disable a Power-Up that is currently enabled, click the gear icon and select “Disable.” Learn more.
Think of something to add to your genealogy to-do list, but not near your computer? Trello has apps for iPhone and Android, so you can seamlessly work on projects anywhere. Use the mobile apps to add lists and cross off tasks on the go, even offline. The next time you connect to the internet, your boards, lists and cards will sync.
Whether you’re researching remotely from your home office, on-site at a repository, or with relatives at the next family gathering, Trello is the perfect virtual whiteboard to help you track your family history wherever you go.
Related Reads


A version of this article appeared in the July/August 2021 issue of Family Tree Magazine. Last updated, June 2023.
ADVERTISEMENT