It’s always exciting when a newly found old photo brings your ancestor to life and helps you share your family story. But when a torn, dirty or faded photo dulls that vintage luster, you’ll need to pull some digital editing tricks from your sleeve. It’s not as hard as you might think: With a little practice and free or low-cost software, you can bring your visual history back to life.
Start by digitizing the photos you want to edit. First, carefully wipe your scanner glass according to the manufacturer’s instructions so you don’t wind up with dust specks all over your scans. Wear soft cotton gloves as you handle the photos to prevent fingerprints.
Scan your photos at a high resolution: 300 dpi (dots per inch) will let you print a photo at its original size; scanning at 600 dpi or higher lets you print an enlarged photo. Save each scan in JPG or TIFF format. Finally, save a copy to edit, so the original scan stays intact—scratches and all.
I fixed fading, spots and tears on these photos using Picasa, Google’s free, easy-to-use desktop software that also helps you organize and share photos. Other software, such as Adobe’s Photoshop Elements, works similarly.
Follow along and see how to digitally leave your family pictures in better shape than when you found them.
Fading and Color-Shifting
Old color photographs can become discolored as their yellow, magenta and cyan inks fade. They may take on a strong red hue or greenish yellow tint, like this photo from my in-laws’ engagement. Automatic color correction, an option in most photo-editing software, is perfect for fixing this type of overall color shift.
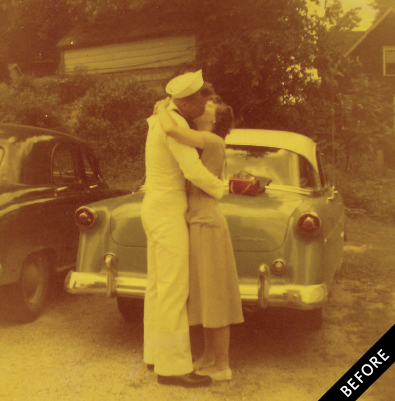
1. Look in the Basic Fixes menu (signified by a wrench icon) and select Auto Contrast and Auto Color to see what the software will automatically do to correct the problem. If you like what you see, save the image. That’s it!
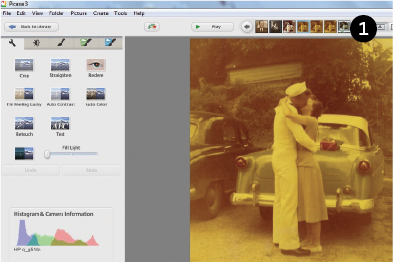
2. If the auto settings don’t turn out quite right, the color sliders on the Tuning tab (with a half-light, half-shaded sun) offer more control. They let you adjust Fill Light (to lighten dark areas while preserving other areas), Highlights (to lighten the image overall), Shadows (to darken the image overall) and the Color Temperature (to make an image warmer or cooler). You may have to experiment. For this image, I used Color Temperature to warm up the image and take most of the green out.
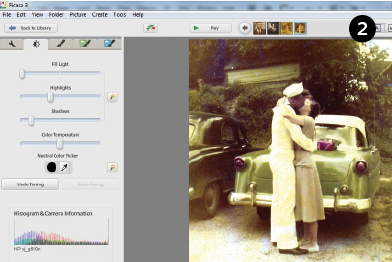
3. The Neutral Color Picker tool lets you even out the color tones of a picture. Click the eyedropper, then click again on a part of the photo that is a neutral color: whites, greys or blacks. This tells the software which color ink has faded so it can correct the whole photo for that color. Once I did this, my mother-in-law’s cute pink purse really showed up on the back of the car.
Spots
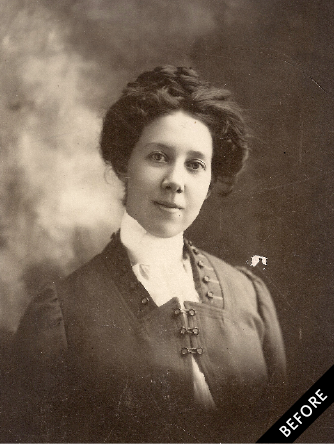
Spots or blemishes might result from water damage, rust (especially on a tintype) or dirt, or the image layer flaking off. My great-grandmother’s photo has dark spots and image loss. You can easily fix small spots like this using a tool that lets you copy a tiny portion of the image to paste over the spot.
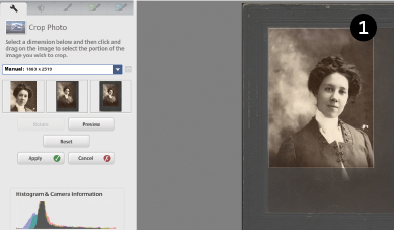
1. First, I used the Basic Fixes menu to crop the image. You’ll save editing time if you can crop out some of the damage without losing important parts of the image.
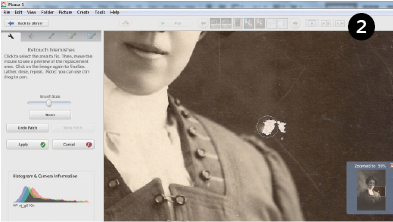
2. Next I focused on the damage by her left shoulder. Because the surrounding area is solidly colored, I used the Retouch tool to copy part of the background and paste it over the damage. First, zoom in on the spot and set the Brush Size using the slider. Click on the damage. Then as you move the brush over the image, you’ll see a preview of what an area would look like pasted over the damage. When you find a good match, click to paste it. (This process is reversed in Photoshop Elements, which calls this the Clone tool: You press the Alt key as you click on an undamaged area to copy it, then you click the damaged area to paste the copied selection.)
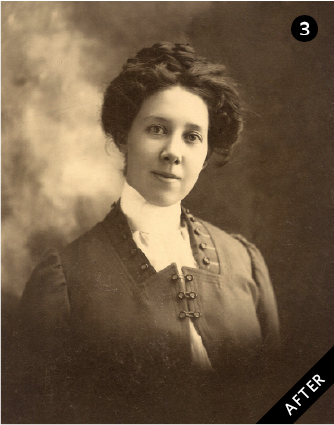
3. With the same tool and a smaller brush size, I removed the tiny white specks in my great-grandmother’s hair and the spot on her forehead. Finally, I clicked the Basic Effects tab (indicated by a paintbrush icon) to give the image a sepia tint.
Tears
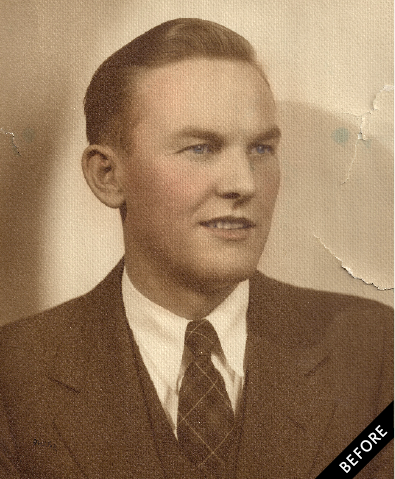
Years of too much loving and handling have damaged this photo of my grandfather as a young man. The textured paper makes it challenging to restore, but the job is still doable using the same Retouch tool.
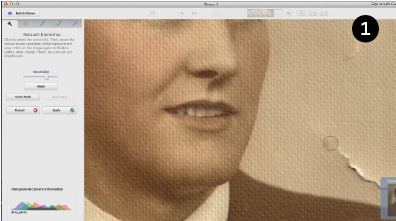
1. Working with shadows and texture can get tricky. Zooming in on the area and setting the Retouch tool brush size appropriately can help. A larger brush may be better for blending large areas, but a smaller one works for areas of delicate shading. Here, I used a relatively large size to select a part of the tear (if you decide your brush size is too big, you can use the Cancel button to cancel the selection).
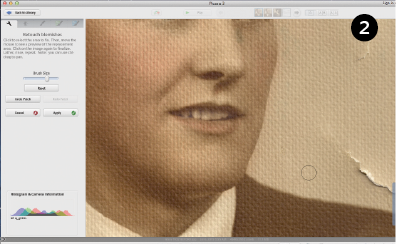
2. Move the brush around the background to find an area that matches the color and texture pattern of the torn area. Click to cover the selected part of the tear.
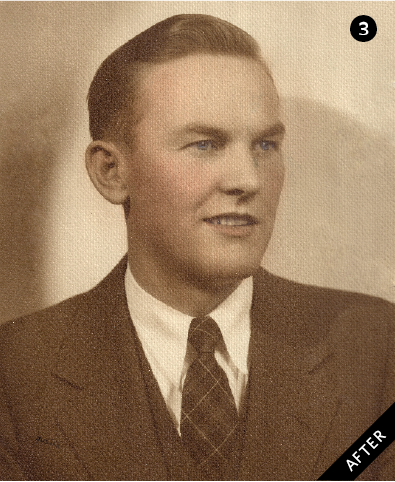
3. Select the next section of the tear and repeat the previous steps. Take your time with the retouching tool, and don’t be afraid to use the Undo Patch button if a pasted area doesn’t look right.
Tips
- Scan your old photos in color—even the black and white ones—to capture subtle tones.
- Picasa creates a copy of your edited photo and moves the original to a hidden subfolder called “.picasaoriginals.” To keep both versions together in the current folder, use File>Save a copy when you’ve finished editing. The edited version will have -1 added to its original name.
More Online
Free Web Content
Comparing Picasa and Windows Live Photo Gallery
Podcast: Photo-editing for genealogists
Organizing digital photos
Comparing Picasa and Windows Live Photo Gallery
Podcast: Photo-editing for genealogists
Organizing digital photos
For Plus Members
Edit gravestone photos for readability
Q&A: Digitizing Photo Negatives
Four ways to use a document scanner for genealogy
Edit gravestone photos for readability
Q&A: Digitizing Photo Negatives
Four ways to use a document scanner for genealogy
From the December 2015 Family Tree Magazine


