Sign up for the Family Tree Newsletter Plus, you’ll receive our 10 Essential Genealogy Research Forms PDF as a special thank you!
Get Your Free Genealogy Forms
"*" indicates required fields
Written by Jemma Pollari, Sponsored by Mylio
Organizing old family photos is a beautiful project. It’s fun to take a trip down memory lane, but organizing old photos is more than that: It’s an important step to protect your family history.
Let’s dive into how you can digitize and archive your family photos. It’s time to free your photos from the lock-up of old albums!
ADVERTISEMENT
As a mom to two young boys, I have limited free time, and photo albums are one of those projects that often get shunted to the bottom of the to-do list. However, we’ve been talking about old photos lately in my family because we have a reunion to celebrate 200 years since our ancestors came to the country. I have been using Mylio Photos to organize our old photos.
However, we’ve been talking about old photos lately in my family because we have a reunion to celebrate 200 years since our ancestors came to the country. I have been using Mylio Photos to organize our old photos.
How to Start Organizing Old Photos (When You’re Short on Time!)
It doesn’t rely on cloud storage, so no matter how extensive your photo collection is, you can browse all of it within Mylio Photos. Both free and paid Mylio Photos+ lets you add unlimited photos to your catalog. Check out the full features comparison here.
ADVERTISEMENT
Both free and paid Mylio Photos+ lets you add unlimited photos to your catalog. Check out the full features comparison here.
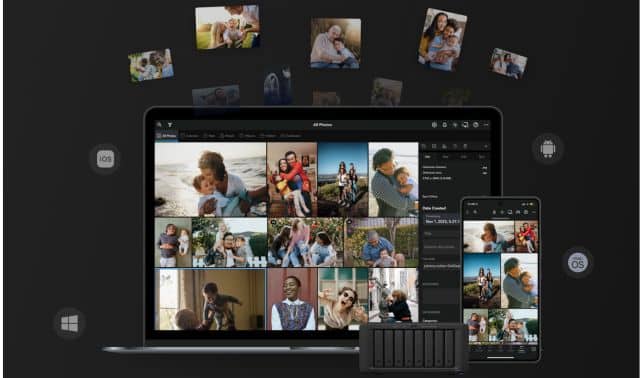
A heap of features makes Mylio Photos the perfect tool for organizing old photos.
Namely, a LifeCalendar with the ability to set fuzzy dates for photos (even date ranges, like “Pretty sure Dad was rocking the mullet hairdo between 1980 and 1982.”), super-fast (and offline) People tagging, and the Map feature.
There’s also in-built editing, perfect for improving scans of old photos. And with Vaults in Mylio Photos+, your photos are always backed up so that you know your family history is protected, no matter what happens to your devices. And it’s all blazingly fast, making it a job you can make progress on no matter how short you are on time.
There’s more, like sharing features, but I’ll get to all that! Let’s start with how to get your scanned family history into Mylio Photos so you can start having fun.
Digitizing Your Old Photos: Tips and Tricks
Digitizing photos could have a whole (series) of articles devoted just to that. But when you’re short on time, there are some tricks and tips that you can use to speed up the process of getting old photos into your computer.
In a perfect world, every old photo would come to you after being scanned in at 1800 dpi by the world’s best scanner and meticulously color-matched to the original, with perfect documentation and dates.

We all know that it’s not a perfect world, though. Instead, you’ve probably got photos a little wonky, a little blurry, maybe snapped by a mobile phone camera from Grandma’s photo album. That’s all fine. Working with what you’ve got and making a start is more important than perfecting it!
Digitizing Photos with a Scanner
You can scan photos on a flatbed scanner; great! Pick the highest resolution it can give you and a TIFF file format, as this is high quality and preserves the most detail.
Scan the photos to a folder on your computer and have Mylio Photos “watch” that folder: They will be automatically added to your Mylio Photos library. More on this later.
Digitizing Photos with a Mobile Phone Camera
Photos that have stuck to the album pages may be damaged by removing them. A mobile phone with a good camera can be an excellent digitization tool in that situation.
For the best quality photos of photos, follow these tips to get your photos square:
- Use the scan feature on your phone camera: this will detect the rectangle of the photo and crop out the unnecessary background, as well as correct any perspective shift on the photo
- If you don’t have a scan feature, try to get the photo as square as possible when photographing it: Hold your camera directly above it and ensure the photo’s edges look square on your screen.
- Increasing the zoom on your camera (but staying in the optical zoom, not digital zoom) is a good idea, too: This avoids fisheye distortion of wide-angle views.


And make sure you have considered your lighting to capture the best detail you can:
- Consider your lighting: Is it reflecting off the album page and creating shine? Changing your angle can help fix this, e.g., tilt the album on a recipe book stand.
- Bright, white lighting is best for this: Bright light will give you more detail, and the white light will avoid ugly color tints on your photos that need correcting.
- Avoid casting a shadow on the photo with your phone: Set your phone camera to a higher zoom, like 2x, as this will let you hold your phone further away and remove the shadow.
- If you change the zoom on your phone camera, you stick to what your phone can do in the optical zoom range – you don’t want to zoom in because this will lose quality digitally.

The great thing about doing this project with your phone camera is that Mylio Photos+ can automatically bring your phone photos into your catalog, so no extra step is required.
Taking Notes on People, Dates and Locations
Whether you scan or use your mobile phone to digitize your old family photos, you will need to correct the dates of the files later on. The date you digitized will be stored in the image’s metadata.
That’s OK, though: We will fix that problem in Mylio Photos.
In the first stages of digitizing, though, make sure you record notes on dates as you go:
- No date on the photo? Look to where the photo sits in the album record and look for other dates. Mylio Photos lets you record fuzzy dates like 1980-1984 so you can still position the photo within the Calendar, roughly, even without an exact timestamp
- What time of year is it? Winter, summer, spring? You can also use seasons in Mylio Photos to add time data
- How old are the people in the photo? Working backward from dates of birth could give you a likely range
Next, take notes on who’s in the photos. These names will come in handy later when cataloging People in Mylio Photos.
1. Catalog and Organize Old Photos in Mylio Photos: Getting Started.
You can get your photos into Mylio Photos at any point as you digitize them. Mylio Photos “watches” folders on your computer rather than needing new photos manually imported (like you might be familiar with from Lightroom Classic).
And as I mentioned, with Mylio Photos+, you can connect your mobile phone so those photos flow in too.
This makes it easy to work through a photo project over a long period – in those moments; you can find ten minutes to complete it!
Let’s get into Mylio Photos now and see how to organize old photos by date. For your first time setting up Mylio Photos, you’ll want to check out this getting started guide.
I am starting in the Folders view (find it in the left sidebar). I have already given all my scanned photos the keyword “scanned,” so now I’ll make a QuickFilter to show those photos in my working folder.

First, I want to work out a date for each photo I’ve scanned. That leads to the next step . . .
2. Get Dates Correct, Even If You Don’t Know Exactly When a Photo Was Taken.
Marking the dates is done in the right sidebar:
Info > Date Created
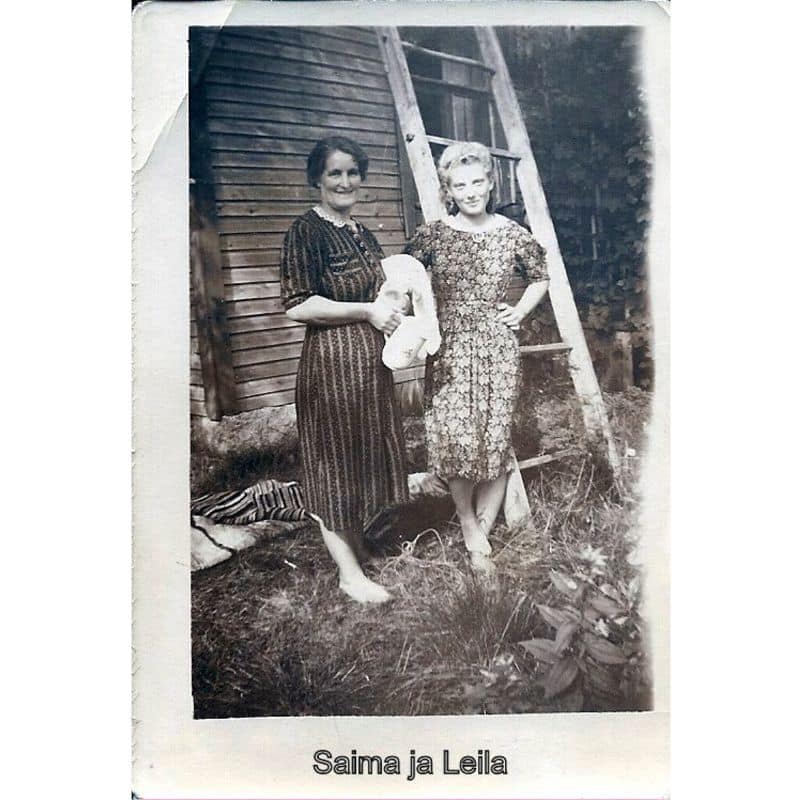
There’s plenty of wiggle room here. This photo was taken when I was about five or six when we lived in a caravan for a couple of years while my parents built our new house. So I’m going to mark in a fuzzy date: somewhere between 1990 and 1992.

I knew this one before we moved to our new home: I am a baby, so it’s probably about 1986.

It looks like I’m wearing winter clothes, so I’ll choose Season & Year as my Date Created option and mark in Winter 1986.

I’m in Australia, so in my Mylio Photos settings, I’ve set up when our seasons start:
More menu > Settings > LifeCalendar > Seasons

In this way, I can get all my photos dated. You can also shift a batch of photos by a specific period – more on that here.
3. Update Locations if You Know Where Old Photos Were Taken
Next, I want to update the location of any photos I have that information for. I can do this in the right sidebar Map tab. Here’s how to do it:
- Select the photos from the exact location, e.g., I have selected the photos in this batch that were taken at my childhood home
- Open the Map tab and search for the address
- Drag the photos onto the Map
- Click the green tick to approve the new location data

Using the advanced QuickFilter, you can also type in “gpstagged: false” to filter out any photos that have location data already and quickly work through geo-tagging the rest.
When your photos are geotagged, you can enjoy seeing them on the Map view (find it on the left sidebar).

Identify Some People in Your Old Photos (And Let Mylio Photos Find the Rest!)
Ok, so we have dates organized. We have locations organized. Now comes one of the enjoyable tasks: People tagging!

Mylio Photos analyses faces without sending any data anywhere: It’s all done privately and securely on your local computer.
Turn on Face Tagging with this button in the right sidebar.

As you start tagging people, Mylio Photos will improve at recognizing that person. Clicking into the People view (find it in the left sidebar) you can view all images of a person, and Mylio Photos will suggest other photos that it thinks contain that person too. You can see this in photos with the black tick/crossbar underneath. Mylio Photos suggests that these contain the person I have selected.

You can select these in batches and hit the tick to approve. The middle button under each face will let you select a different person if necessary (apparently, my Dad, my toddler, and I, have confusingly similar faces).

Once you get going with “People” tags, you’ll find more and more discovered in your scanned library. Mylio Photos is very good at recognizing people of different ages, so it knows me as a baby, child, and adult. And you can even tag your pets!

Edit Your Digitized Photos to Get Them to Look Their Best
At some point in the digitizing process, you’ll probably want to edit or enhance your scanned old photos to ensure they look great.
Mylio Photos has sophisticated built-in editing that will serve most people’s needs. You can also edit in Radiant Photo, Lightroom Classic, or any software you know.
Editing tools are found in the right sidebar, under Edit. Editing in Mylio Photos is non-destructive, meaning that your original scans are preserved as they were scanned, and the edits are stored in the Mylio Photos database.

Depending on what you need the scanned photos for, you might need a quick AutoEnhance. You also have full control to fix problems with contrast, exposure, and more. When you have finished, you can export a new copy to create an image that includes your edits. This protects your original scanned old photos from accidental editing mistakes!
Browse and enjoy your LifeCalendar.
Over time, as you work through digitizing and organizing old photos from your past, you’ll end up with a rich view of your family history in the LifeCalendar view of Mylio Photos.

The Calendar also shows Events you have made in each time range – this is an excellent way to catalog events like weddings, family holidays, and more.
Archive Your Organized Old Photos: Safely Back Up Your Files.
With all the work that you have done on digitizing, the next step is to make sure that your hard work is preserved. A backup plan is essential for all your photos; scanned old family photos are no exception! With Mylio Photos+, you can designate a drive on your computer as a Vault. A Vault protects your media from device loss, theft, or catastrophic disk failure. To set up a Vault, follow the quick start guide here. Make it a priority to get your photos safely backed up (before something goes wrong).
Share and Enjoy Your Organized Old Photos with Your Family.
Having done the work – or at least made a start on it – what’s next? What can you do with your safely archived family history?
Share it, of course!

Mylio Photos mobile app lets you share any photo you’ve ever taken, and with the built-in sharing tools in the desktop version of Mylio Photos, you can share photos by email, to Flickr, and more. Excitingly, the ability to share your photos library with other Mylio Photos users will come in a future release.
This will make sharing and enjoying photos in a beautiful, organized library easy.
Mylio Photos makes organizing family history fun and safe, too. Safe in more than one way: None of your data is stored online by Mylio Photos (including facial recognition for People tags). And adding Vaults to your Mylio Photos devices means your photos will be protected for future generations.
If you’ve ever wondered where to get started digitizing and organizing old photos and archiving your family history, I hope you will give Mylio Photos a go.
You’ll see how fast and easy it is. Seeing your progress coming together in the “People” and Calendar views is so rewarding. Keeping your family history safe has never been so satisfying.You can download Mylio Photos for free here. Enjoy.
ADVERTISEMENT