Sign up for the Family Tree Newsletter! Plus, you’ll receive our 10 Essential Genealogy Research Forms PDF as a special thank you.
Get Your Free Genealogy Forms
"*" indicates required fields
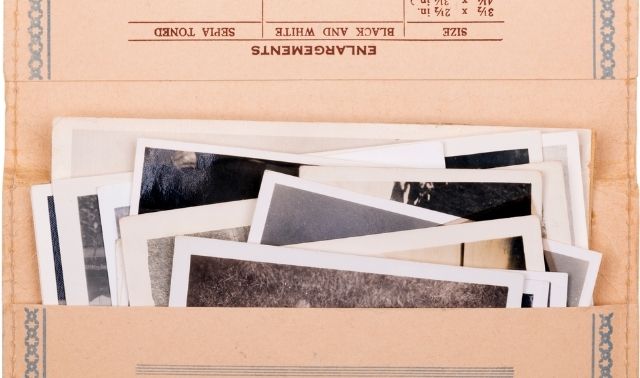
Do you have family photo albums and boxes of slides and negatives? What about old letters and family Bibles? Maybe you have home movies, too, but no projector to view them.
Converting these items to digital allows you to edit and improve images, then easily share and attach them to your family tree (online or on your computer). Digital copies also serve as a backup in case of natural disaster.
If you started researching your family history before computers and the internet became popular, you probably accumulated a lot of paper research notes and correspondence. Digitize them, too, and you can discard many of the originals and replace them with searchable files on your computer.
The prospect of digitizing your family pictures, videos and records may seem overwhelming. These steps will make the project more manageable.
1. Make an Inventory
Start by listing the items you’d like to digitize: photos (including albums, framed and loose pictures, slides and negatives), documents, and movies.
Using word-processing software, I put all this information in a table with columns for Years, Description, Type (album, prints, slides, negatives, home movies) and Location of Physical Version (box number, room or closet). You might include the size of negatives (such as 110 or 35mm) and prints (such as 4×6 inches); space to note high-priority items; and “Location of Digitized Version,” the folder on your computer or external hard drive where the scanned items lives.
You could create a separate inventory of heirlooms, such as letters, family Bibles and diaries, furniture, artwork, books and clothing. Note where each item is located, such as the room and perhaps a specific shelf, drawer or box.
Consider organizing your physical pictures, papers and heirlooms before you digitize them, as that might make them easier to manage in digital form. At minimum, try to remember which items were originally stored together. I store a lot of pictures and papers in numbered archival Hollinger boxes, and note the relevant box number in my inventory.
2. Triage Items
Next, identify the top-priority items to digitize, such as the oldest or in the worst condition. In many cases, you might have the only copy that exists, making them a high priority to preserve.
You might opt to prioritize materials that you can easily digitize with the equipment you already have. Items that require large or specialized equipment (such as large-format images, multi-page books, or home movies) could move down your priority list.
Also consider how difficult it would be to replace your materials, particularly records. Birth and death certificates may be hard or expensive to order from archives. But copies of federal census pages are easily accessible online, and probably not worth scanning. (In fact, you’ll probably get a higher-resolution image of the latter from a website.)
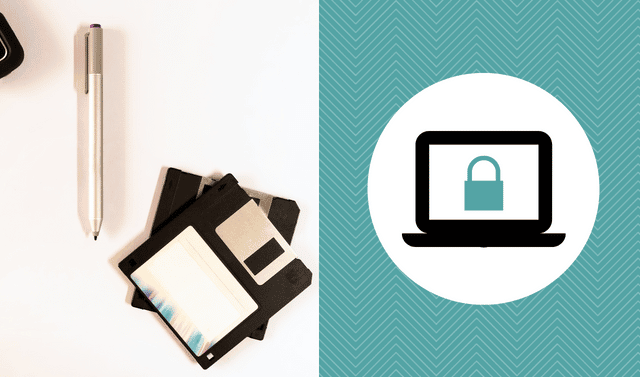
3. Gather Your Equipment
Once you know what you need to digitize and the rough order you want to digitize them, you’ll need a way to do it! You’ve got a few options for digitizing genealogical materials, ranging from hiring professionals to DIY.
Scanning Services
These dedicated professionals are especially helpful if you have items that require specialized equipment. The following services handle many types of media, and offer photo-restoration and backup services:
Look for local companies, too, so you can maybe avoid sending your precious photos through the mail.
Home Scanners
Depending on the size of your collection, a dedicated scanner may be well worth the investment. Scanners generally connect to your desktop computer or laptop, and some include photo-editing or -organization software.
When shopping for a scanner, you’ll want to consider the type and volume of media you need to scan. There are several general types of scanners on the market:
- Flatbed scanners: Open the lid, place your photo or document on the glass platen, and scan with the push of a button. Some even support slides and negatives; manufacturers also make dedicated scanners for those media.
- Photo scanners: Built specifically for photos, these can process larger volumes more quickly than flatbed scanners.
- Portable scanners: These allow you to take your digitization on the go—say, to an archive or a relative’s house.
- Overhead scanners: These act something like a camera, imaging content that’s placed on a large scanning base.
Some scanners have auto-feed functions, which can considerably speed up the scanning process. Place a stack of documents, and the scanner will digitize them one at a time in sequence.
Tip: Before you buy a scanner of your own, see if your local library or archive has some for public use. Many of the larger genealogical libraries do, including the FamilySearch Library in Salt Lake City and the Midwest Genealogy Center in Independence, Mo.


Scanning Apps
Smartphones and tablets are handy tools for digitizing photos and documents, especially when combined with scanning apps that automatically detect edges, crop photos and correct skewed images.
These are two of the best scanning apps. The basic versions are free, at least to try. But premium versions add more features:
- Adobe Scan: Ideal for scanning documents and books, Adobe Scan automatically recognizes text in your scans. That means you can easily search, copy and paste text in the new PDF files.
- Photomyne: One of the best apps for scanning photos, Photomyne can scan multiple photos at once and automatically crop them. It also colorizes images and sharpens faces. Photomyne has separate apps for digitizing slides (SlideScan) and negatives (FilmBox). And the company sells scanning accessories, including phone mounts and backlights for scanning slides and negatives.
Major genealogy websites also offer scanning apps, allowing you to easily integrate digitized material with online family trees:
- Ancestry: The Ancestry App lets you build your family tree, search historical records and access your DNA test results. You can also scan photos and documents and attach them to profiles in your Ancestry Member Tree.
- FamilySearch: Use the Memories app to capture photos and documents, record audio stories and attach them to profiles in the FamilySearch Family Tree.
- MyHeritage Reimagine: This freemium app focuses on scanning and enhancing photographs, allowing you to scan entire album pages in a single tap. The tool automatically crops photos and includes tools to restore color, remove scratches, sharpen blurry images and colorize black and white photos. The MyHeritage App includes all the photo features in the Reimagine app, plus lets you edit your MyHeritage family tree, search historical records and check DNA test results.
I compare these and other mobile scanning apps here.
4. Understand Your Materials
When digitizing your family photos, papers and other items, it’s important to select the best technique for what you have. Here’s what to consider for various objects.
Photographs
Start by cleaning dust from prints, slides and negatives. Instead of compressed air, use a rubber blower, a soft-bristled anti-static brush or an anti-static cloth. They’re available from Gaylord Archival and University Products. Also, if you’re using a flatbed scanner, make sure the glass plating is clean.
Scan photos at a resolution of 600 dpi (dots per inch) to retain details and later digitally enlarge the image. Scanning at 300 dpi takes less time and generates smaller files, but isn’t ideal for archiving important photos.
In a similar way, TIFF files are best for long-term preservation. The more widely used JPG format creates smaller files—but you trade that convenient size for lower image quality. You can always save a TIFF as a lower-file-size JPG for specific uses (e.g., attaching to an email or uploading to websites that have file-size limits). Both TIFFs and JPGs can be edited by most photo-editing software. Note that many mobile apps automatically save images as JPGs, giving you little control.
Take special care with old, delicate photos. Don’t run them through an auto-feed scanner.

Slides and Negatives
Some flatbed scanners can handle slides and negatives up to a certain size. But a dedicated slide and negative scanner will operate faster.
Slides and negatives should be scanned at a higher resolution than photos: 2400 dpi. That will be sufficient for most purposes, and generates a file size that’s more-manageable than higher resolutions.
Home Movies
Digitizing videos requires a different kind of hardware, and you’ll need to keep the format in mind. For VHS tapes, a USB-to-composite video convertor turns video from a VCR, camcorder or other analogue source to digital files.
Capture Super 8 and 8mm movies using a projector in a dark room with a digital camera. A dedicated film scanner will be more expensive, but can convert the film frame by frame for better results. Converting this type of film might be best done by professionals.
Audio Recordings
To convert a cassette tape to digital, connect the cassette player to your computer with a cable. A USB cassette converter (Gracioso has one for about $43) makes the process even easier.
Magnetic wire recordings, an earlier technology, store sound signals on a thin steel wire. The first magnetic recorder went on the market in the early 20th century, and the technology was at its peak from about 1946 to 1954.
You’re unlikely to have the equipment to play a wire recording, so you’ll need to outsource the conversion. I recently had Two Squares convert a wire recording of a funeral service from 1949. It cost $50 for the conversion plus $10 for noise-reduction and $15 for shipping and handling. The resulting 49-minute audio file is excellent.
Papers
Flatbed scanners are best for documents such as old family letters and papers you want to keep.
Remove any staples, paper clips and other foreign objects. That takes time, but will make them more legible. (And you should do so before storing them anyway.) If you don’t want to keep envelopes from correspondence, cut off their fronts and scan them with the letter.
You can save multiple pages in a single, searchable PDF file, so that format is ideal for saving multipage documents.
Oversize Documents and Photos
Typical flatbed scanners can only handle materials less than 8.5×11.75 inches. But mobile scanning apps and some scanners with automatic document feeders can digitize longer pages.
Many popular photo-editing programs—some even included with your scanner—allow you to “stitch” multiple images together. To do so, you’d scan a large item in parts, then digitally combine the files.
Books, Scrapbooks and Photo Albums
Scanning a book with a flatbed scanner is time-consuming because you have to lift the book to turn the pages, then initiate each scan on your computer. You might also damage the book’s binding by pressing it against the scanner bed. Unbinding the book (if you’re willing) lets you scan more quickly, as you can place a stack of pages in an automatic document feeder. Another option is a scanner with an overhead camera, which scans two pages at a time and preserves facing pages.
Scrapbooks and photo albums may be too fragile to deconstruct, so many archivists recommend keeping them together. Scan the whole page; some programs will automatically detect the constituent photos, then crop and save them as individual files.
Make sure you scan all covers, which contain valuable publication information and can help you more easily sort materials.
Heirlooms and Your House
Take pictures of family heirlooms, such as books, clothing, furniture, dishware, toys, clocks, musical instruments and trunks. Get photos from all sides. Scan any paintings and other artwork using a mobile app, rather than a flatbed scanner; even if they fit, the scanner might damage them.
Take pictures of your home, too. Walk around your house while recording a video on your phone, and describe what you see. You and your descendants will be glad you did!

5. Track Your Progress
Given how time-consuming scanning can be, you don’t want to inadvertently scan the same photo or document more than once! Keep your already-scanned and to-scan items separate from each other, and find a system for indicating both physically and digitally that an item was scanned and where the file is.
After I’ve scanned an object, I write scanned lightly in pencil on the back. And for albums, I add a sheet of paper that indicates the pictures have been scanned and where their digital files live. I also make sure to note the original owner and the dates covered by the album.
Metadata can help you sort digital files. In my photo-organizing software (the now-defunct Windows Photo Gallery), I tag each scanned image with the location of the original (Box 12 or Blue Morgan album).
Other programs that support tags include Adobe Photoshop Elements, Apple iCloud, Microsoft OneDrive, Mylio and PaintShop Pro.
Note you can’t tag photos in Google Photos. But you can organize them into albums (that, for example, correspond to physical albums or storage boxes).
BONUS: Label and Store Your Digital Files
By the Editors of Family Tree Magazine
Once you’ve digitized a set, it’s time to organize them. You’ll want to keep originals, so figure out the best method for storing photos and records to keep them preserved or return them to their spots and/or owners. For copies of things like census records and notes, you can recycle or toss them as you wish.
Organize your digital items. You can use the same surname folders as on your baskets, or find another system that works for you. But most importantly, make sure you rename and label your photos and documents clearly.
You’ll also want to determine what kind of digital-preservation system you want to use. There are plenty of cloud storage options such as Google Drive, Evernote and Dropbox that will help keep your work protected, as well as genealogy software and online trees. You can also share the items with family and friends by creating your own family website or on Facebook.
Finally, pat yourself on the back and reward yourself for a job well done!
Related Reads


A version of this article appeared in the September/October 2024 issue of Family Tree Magazine.
Author
A contributing editor for Family Tree Magazine, Rick Crume specializes in online research, genealogy software, DNA testing and British genealogy.