Sign up for the Family Tree Newsletter Plus, you’ll receive our 10 Essential Genealogy Research Forms PDF as a special thank you!
Get Your Free Genealogy Forms
"*" indicates required fields

As you research your family history, you’ll probably collect many paper files, such as old letters, birth certificates and family Bible records, plus digital records in various formats, all of which you’d like to preserve and share with other researchers. Here I’ll show you how to attach those records to your family tree, whether you use genealogy software or an online family tree.
What to Know About PDF Files
First, a note on PDF files. While JPEG, PNG and TIFF files work well for saving images and they’re OK for single-page document files, the PDF file format is ideal for most document files. You can combine multiple pages into a PDF file, so it’s easy to use with genealogy software and online family trees. PDF files can also be read on both computers and mobile devices using the free Adobe Acrobat Reader and other apps, including Web browsers.
Adobe Acrobat software, from the company that developed the PDF standard, lets you create and work with PDF files. Using Acrobat Standard DC for Windows, $23 a month or $155.88 a year, you can combine multiple documents, such as PDF, Word and JPEG files, into a single PDF file. You can also change the order of the files, add page numbering and convert PDFs into Microsoft Word files and image files. Another version, Acrobat Pro DC, $25 a month or $179.88 a year, lets you edit PDF files on Macs and mobile devices.
ADVERTISEMENT
Unlike Windows, macOS has powerful built-in PDF tools. To combine files into a new PDF, switch to Gallery view from the Finder toolbar and hold down the Command key while you select existing PDF files and image files in the order you want them to appear. Once you have selected the files, click on the Create PDF button in the inspector panel on the right. Then Finder will combine the files you selected into a new PDF file on your desktop.
Free online PDF editors, such as iLovePDF, PDF24 Creator and PDF Candy, might offer all the functionality you need. They have all the core features of paid programs, such as merging and splitting documents, converting files to and from PDF, compressing a PDF, reordering the pages of a PDF file and adding page numbers. Note that the free version of PDF Candy lets you complete only one task per hour.
Follow the steps, below, to save your documents as PDF files and attach them to people, facts and sources in genealogy software and online family trees.
ADVERTISEMENT
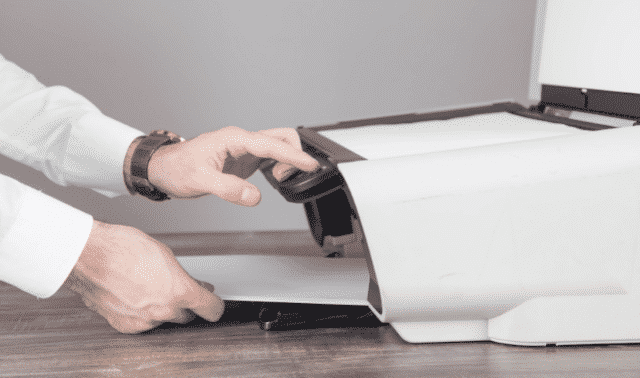
1. Scan Paper Files
Scan one page of a document at a time with a flatbed scanner. You can save the output as an image or PDF file. A sheet-fed scanner can scan a stack of papers all at once and save them as a single, multipage PDF file. For example, the Brother ADS-1200 handles both single-sided and double-sided documents and scans up to 25 pages per minute. While you probably wouldn’t want to risk damaging old family letters or historic records by running them through an automatic sheet feeder, a sheet-fed scanner is ideal for photocopies, correspondence and notes that you don’t need to save.
Since reviewing a Fujitsu ScanSnap sheet-fed scanner for this magazine back in 2013, I’ve used it to convert thousands of pages of paper files to PDF files and freed up a lot of space in my filing cabinet.
2. Save the Record as a PDF File
Using the PDF editors described above, you can combine files of various types into a single PDF file that’s easy to use with genealogy software and online family trees. Here are a few examples of media files I created and links so you can view them on FamilySearch:
• A Crume family bible. Using a flatbed scanner, I scanned the family register and clippings inserted in the bible. Using Microsoft Word, I created a title page with a description of the bible. Then I used Adobe Acrobat to combine the fourteen pages into a single PDF file.

• Stanley Crume’s Army records. I used a flatbed scanner to scan the 132 pages of my dad’s records from his service during the Korean War. I used iLovePDF to compress the files and add page numbers. Then I still had to divide the whole thing into five separate PDF files, each under the 15 MB maximum file size for both Ancestry and FamilySearch. I added title and description pages to each file.

• James L. Olmsted’s Civil War pension file. Since these were just photocopies from the National Archives, not delicate original records, I used a sheet-fed scanner to scan the 35 pages. I also added a title page.

• Elizabeth Olmsted’s postcard. Using a flatbed scanner, I scanned both sides of the postcard and added a page with a description.

3. Link the Media File to Your Family Tree
When recording information on your family, it’s important to cite your sources, whether they’re birth certificates, family bibles or newspaper articles. But going a step further and linking a digital image of the source record to the citation is even better. That makes your source immediately available to you and, if you have a public online tree, to anyone who might access it. Here’s how to link a digital copy of a source to a personal profile or a source citation in genealogy software and online family trees.
Ancestry Member Trees
You can add records from Ancestry’s databases, as well as outside sources, to your Ancestry Member Tree. Ancestry supports several photo file types (JPG, JPEG, PNG, TIFF, BMP and JIF) and document file types (DOC, DOCX, RTF, PDF AND TXT). A media file cannot be larger than 15 MB.
Follow these steps to add your own record to your Member Tree:
Click on a person in your family tree and select Profile from the menu that appears. On the profile page, make sure the Facts tab is selected. Click +Add in the Sources column and select Add source. Click the link to create a new source in section 1. Fill in any details you have and click Save Source and hit the Back button. Enter any information you have in section 2. Select any facts or events, if any, in section 3 that relate to this source. Then click Submit.
To link an image to the source, hover over the source you just created in the Sources column and click the View button. Select the Media tab in the menu and click +Add media to source. Click Choose files in the Upload Media page, select the file. Enter details about the record and then click Done.
The FamilySearch Family Tree
You can link not only historical records from FamilySearch’s own record collections, but outside sources as well, to the FamilySearch Family Tree. FamilySearch supports JPG, PNG, TIFF and BMP for image files and PDF files for documents. A file can’t exceed 15 MB.
Sign on to FamilySearch and navigate to the Person page in the Family Tree. Click the Sources tab > Add Source > Add New Memory Source. Select either Upload Memory or Select from Gallery if you already uploaded it. Add details, including the source’s date and title and a citation explaining where the record was found. Next, check the boxes for each event that the source supports. Finally, click Save.
Family Tree Maker
Supported file types include JPG, BMP, TIFF and PNG for images and DOC, RTF, TXT and PDF for documents.
Click Media and, on the upper right, click Add > Add New Media. Locate and select the item and click Open. In the Copy to Media Folder dialog box, select either the option to just create a link to the file in its original location or to copy the file to the media folder for the tree and link to it there. Optionally, assign one or more categories to the media file. Then click OK. Select the file and use the Media Detail panel to label and describe the file. Click on the second icon in the Media Detail panel to link the media item to a person or a source citation.
RootsMagic
Supported file types include JPG, BMP, TIFF and PNG for images and any type for documents.
Double-click on a name to open the Edit Person window. To link a media item to the person, click beside the person’s name in the column headed by a picture icon. To link a media item to a fact, click beside the fact in the same column. Then click Add media on the right, drag the file or select it and add details, including a caption, description and date.
To link a media item to a source, click beside a fact in the column headed by the pen icon. Click Add source citation or select an existing one. Then you can link media to either a master source or a citation.
Linking digitized records to your family tree is a big job, but it’s great to be able to view your sources with just a click of your mouse.
Related Reads


Last updated, July 2022
ADVERTISEMENT
Author
A contributing editor for Family Tree Magazine, Rick Crume specializes in online research, genealogy software, DNA testing and British genealogy.