
You’ve heard it before: Scan your photos! Make backups! Digitize, digitize, digitize!
That’s good advice. Thanks to records and family tree-builders coming online, genealogy is increasingly done with laptops and tablets rather than pens and paper. The proliferation of high-resolution smartphone cameras, too, has made point-and-shoot film cameras and even their digital successors obsolete.
In this article, I’ll walk you through seven steps for turning your mess of digital photos into one, secure, consistent system for archiving them for posterity. Along the way, we’ll declutter your devices and make it easier for you to add new photos—those you find in research or snap on your smartphone—to your archive.
Note: This article tends to use the words “photo” and “file” interchangeably. Most of the advice we’ll discuss here applies to not just images but also PDFs, audio files, and video files.
Why Should I Organize My Digital Files?
In our zeal to preserve our research, we’ve created new problems. One of the most common is simple overwhelm: It’s so easy and inexpensive to take and save digital photos that we end up with a glut of them.
I, for one, have nearly 9,000 photos on my phone. And because I’m a dad, that number will only go up over the years. How can I find the photos most important to me amongst so much data?
That’s a problem not just for me, but my next-of-kin. When I’m gone, someone will have access to my phone. But will they take the time to sort through those thousands of photos? Will they know which ones were important and why, especially since there aren’t physical captions to provide context?
“Step 0”: Digitize Everything
We could write a whole separate article on efficiently and effectively scanning piles and piles of family photos. (In fact, we have.) But for our purposes, we’ll say only that you need to make digital photo files before you’re ready to organize them.


Think not just of old photos you’ve inherited, but also photos you’ve acquired in other ways. While examining my collection, I found some sneakily offline photos:
- Theme park pictures taken (and sold to me at a high price) by employees
- School photos for which my wife and I only bought prints
- Our family’s annual Christmas cards
- Novelty Polaroid-like instant snapshots taken at parties
Step 1: Gather Your Files in One Place
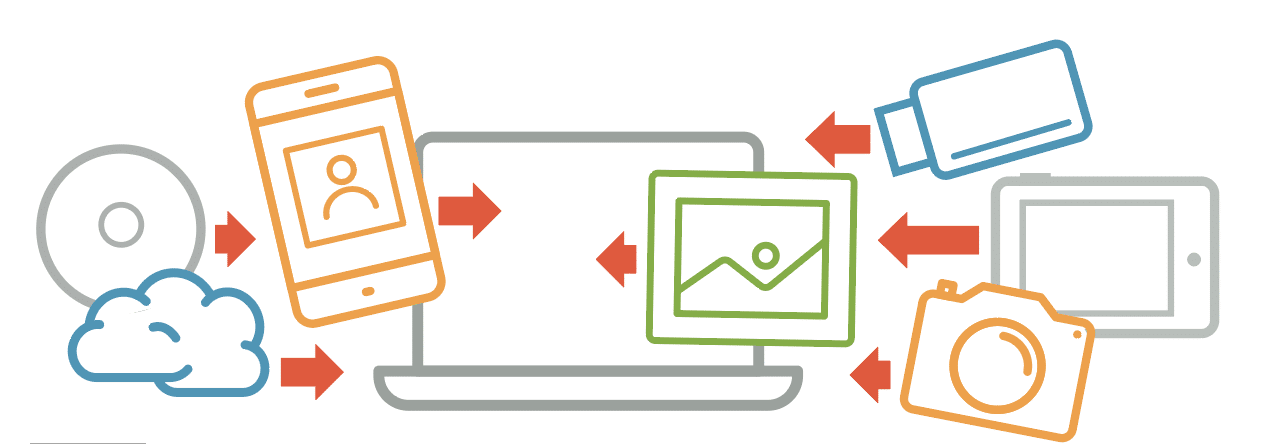
Disciples of Marie Kondo’s “KonMari” method of decluttering will recognize gathering all like items as a prerequisite for organizing them. Before we create an organized photo-filing system, we have to understand the scope of our collection. And tackling as many of your photos as possible at once will be more efficient than constantly having to stop to incorporate photos as you find them.
We’ve done most of this work in “step 0” by scanning any remaining physical, undigitized photos. Take a second to look around your home for any leftovers. Have you inherited any from relatives, or taken film photos that still haven’t been scanned?
Also make sure you’ve collected photos from all digital sources too, including:
- USB drives and external hard drives
- CDs
- Old computers or phones
- Cloud services (Dropbox, Google Photos, etc.)
You could dump them all into a “to be sorted” folder or create separate folders by photo source (e.g., iPhone camera 2016–2025 or Nikon camera 2004–2014).
Flow all those files into one place, likely your computer desktop’s hard drive. In a 2014 issue of Family Tree Magazine, Mike Ashenfelder, digital preservation coordinator for the Library of Congress, advocated for a computer. “Don’t just download onto a cloud server,” he said. “Access to your photos on a cloud server isn’t always guaranteed when you want it, and there’s the danger that the server will disappear or go out of business, and take your photos with it.”
In that same issue, Cathi Nelson of The Photo Managers recommends regularly flowing new photos into your system. “Make it a habit once a month to gather all your images from your phone, camera, tablet and other devices, and download them into a folder on your computer,” she said.
Step 2: Purge Excess Photos
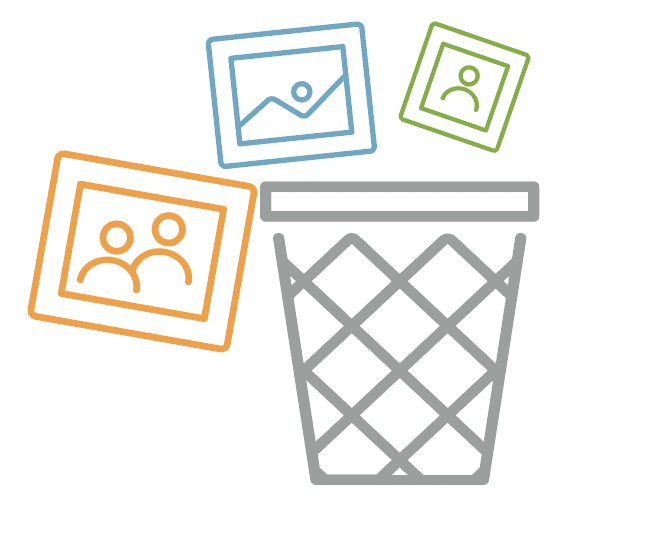
Having a high-resolution camera in our pockets means we’re not shy about documenting (and indefinitely storing) anything and everything. We have the technology to preserve our family photos from the ravages of tears, discoloration and poor-quality paper. But that doesn’t mean we need to save all our photos.
We first need to winnow down our collection. What are the kinds of photos we actually want to keep? The reality is we can’t keep everything, as even important photos will be lost in a sea of data. To paraphrase a certain Pixar film about superheroes: “If everything’s special, nothing is.” Ashenfelder put one philosophy more simply in 2014: “If it’s a photo you’d post to Facebook, save it. If not, delete it.”
Before you enshrine these not-for-primetime photos in your family archive, crawl through your phone to make sure you even want to keep them. You’d be amazed at the number of random screenshots, duplicates, or meant-to-be-temporary photos on your device.
Photo duplicates
If you’ve ever had a stranger take a photo for you out in public, you’ve probably heard them say something like, “There, I took a bunch! Hopefully there’s a good one in there.” If you don’t remember to circle back to cull all those extras, you’ll be stuck with several nearly identical photos.
Fortunately, some apps can help you identify potential duplicates and easily compare them. Keep only the best copy of photo, in which everyone is smiling, the motion isn’t blurry, and the lighting is just right. Some programs can even stitch them together for you, allowing you to crib the best elements from each.
Temporary photos and screenshots
Some of the 9,000 photos on my phone are priceless memories that I’ll want to keep forever. But they’re hardly distinguishable from a host of other snapshots better fit for my Deleted folder.
Many photos aren’t meant to be preserved for more than a few days, much less for posterity. For example:
- Restaurant menus
- Receipts or online order confirmations
- Grocery lists
- Screenshots of jokes
- Pictures for the vet of suspicious-looking foreign objects in a cat’s hairball (I wish this were a joke. PSA: Cats and balloon strings don’t mix.)
Blurry, unclear or generic photos
Point-and-shoot film cameras trade precision for convenience. Your archive doesn’t need to be so complete that it contains even photos that aren’t up to muster: moving (illegible) objects, extremely poor lighting, or “phantom limbs” of people left out of frame.
Also think about how unique your photos are—and whether they show people at all. Do they depict a standalone landscape or landmark that’s widely photographed elsewhere? Your ancestor’s distant photo of the Eiffel Tower may have meant a great deal to him, but it’s less precious to you—unless he happened to be in it. Sensible exceptions include under-documented historic events or places important to the family.
Time-saving tip: Delete in small batches
One method of purging photos I learned from a friend: Each morning, type the day’s date (e.g., January 16) into your smartphone’s photos app. This should filter your photos to those taken on this day in previous years. Then, review that day’s photos and delete the extraneous ones. This allows you to tackle small groups of photos at a time, while still making consistent progress (and taking a trip down memory lane).
I started doing this at the beginning of 2026. As of this writing in mid-January, I’ve already deleted 250-plus excess photos. That’s just a small percentage of my phone’s photo library. But they still represent dozens of fewer photos for me to figure out what to do with.
Step 3: Select a Photo-Management Tool

In what program will you be organizing your photos? Your device comes with built-in software for moving, renaming and sorting files—for example, File Explorer on a PC or Finder on a Mac.
But you might find you need something more robust to sort, tag, add metadata to, or otherwise edit photos in bulk. There are two basic kinds of such software:
Default photo apps
In addition to a basic file-management interface, your device comes with a built-in media-viewer: Apple Photos on Macs, iPhones, and iPads; Google Photos on Android devices; and Windows Photos on PCs. These offer at least a few more tools. Apple Photos, for example, allows you to tag faces, create albums and sync photos to iCloud.
Third-party apps
These are specialized tools, offering more bells and whistles—and maybe some AI assistance. Note you’ll need to import your photos into these apps, which could take quite some time depending on the size of your collection. There also may be a fee associated with at least some of their features.
Criteria for choosing file-management software
Before committing to any one app, complete a free trial (if available) and upload just a small segment of your collection to see how you like it and what tools are available.
In general, whether a tool is right for you will depend on its:
- Ease of use: You’ll likely spend a lot of time in this program. Is there a steep learning cure, or is it fairly intuitive (at least for what you want to do)? Can you easily sort photos into albums to share with others or use in a project?
- Compatibility: Consider whether the app is for desktops, mobile devices, or both. How does it fit in with what you already use? Can you access the app from multiple devices? And can it handle all the file formats in your collection—even videos and audio files, if you have them?
- Cost: Is your tool free (at least for the features you need)? If not, is it subscription-based or a one-time fee? Apps and software increasingly require subscriptions instead of a flat license fees; that affects a program’s total cost and begs the question of what happens if you cancel your subscription.
- Metadata: Who is in your photos? Where were they taken? Who did you receive them from? You can include these details on the back of a physical photo or in the caption of one being published, but not so easily in a virtual environment. Digital files offer this too in the form of metadata, but you’ll need to make sure the information you enter (e.g., a photo’s date or the identify of one of its subjects) can be read by other programs. Look for a tool that meets IPTC standards for metadata, set by the International Press Telecommunications Council.
- Editing: Do your photos need some touchups (e.g., to correct color)? Some tools offer robust editing functions, while others focus instead on simpler tasks like file-naming.
- Tagging: Identify the people in your photos, either manually or by using an app’s built-in facial-recognition technology.
In addition, you’ll want a program that’s likely to be supported for a long time. That way, you won’t need to learn multiple systems and/or figure out how to migrate your photos from an app that’s closing. One cautionary tale is MemoryWeb, a well-respected photo-organizing app that suddenly shut down in 2025.
Another factor: How easy will it be for you to move your photos out of this tool? Edits and metadata from one app might not be recognized by others. And you’ll ideally want your “official” file system to live outside any one tool to make it easier to back up and access from other devices.
Step 4: Give Your Photos Custom, Meaningful Names
By default, smartphones, scanners, and digital cameras number photos sequentially using a generic convention: e.g., IMG_0116.jpg. That tells you nothing about who and what the photo depicts, and next to nothing about when the photo was taken. We genealogists cringe when encountering unindexed collections of microfilm images—our photo archive shouldn’t become one.
Instead, develop your own template for naming digital photos that includes at least some information. Record it in the downloadable, typeable worksheet below:

Details to include
A file name with all a photo’s details (date and place taken, names of the people pictured, name of the photographer, name of who currently owns the folder) would be unwieldy. And anyway, there’s a good chance you won’t have all that data for all your photos.
In most cases, you’ll want to name photos by the date they were taken. All photos (regardless of what they depict) were taken on a certain date, making this widely applicable. And if calibrated correctly, your digital camera or smartphone should have stored this detail automatically. The genealogical standard YYYY-MM-DD format allows for an easy chronological sort.
Next, you could come up with a brief description of what’s pictured. We mostly work with photos of people. So the next section of your file-name template could be the name of the person depicted. That would make a file name that looks something like this: 1969-07-21-Armstrong-Neil-moon-landing-rover.jpg.
Whatever you choose, apply that naming convention to all photos as you organize. This has the added benefit of bookmarking your progress as you go.
File folder structure
You don’t want to have to deal with a seemingly endless scroll of image thumbnails and file names. Instead, build a folder structure on your device that makes photos easier to find and reflects your file-naming template.
Mollie Bartelt of Pixologie, The Photo Estate Company nearly universally recommends organizing folders by date. She creates nested folders first by decade, then year, then month and (if necessary) day. That keeps the number of folders manageable, allows you to quickly find photos from a specific event, and provides an easy way of adding new photos as you take them.
Other best practices include:
- Sort photos into folders by decade or year first, before naming them: This might make your to-be-sorted “pile” less intimidating.
- Decide how to handle photos that have different levels of detail: How will you label photos that have no subjects (e.g., of a house or place) or are of unknown people? How will you label photos that have multiple subjects?
- Consider making folders for specific events: You might have several photos from a single place or event—for example, I have dedicated folders for my wedding and certain vacations
Step 5: Get Sorting

With your photos and folders in place, get to work! Move your named files to their appropriate folders.
If your photo collection is as large as mine, this project won’t be finished overnight. Try tackling one decade or year at a time if you’re feeling overwhelmed. Another strategy is setting aside just one day to get as much of the project done as you can; I provide suggestions for such an event here.
Step 6: Back Them Up

One thing that seems to get left out of the “Digitize Everything!” craze: In some ways, digital files are more vulnerable to loss than their physical counterparts.
Like other in-real-life objects, your laptop or external hard drive can be destroyed by fires, flooding, or other natural disasters. They can also be dropped, lost, have water or coffee spilled on them, or eaten by a dog. We cover how to prepare for some of these here.
And digital files have their own hazards, making your archive susceptible to:
- Data corruption
- Obsolescence (e.g., if the storage media or file format can no longer be read by modern devices)
- Accidental deletion
With that in mind, organizing your digital photos can’t be a set-it-and-forget-it task. Creating regular backups will help prevent your digital files from being lost or forgotten. And checking on them periodically will give you peace of mind that they’re still intact.
Organization experts recommend a “3-2-1” backup strategy: three copies of your files stored in at least two different media formats, one of which is located somewhere outside of your home. That system encourages diversification so you’re not relying on one device or service.
A photo archive conforming to that criteria could thus be on:
- a laptop computer’s hard drive
- an external USB hard drive
- an online cloud service
External hard drives
These are popular add-ons to your laptop’s memory, as advancements in storage technology have made them cheaper than ever. But be careful: External hard drives—typically expected to last just three to five years—don’t have a very long lifespan.
Watch out for obsolescence, too. Many external hard drives connect using USB ports—which some newer laptops no longer have. You’ll want to make sure you’re periodically updating your storage device. (Don’t let your archive go the way of the floppy disk!)
Cloud tools
Backup services include Backblaze, Carbonite, Dropbox, Forever and Permanent. Your preferred device probably offers a built-in cloud backup for an extra fee—Google Drive for Android devices and Time Machine or iCloud for Macs, for example.
Make sure you understand your service’s pricing and terms of use. See if it allows you to schedule regular backups of your device. And consider storing copies of at least your family photos with genealogy files too, if space allows, creating some redundancies.
Tip: Do not use social media as a backup
Note that social media apps (Facebook, Instagram, etc.), family tree websites (Ancestry.com, FamilySearch and MyHeritage), and photo-product sites (Snapfish, Shutterfly, etc.) are not reliable backups. Most compress your photos—reducing their resolution—and are prone to changing their file-storage policies.
Step 7: Share Your Photos

There’s an outdoorsman adage: “Leave no trace” in nature by cleaning up after yourself when camping or hiking. But as genealogists, we need to do the opposite. If we want our work to outlive us, we need to make sure other people know about our collection and where to find it.
Part of “leaving a trace” is establishing a consistent and diversified backup system (see Step 6). But equally important is sharing your collection with living relatives. Photos have a way of engaging people more than other artifacts of genealogy research. Knowing your great-great-grandfather’s birth date is one thing. But seeing his face makes him a more fully realized person.
And critically, digital photos don’t leave the same kind of footprint as their physical counterparts. In the pell-mell after your death, it would be easy for your next-of-kin to forget to check your hard drive—certainly easier to forget than a box of old photo prints they have to physically carry from your house.
Here are some simple ways of getting your photo collection out in front of others:
Create gifts and displays
Assemble your photos into a family tree, then print and display at a reunion. Or create a different photo heirloom. Put together a project plan with these tips, and see these sample photo gift ideas:
- Ornaments of a shared ancestor or beloved vacation house
- Canvas prints of family photos
- Bunting displaying your family tree
Simple pieces like these work on several levels, as they:
- Remind relatives that you have a collection
- Encourage others to share their own photos
- Make genealogy more personal, maybe inspiring the viewer/recipient to get involved
Upload to family tree websites
While not a reliable backup method, online family trees help distribute your files while adding some personality to your ancestors’ profiles. Genealogists also consider photos to be “cousin bait,” as they tend to attract interest from even distant relatives.
Curate photos into albums
This is maybe the most important step. Even once you’ve pared down your photo collection and neatly organized them into folders, you’ll still want to highlight the most-important snapshots.
Photo books are easier and cheaper to make than ever, and can serve as the “official” version of your photo archive—complete with captions that identify each subject, date and location.
We have an abundance of photo riches. Our ancestors may have been photographed only once in their lifetimes; today, some people take 10 selfies before (and with) their breakfast.
That blessing can feel more like a curse if we find ourselves buried in digital photos. But with a consistent filing system and the right attitude, we can sort through the photo clutter and enjoy family memories for years to come.
Related Reads


A version of this article appeared in the March/April 2026 issue of Family Tree Magazine. A similar article by Karen Edwards ran in the October/November 2014 issue. Last updated: April 2026
Pin this article for later!